Lockdown stashbuster 3…

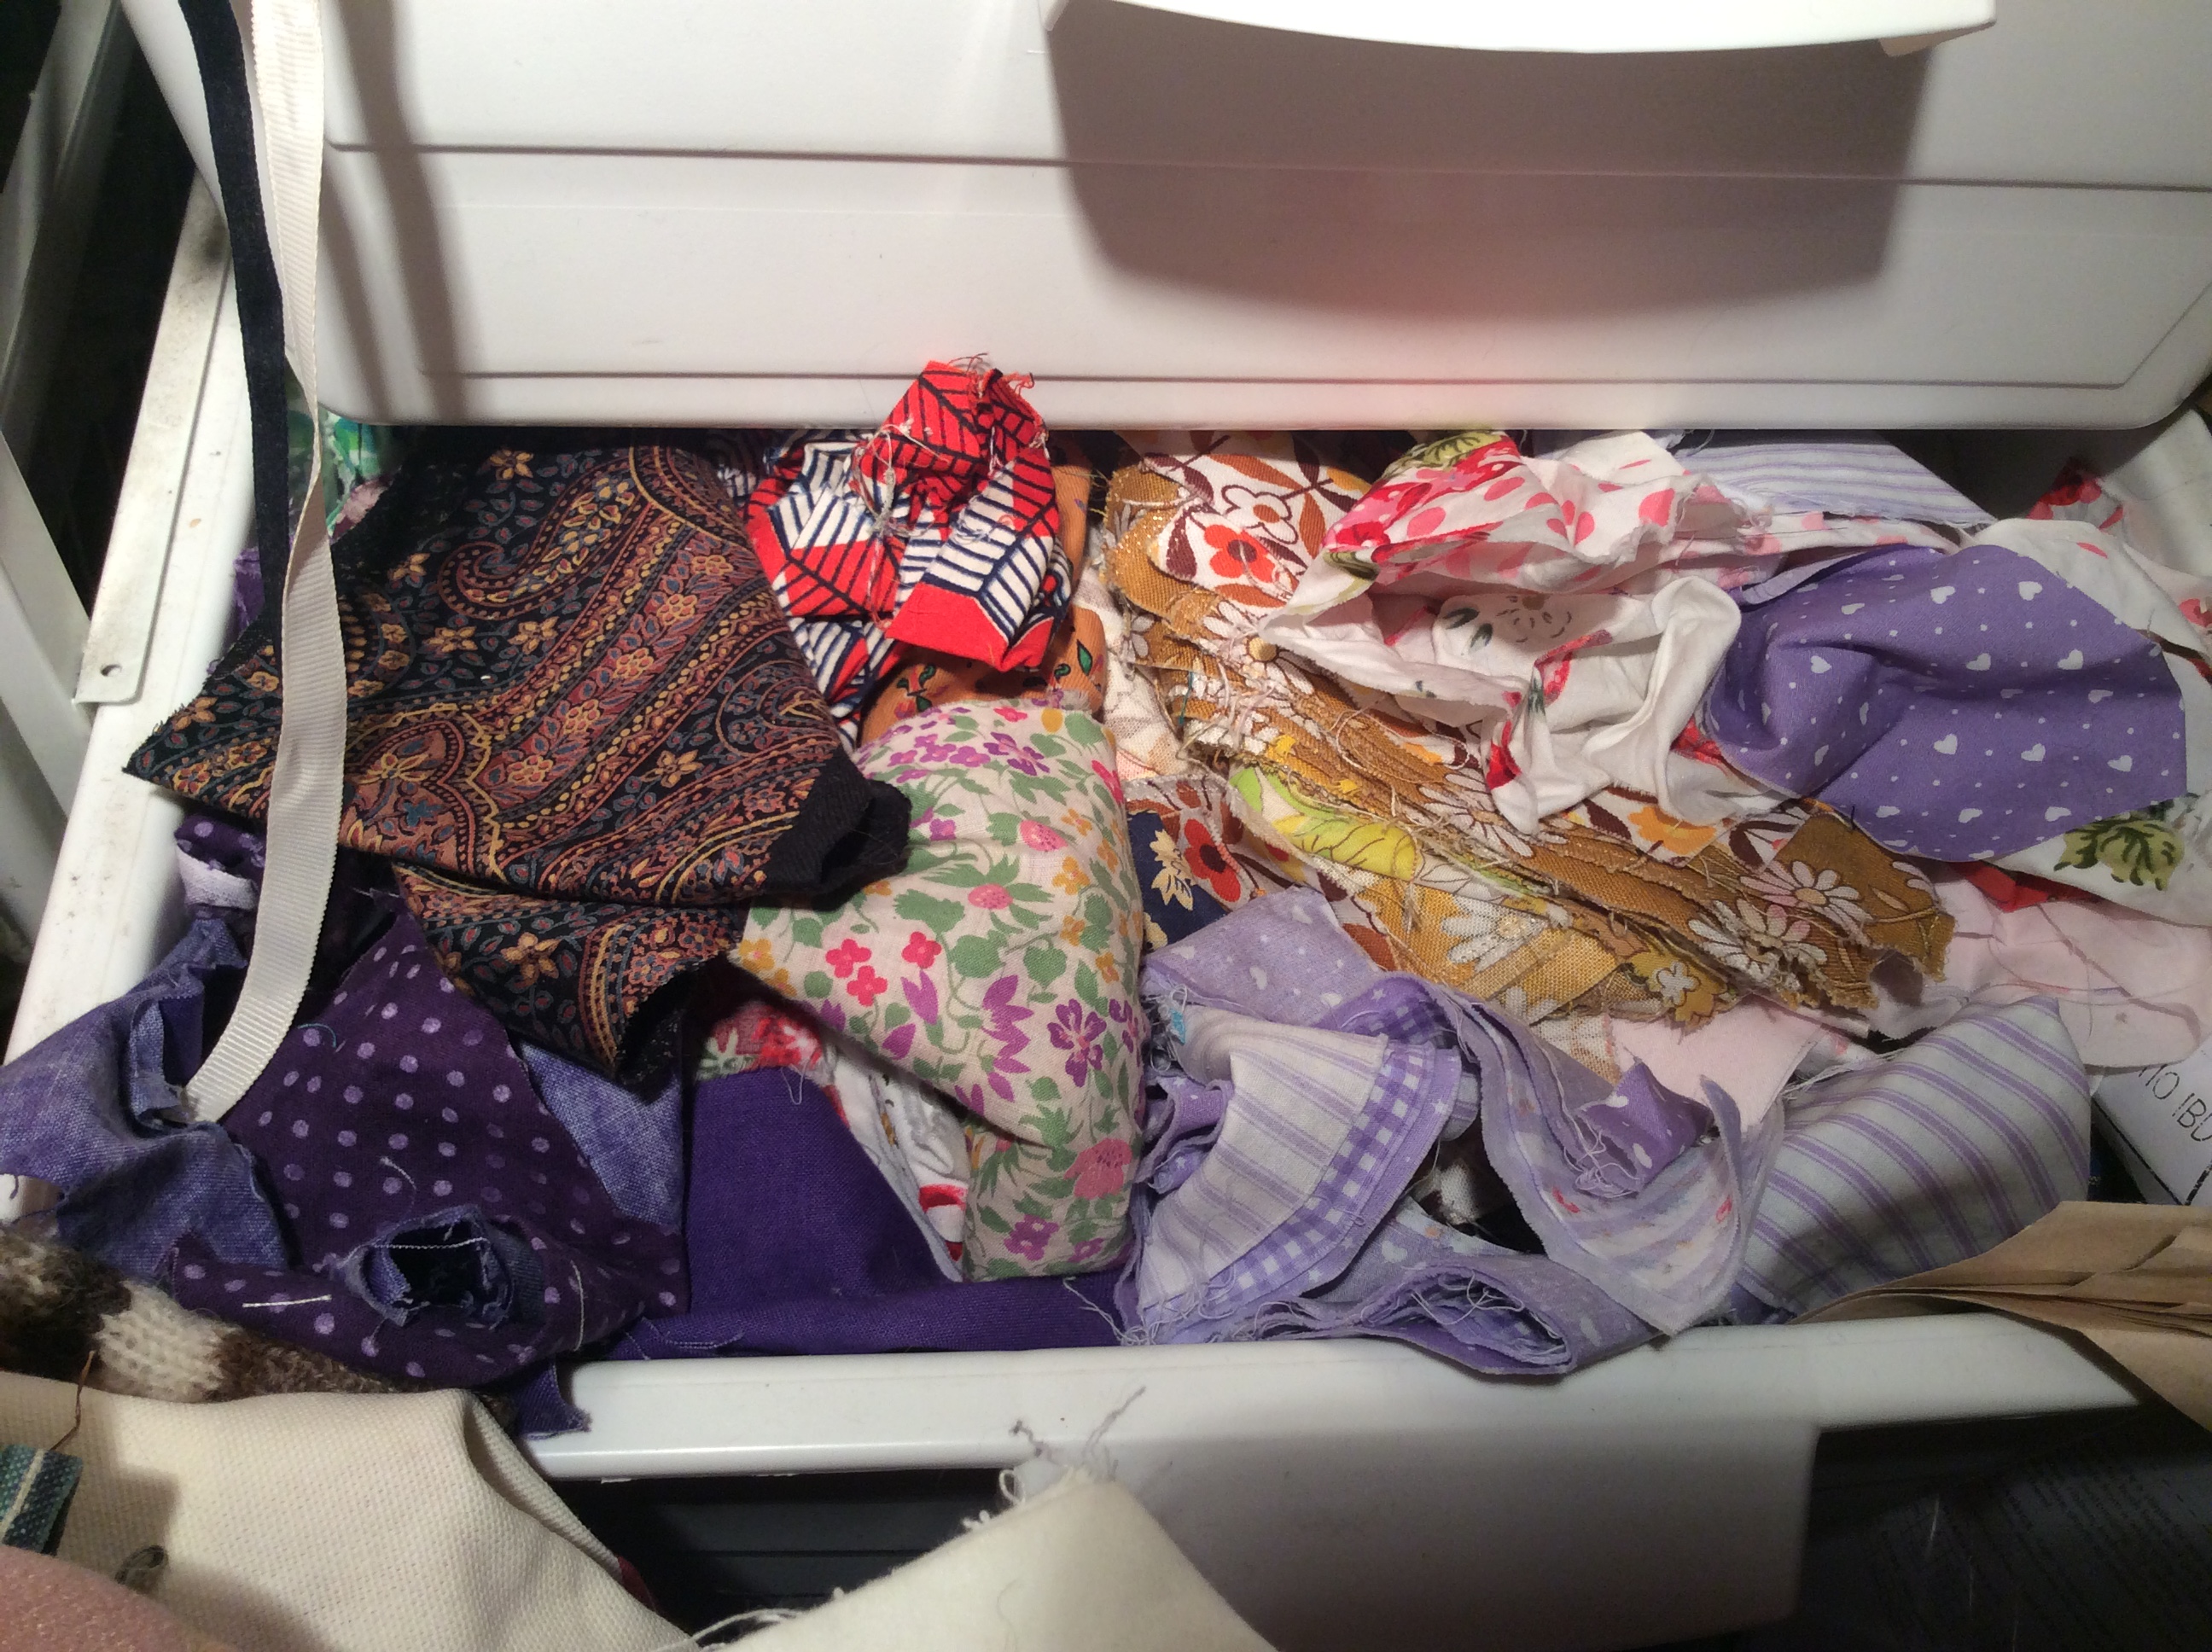
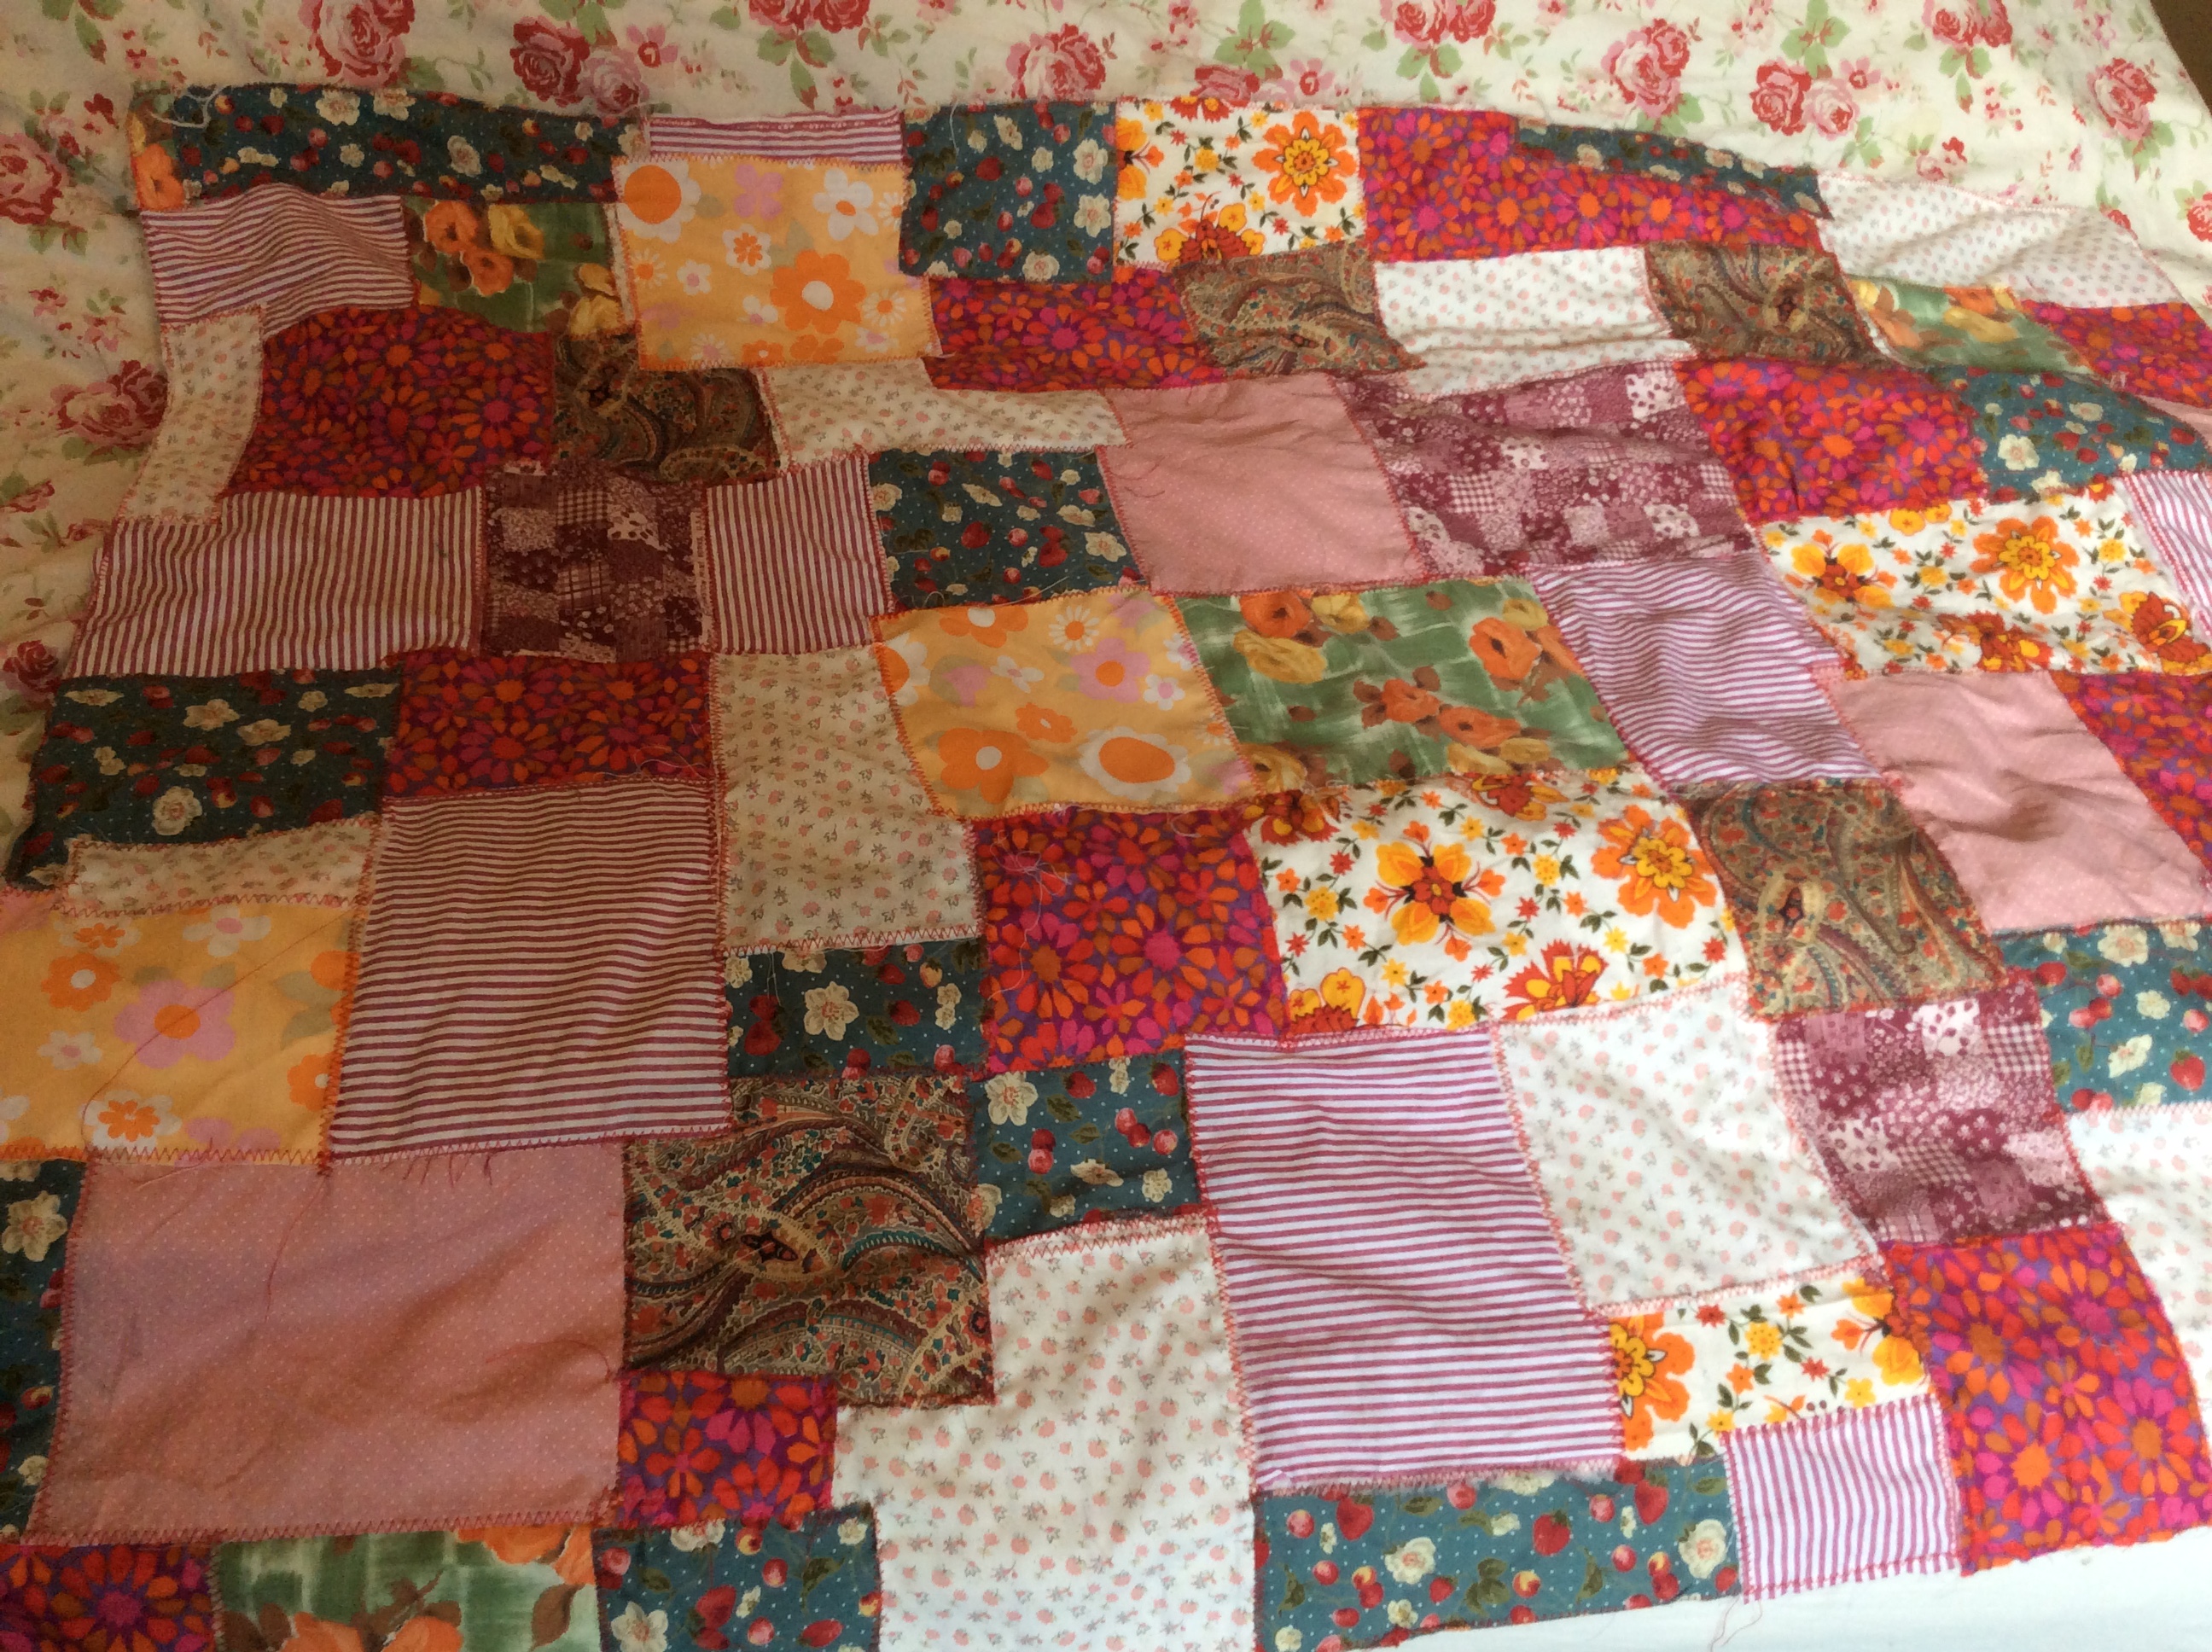
Whilst sorting out the blue/green strips for Stashbuster 2, I realised I had a lot of smallish rectangles (or thereabouts) in the scrap drawer. So my plan for Stashbuster 3 was to use some of those up gainfully, trying out a different technique. So this time it was foundation-pieced onto some random lightweight cotton; I took the rectangles and placed them randomly on the foundation cotton, then swapped them round until I’d a) achieved coverage of the foundation piece, and b) something vaguely pleasing to the eye, provided that eye happens to like chaotic brightness.

Hmm… there are still a lot of holes!

Then I pinned the pieces into position, rolled it up & took it through to my big computerised (secondhand) Pfaff, and zig-zagged the pieces into position. Needless to say, a fair few had fallen off by the time I got to them, and I managed to stab myself with the pins umpteen times. I wonder if a dab of PVA in the centre of each scrap would have worked better?

Scraps zig-zagged on…

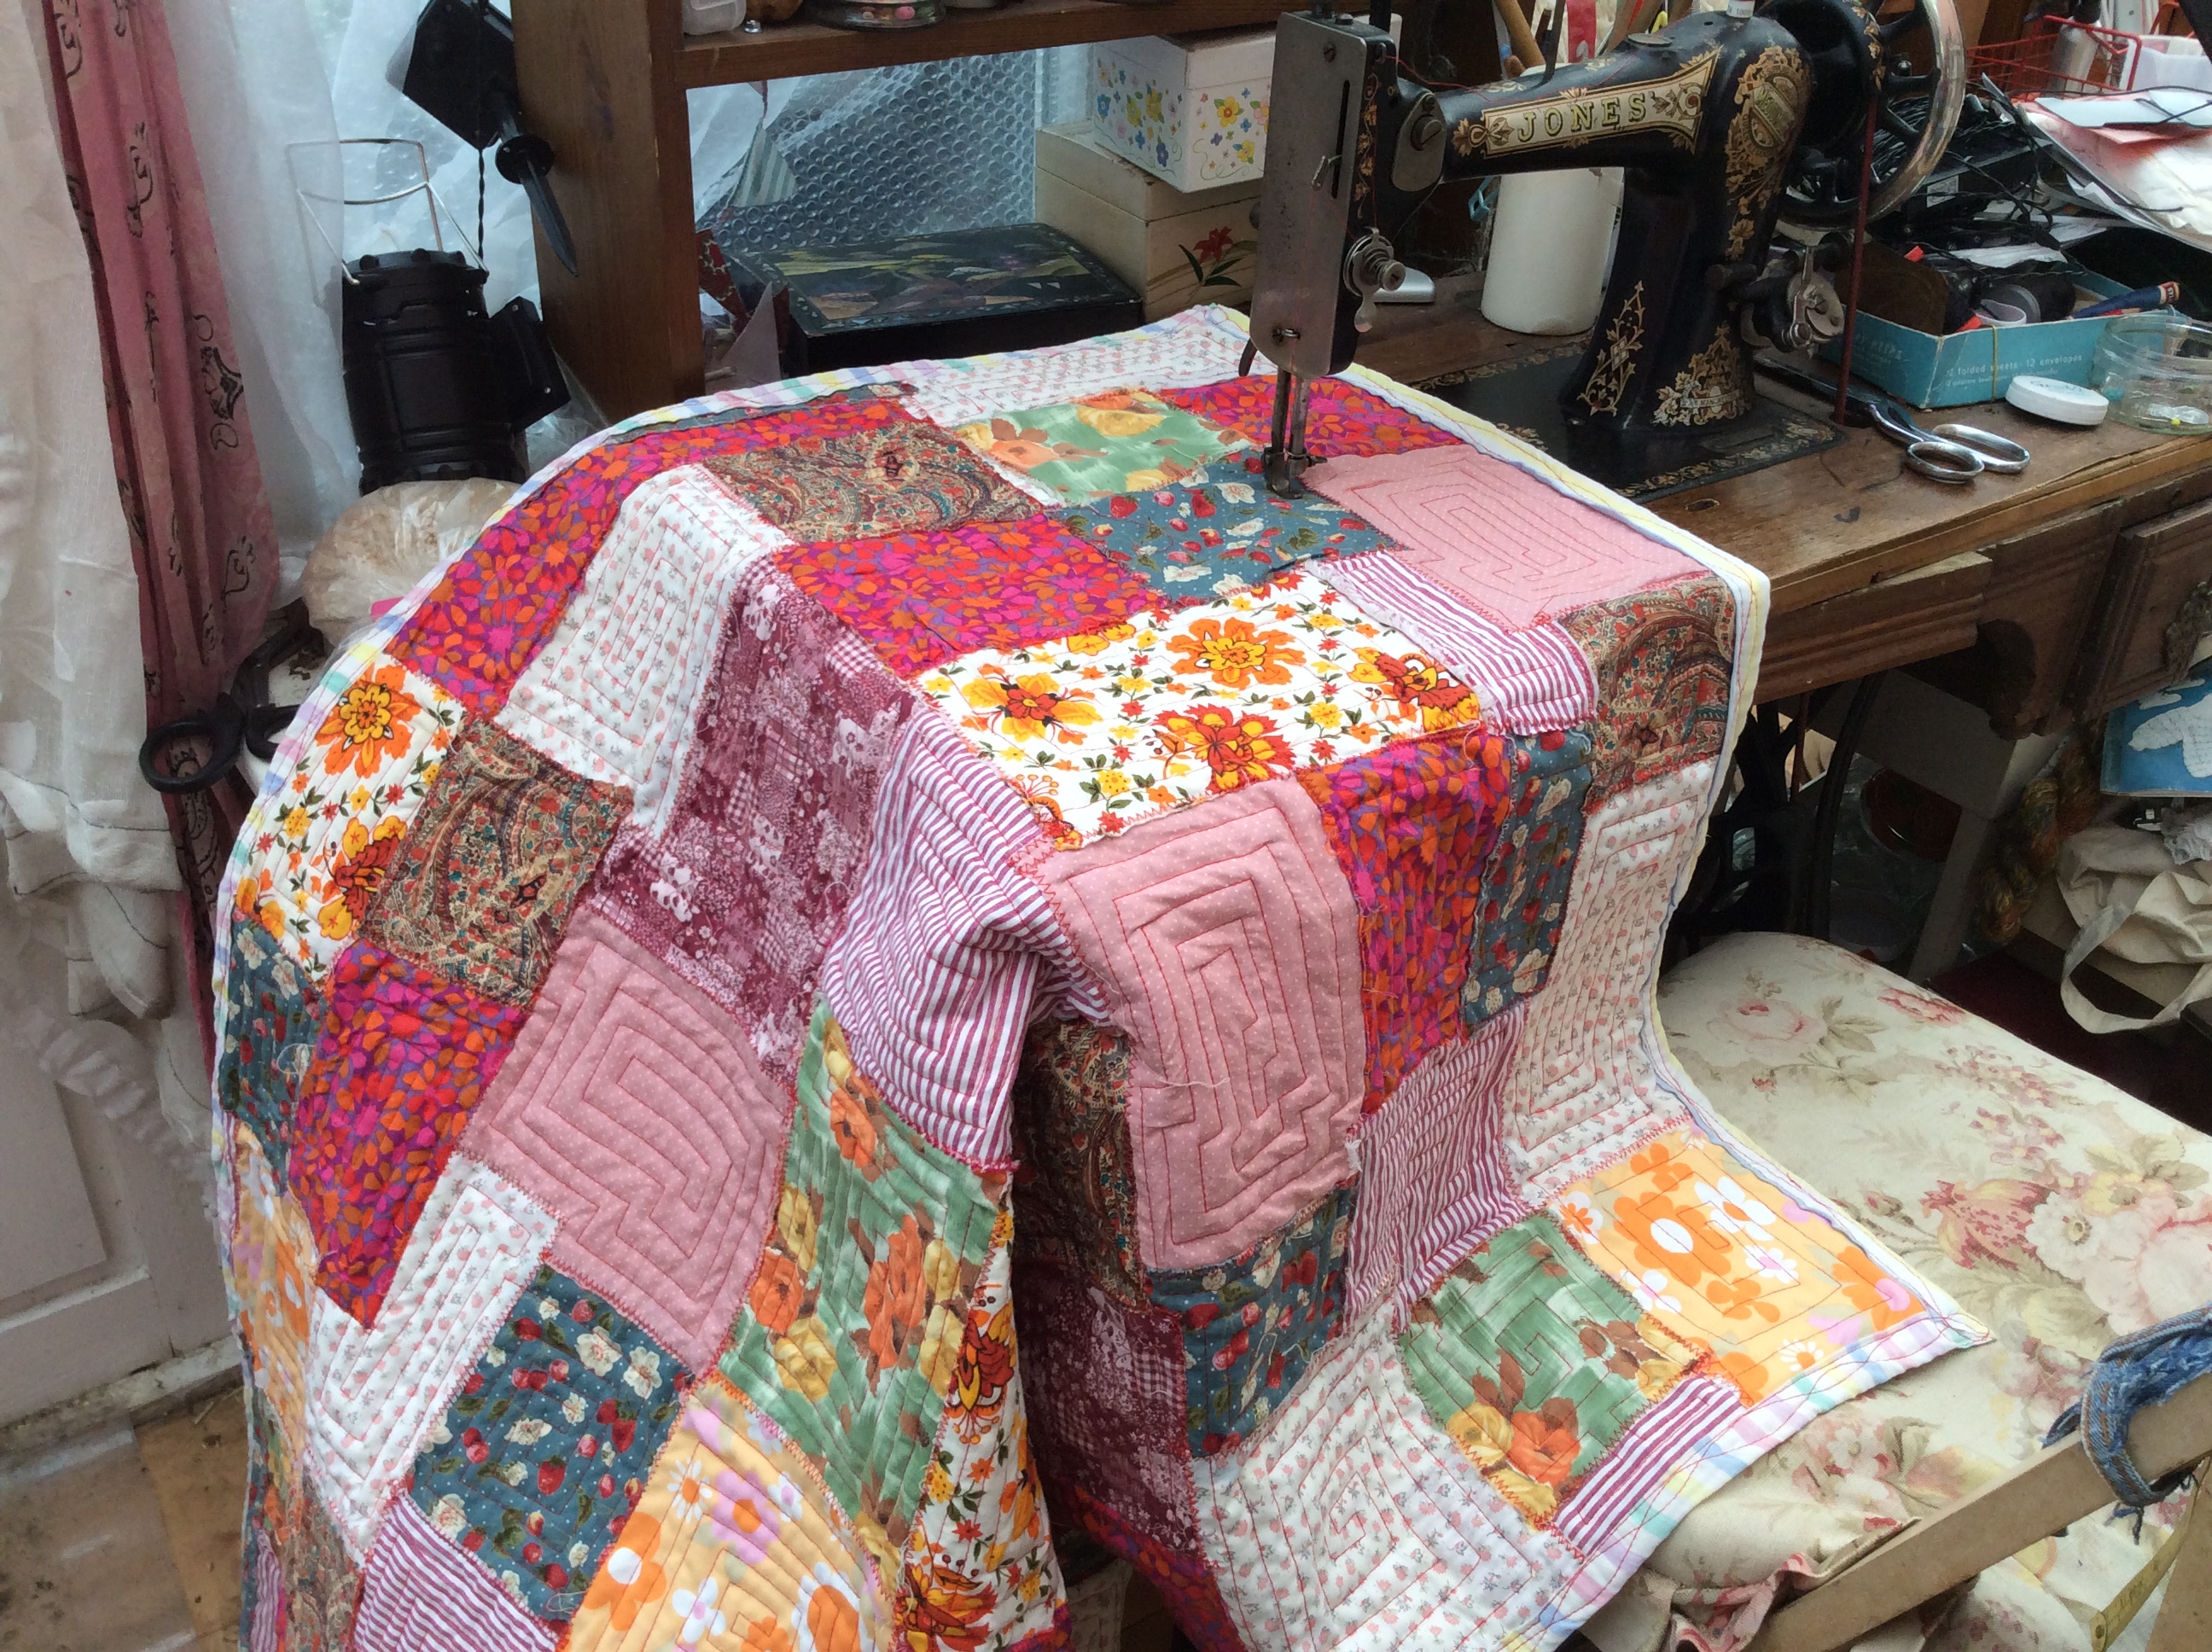
If I weren’t just stashbusting, I might have used some of the Pfaff’s enormous range of stitches and some interesting thread. However, in the cause of using stuff up whilst I actually have some time available, I just went for fast & furious. After cutting & sticking on some wadding & backing (which also did duty as the binding, folded over, ironed & stitched down) with that miraculous 505 spray, I transferred operations to my REAL sewing machine, the 1909 Jones treadle.

If I could only keep one machine, it’d be this one. Never skips a stitch or sulks.

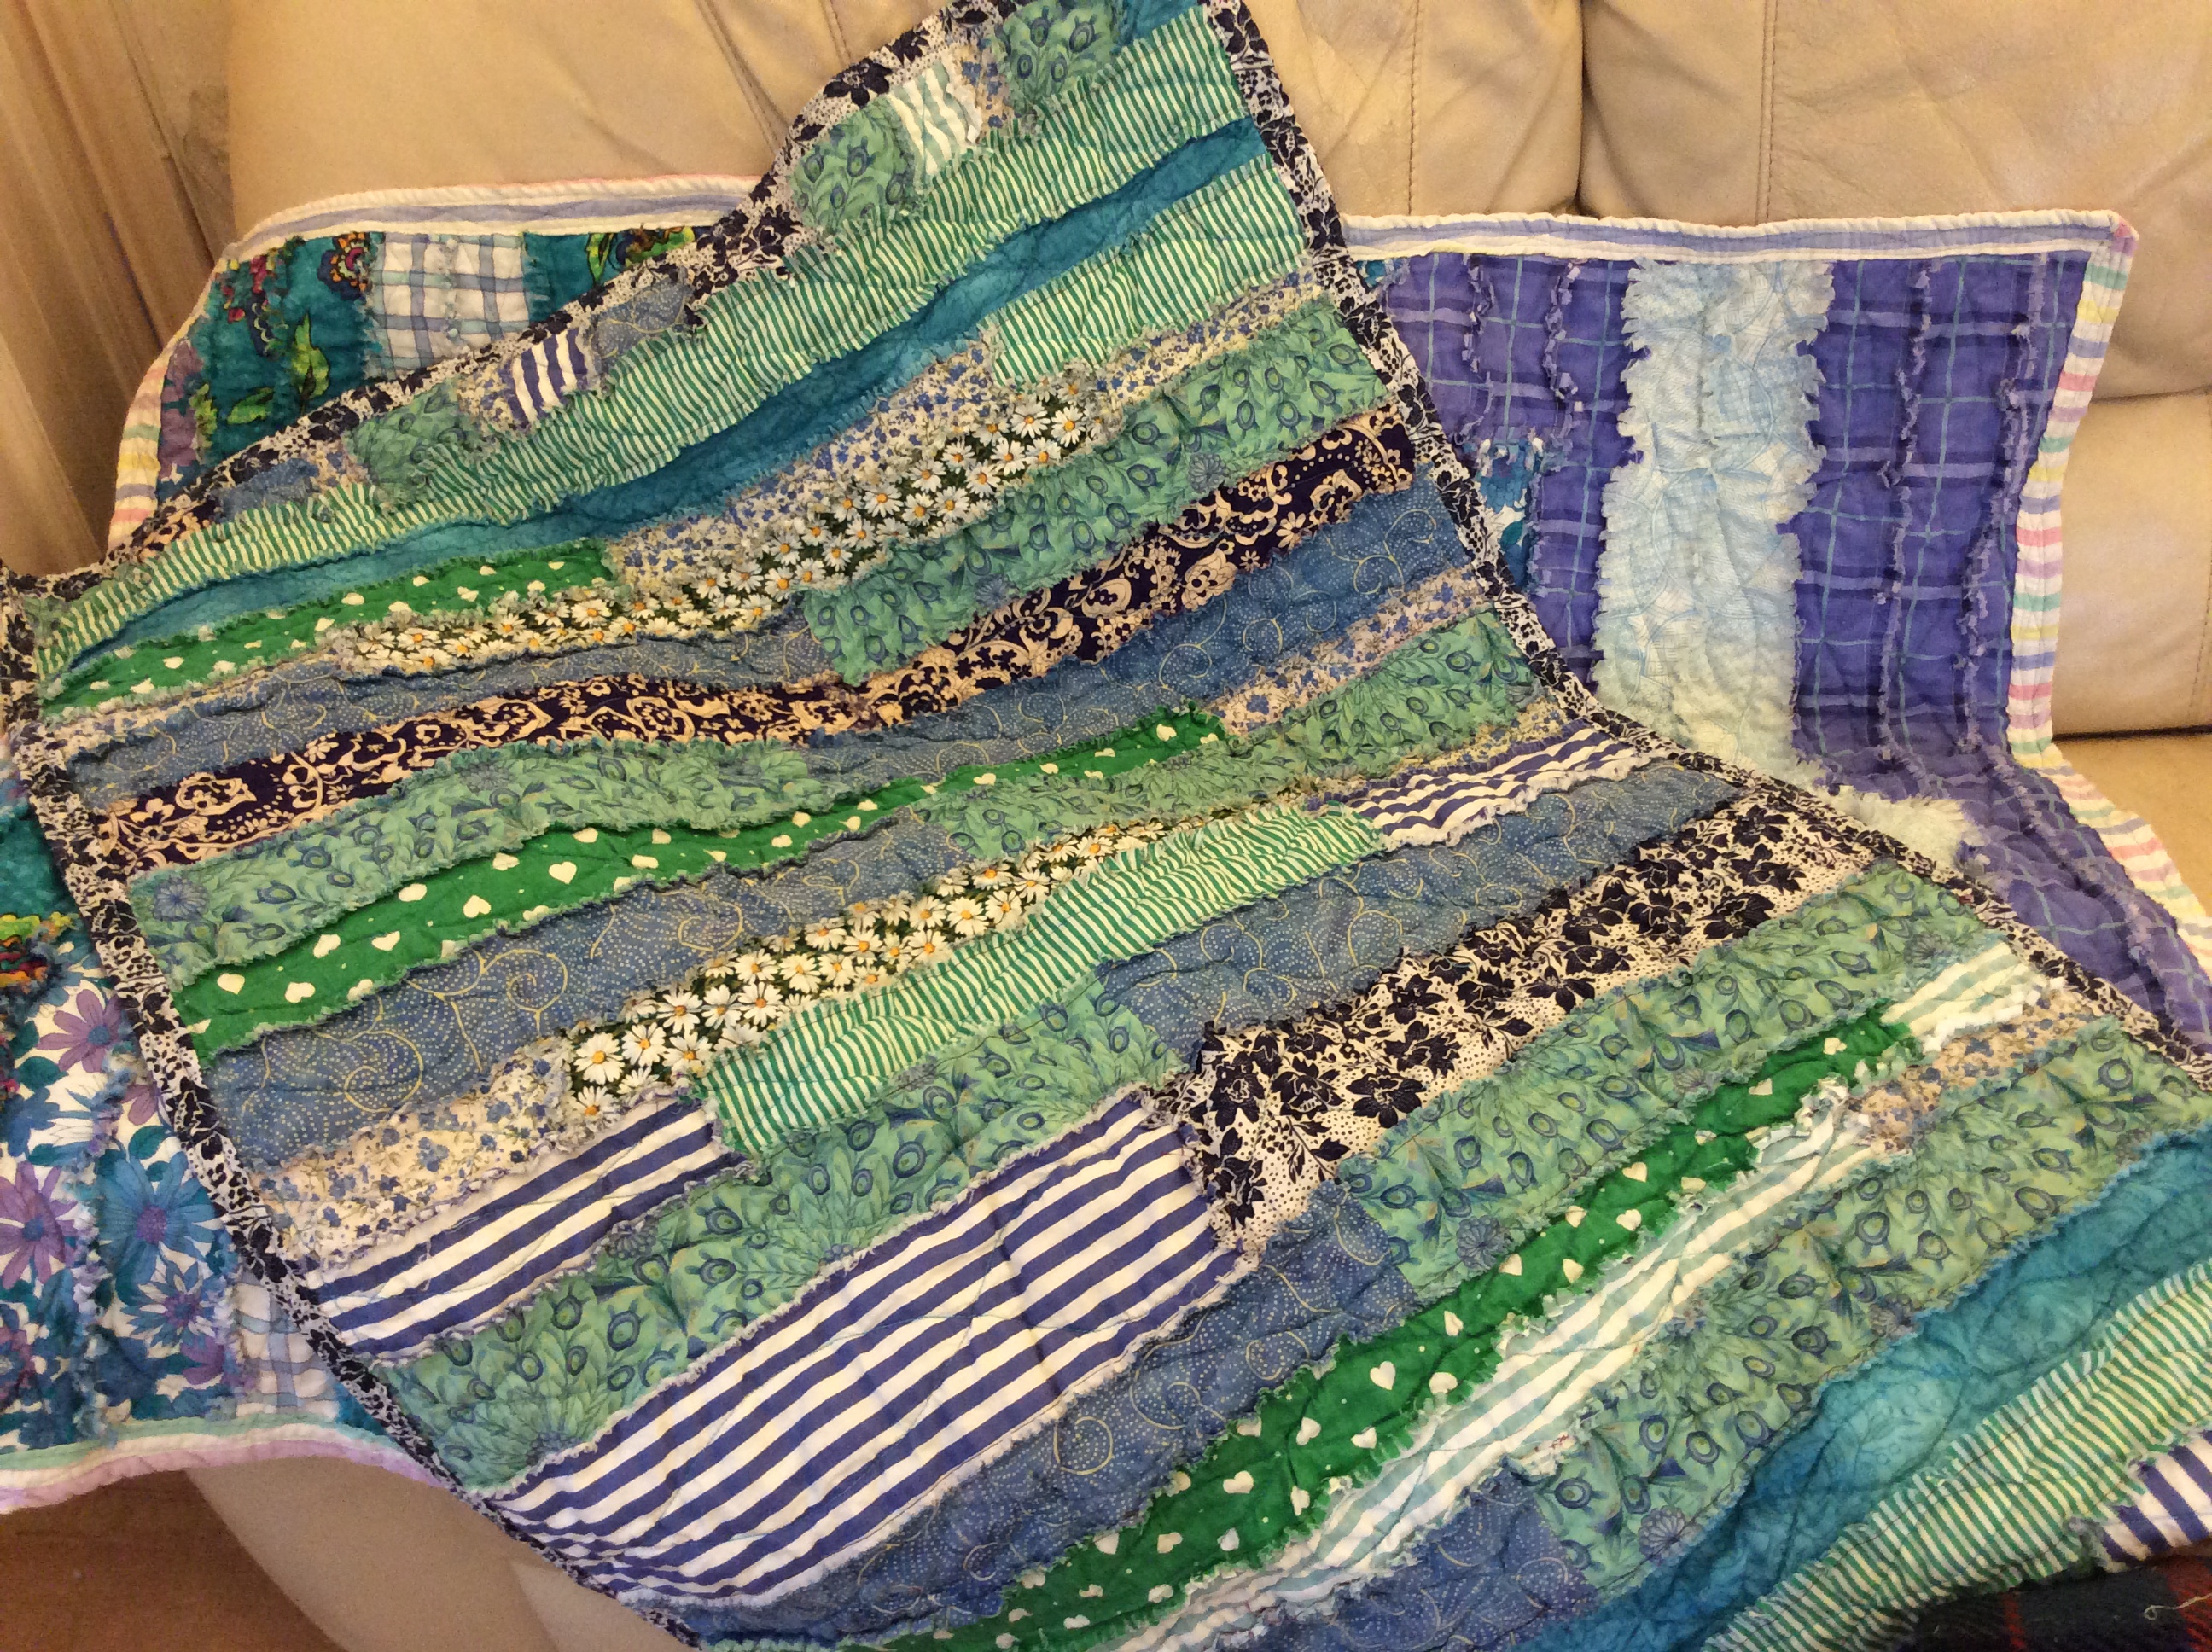
It took a lot longer to quilt this one; it’s much more closely quilted. I chose to more-or-less echo the shapes of the rectangles and their overlaps. So if quilts got names, I’d call it “Corners” as I turned an awful lot of those! But the joy of working on an old-fashioned treadle is total control; it never runs away with you. Anyway, by this morning I was very nearly there…

Hours & hours of turning corners later…

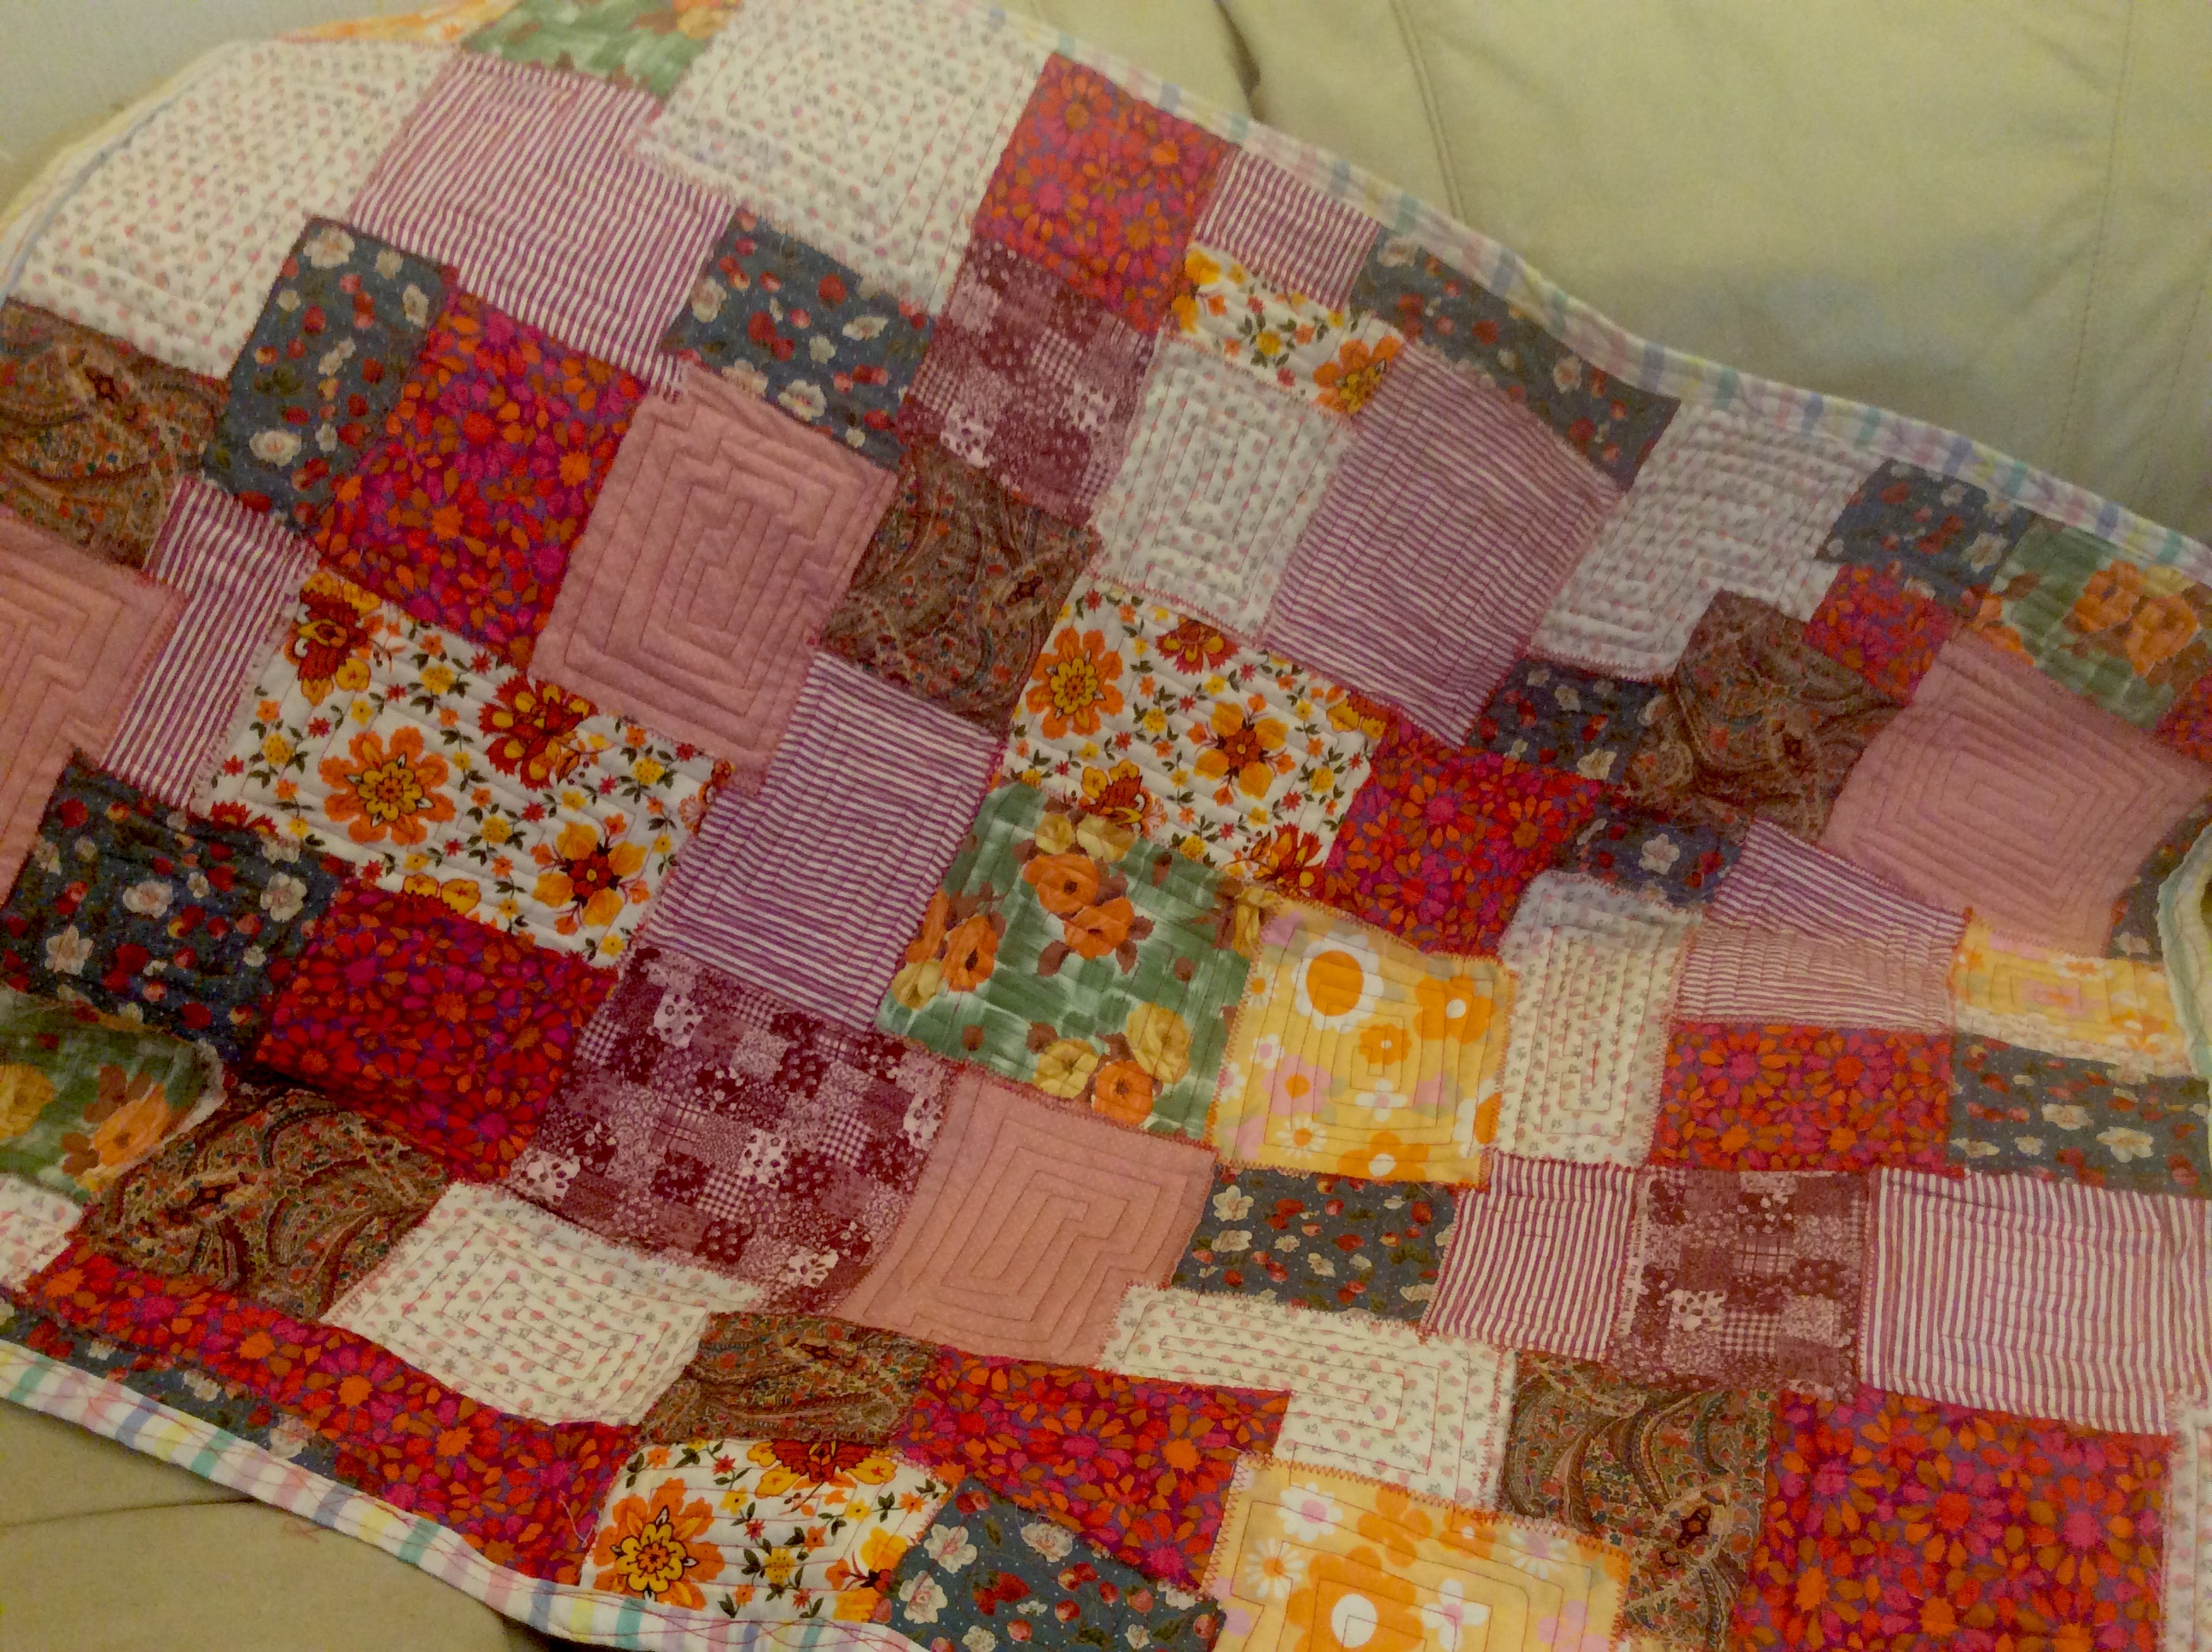
All done by lunchtime! And has been washed, dried & stashed away with Stashbusters I & 2, waiting for small owners, should those days ever arrive! Mind you, I’m not saying they have to be human owners…

The finished article.

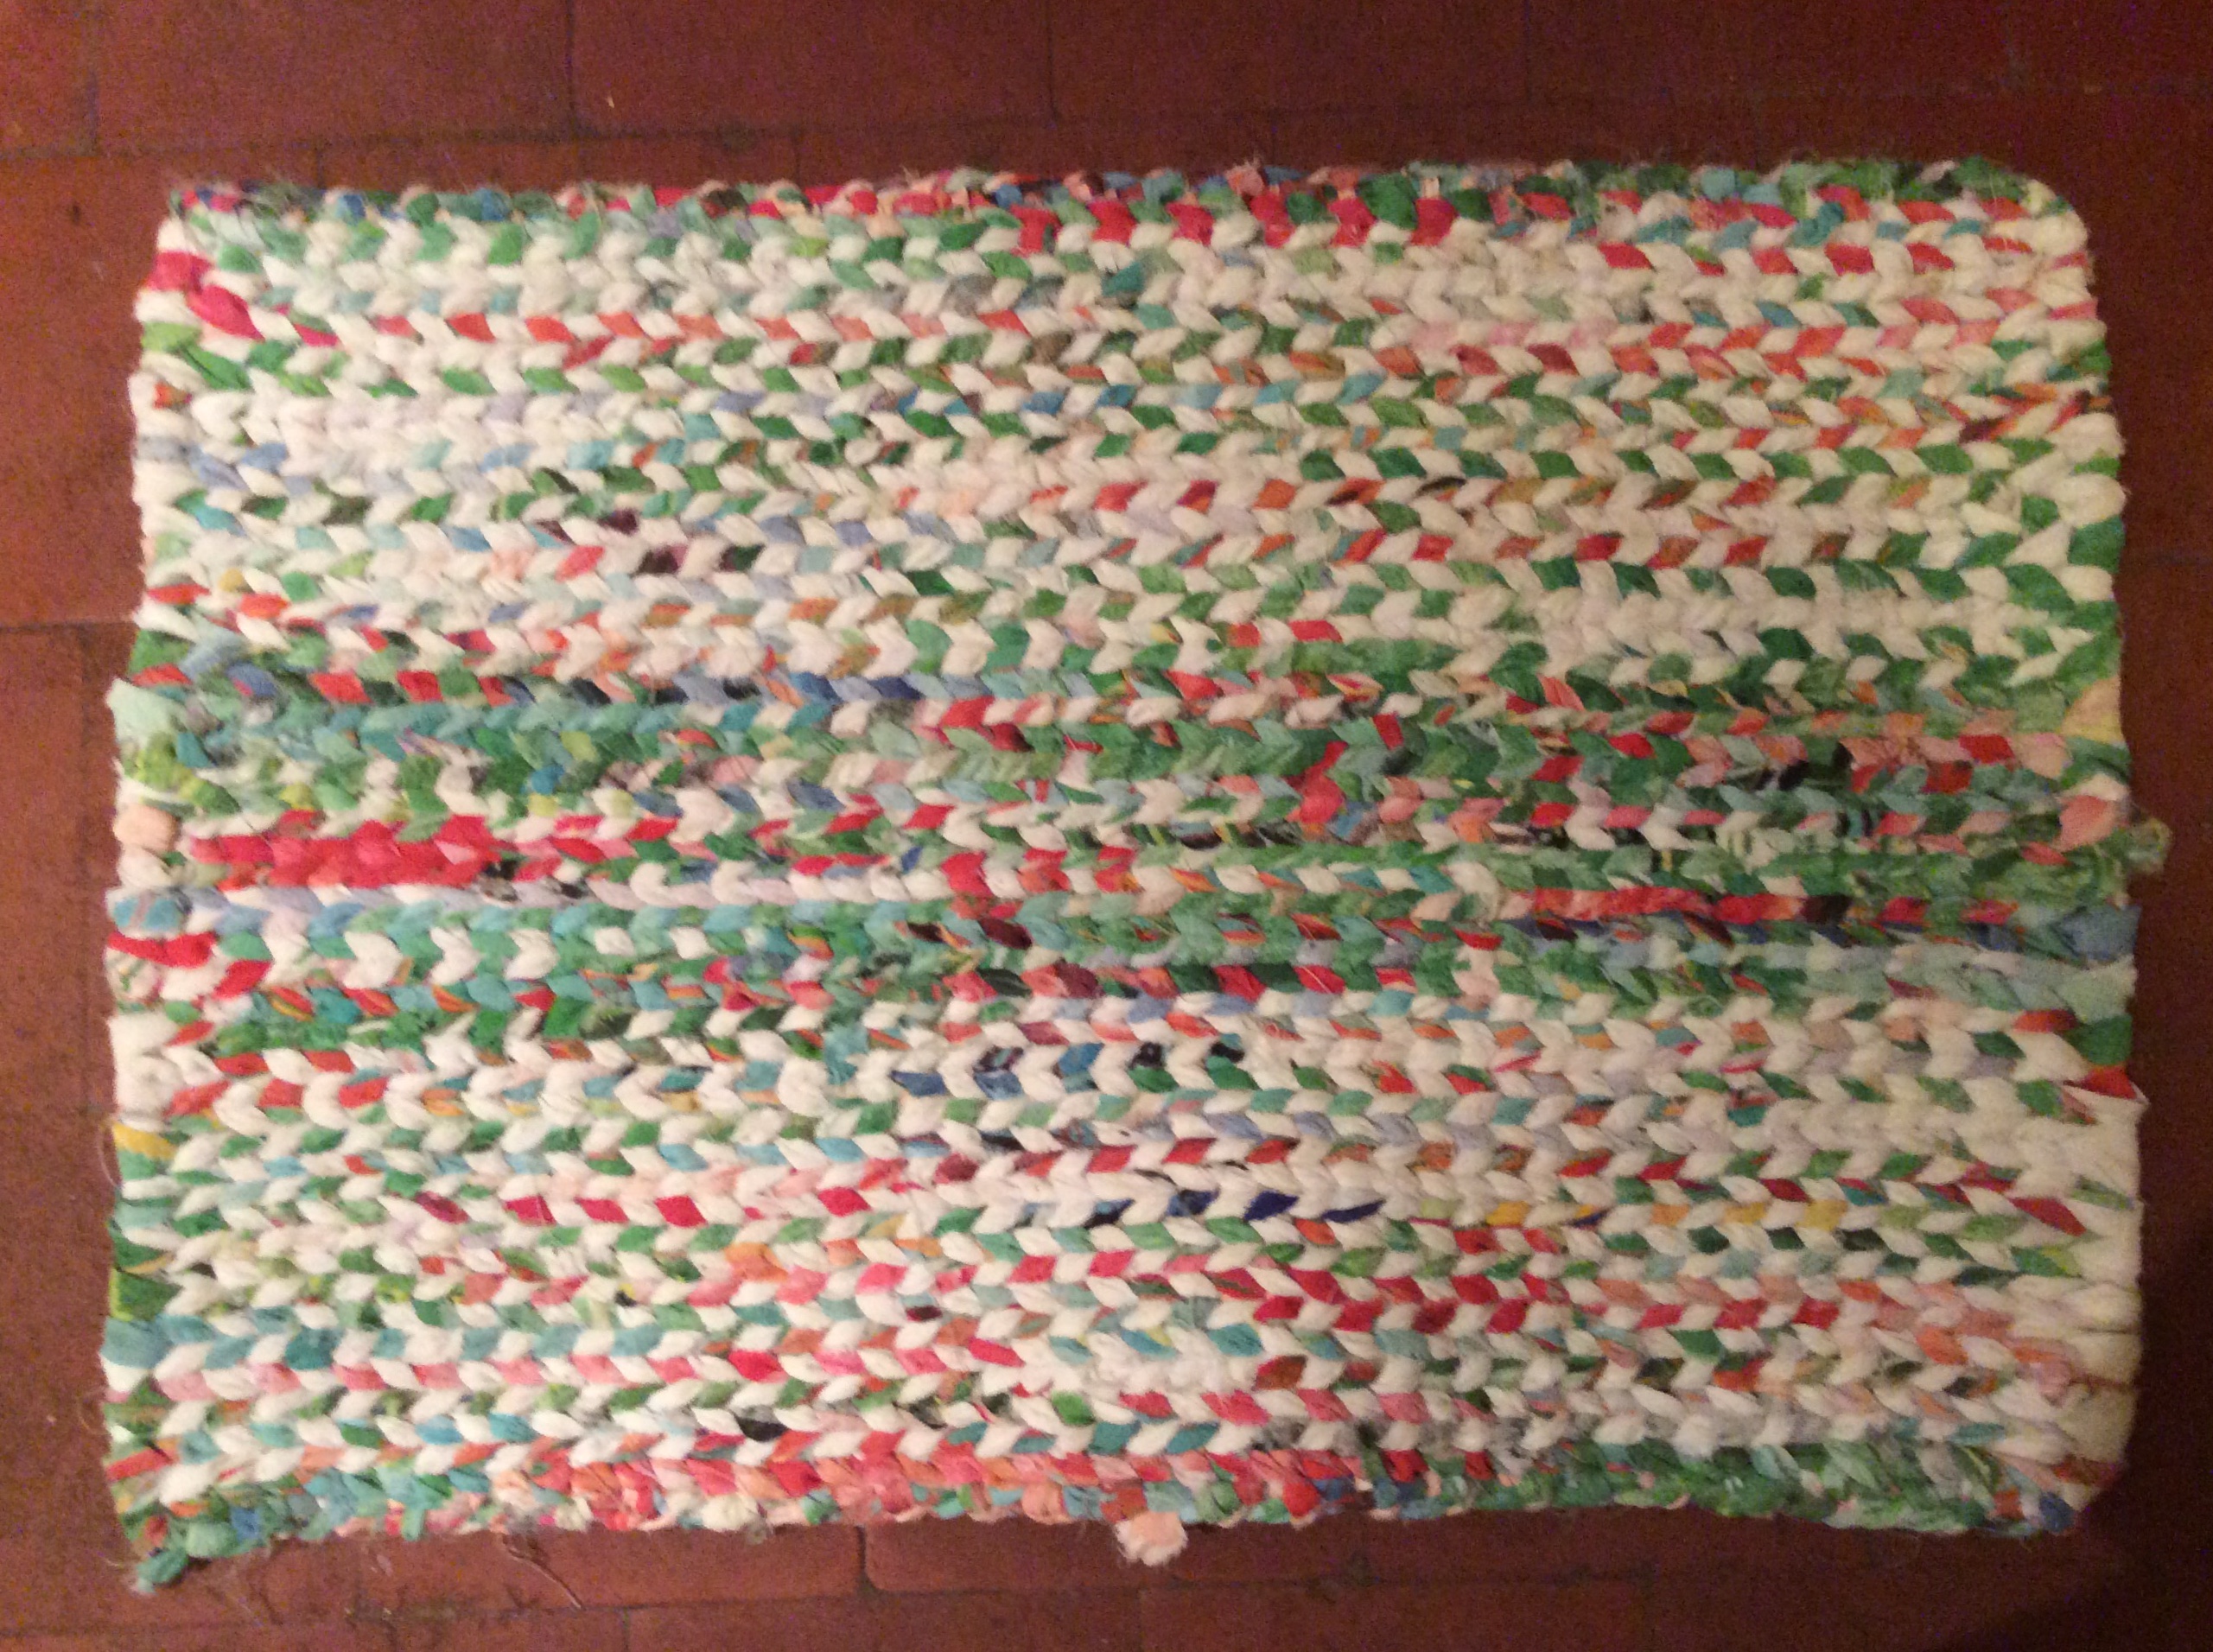
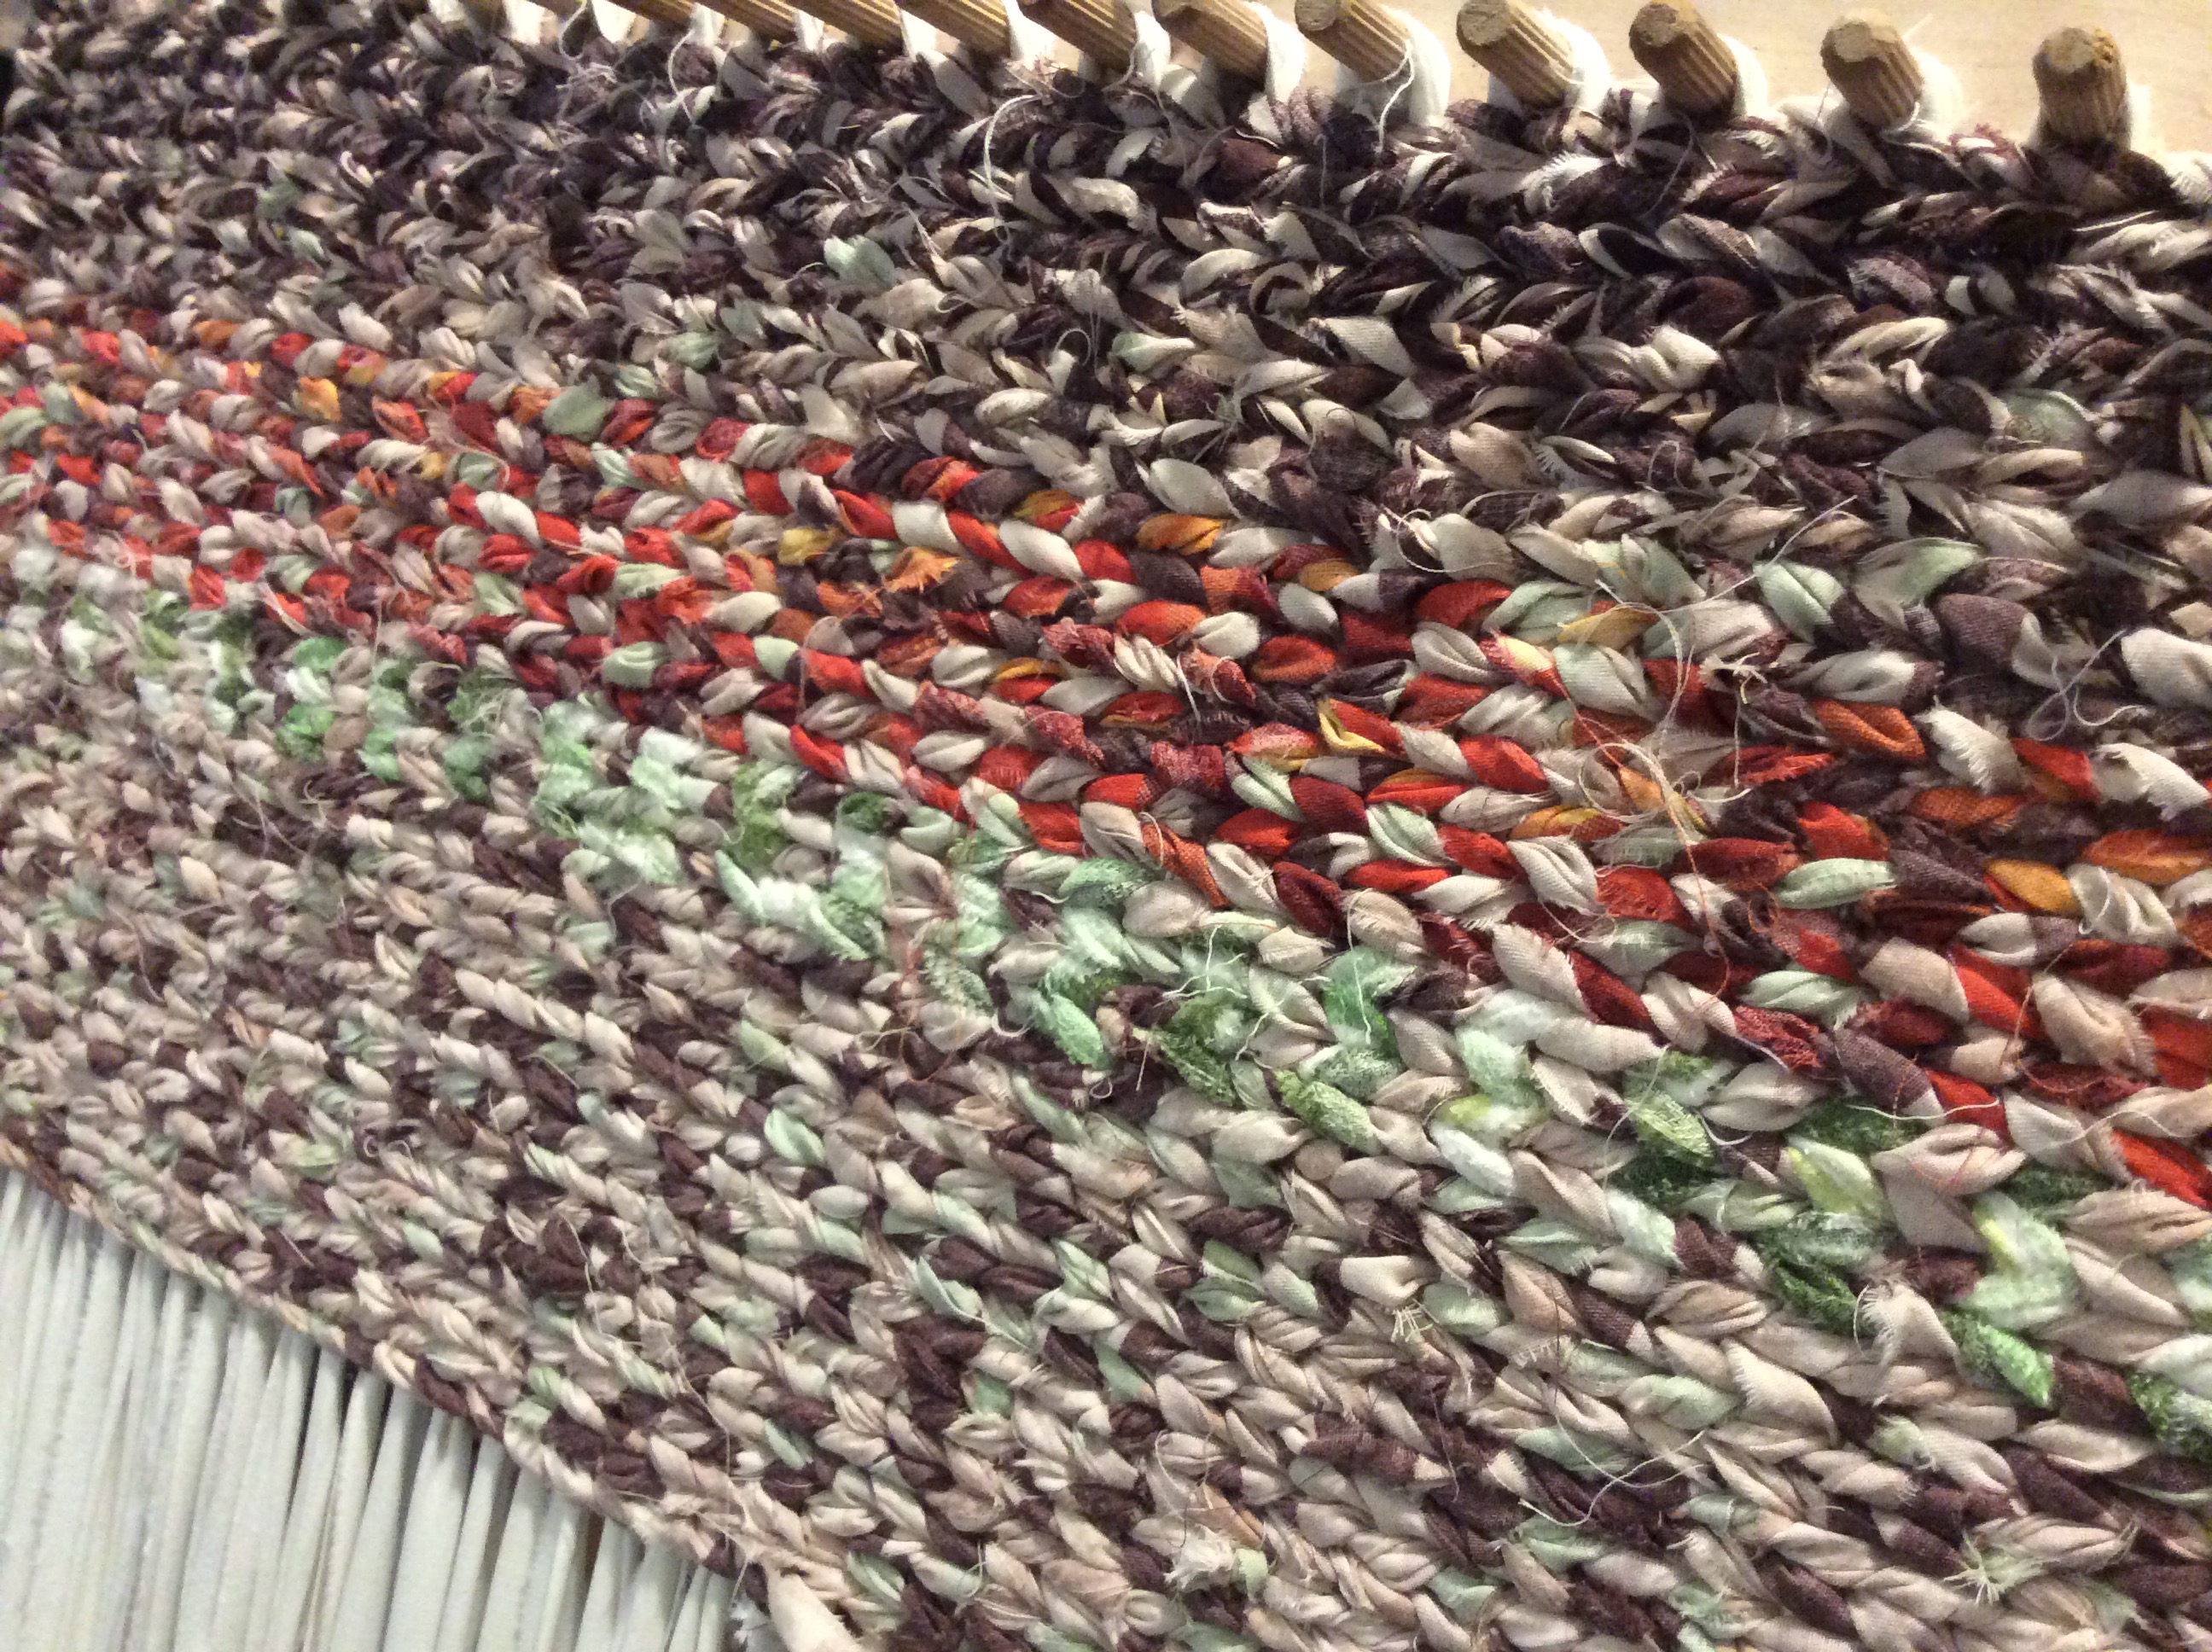
Stashbuster 4 will be somewhat of a change of direction… but there are a couple of large alteration projects to shift first, to make more room in the “Sewing studio” aka the spare bedroom. So I’ll allow myself at least a week to get this one done & dusted.

Stashbuster 2…

Raggy cot quilt from scraps…

Stashbusting cot quilt no. 2 completed… My self-imposed challenge this time was only to use fabric from my scrap drawer for the top. Whenever I have a scrap of suitable fabric either left over from another project or come in on a job lot but much too small to sell on, I stuff it into my scrap drawer for using up another day. Well, that day is this day.

There’s a slight cheat in that one of the fabrics hadn’t quite made it into the scrap drawer (from a damaged “New Look” cotton skirt, which I hadn’t quite got round to dismantling) but that’s where it was bound. Not all the scraps go into quilt tops; there are 1001 uses for a small bit of decent fabric, like – oh, lavender sachets, bunting, test-stitching a newly refurbished sewing machine, lining a woven bag – they’re always useful.

My elderly mother got quite excited when she heard I was making cot quilts, pointedly wondering whether there was any news from the assorted offspring. It was hard to break it to her that actually I’m just making them for practice, to use stuff up & experiment with simple techniques, and because that size is so eminently do-able in short bites of time!

But I had thought that actually using up a whole cot-quilt’s-worth would clear a fair bit of space in there. Sadly, not so! I think there’s still enough for a couple of king-size quilts in there. I do have an intriguing idea for the next one, but this may go on for longer than a month…

My not-very-empty scrap drawer…

Hands-on stuff…

The dark evenings and winter chill made me determined to finish the small rug/shower-room mat that had languished on my big twining loom since last spring was sprung.

IMG_4701
Our new shower mat – still needs a little tidying up!

That, plus the fact I’d agreed to run a little workshop on the subject of “simple forms of weaving” for our Guild’s Skills Day at the end of January. I got stuck in and finished the shower mat within a couple of evenings – it’s now in use – and warped the loom with torn-up sheets ready for the workshop. My “students” seemed to enjoy themselves and between us we did several inches of  a new, full-size rug in warm shades of brown, orange & light green, still ongoing here at home. However, during the day, it did occur to me that it would be good to have some smaller looms available for people to learn the technique on and hopefully complete something small but useful within a day.

IMG_4703
New rug under construction!

So I started looking around for some suitable wood, ordered a batch of beechwood pegs and raided a DIY superstore for eye-bolts, wing-nuts and stainless steel rods, as we also needed to buy a sander for our younger daughter’s latest project. (Which is possibly THE most expensive way of acquiring eye-bolts, all beautifully but individually packaged & priced to match!) We did have some old bed-slats in the garage roof, but eventually I decided that they were too wide to handle easily and too shallow to fix the pegs into securely. Then my eye fell on a batten that had once held a 6′ wide Roman blind… although it’s technically a soft wood, it proved to be very sturdy and quite hard to drill into, so I think it’ll stand the strain. So I chopped it into 18″ lengths, bolted those into a square, then drilled holes & inserted the pegs along the top & bottom. Once I’d sorted out a way to fix the rod down the side – random washers & wing nuts to the rescue – I had a slightly eccentric but entirely workable loom.

IMG_4710
Home-made 18″ twining loom

However it took me a couple of days, on & off round Real Life, to weave an 18″ square, which made me think it’s a little too large for what I was aiming at. So the next construction project will be a 12″ version. In the meantime I’ll be weaving a new top for a little old footstool, not to mention working on a set of matching chair pads for our mis-matched kitchen chairs. And then – I might just go 3d with it and maybe try a small basket to keep yarn in?

IMG_4705
A footstool in need of a twined makeover…

That’s one way to make a dent in my fabric stash! And there are plenty of others…

Denim strikes again!

Recently my little van needed to spend some time in “dry dock” having a spot of surgery. When I emptied her out – well, mostly – I was struck by the sheer amount of junk I’d been carrying around, particularly in my “beach” bag which used to hang over the back of the front passenger seat. There certainly were things appropriate to last-minute dashes to the beach – we live 20 minutes drive from Sandbanks, and it’s always pleasant to spend a sunny evening down there, usually on a whim – but also things I might need when I’m running the stall or doing a car boot sale. One or two tools, some for the van, but some in case I should come across an elderly sewing machine in distress. And a number of miscellaneous items I can’t imagine I’d ever need at all! All tangled up together so that I could hardly ever find what I actually needed & knew was in there somewhere

So, it was high time to rationalise, and tidy things up a bit. I had An Idea… our local recycling firm have recently opened a warehouse-shop where they deposit most of the rejected textiles they collect; some items (brand-new-with-tags, “quality” and “designer” stuff) are sorted onto hangers, which they charge a bit more for, but mostly you fish about in builder’s bags & pay 50p per item. I already had a fair bit of reclaimed denim, left over from making quilts & other things (including the old beach bag) but knew I wouldn’t have enough of the bits I needed for this job, so I popped down there & rescued 5 pairs of jeans to chop up.

A bit of cutting, twenty minutes or so of stitching, a bit of “chenilling” round the edges just because it pleases me, a quick wash, and lo & behold, my van now has pocketses! And there were still some pockets left, so I made another, different set to string across the rear of the back seat too, from headrest to headrest, to carry things that aren’t used so often but are still useful to have on board. With a bit of thought, I could have included a “secret” pocket in the front one, or one big enough to carry maps, but I’m happy with the result.

Now, of course, I have 10 cut-off legs, some waistbands, and some side-seams to stash away for the next Idea-with-denim that drifts my way!

pockets1

pockets2

A riot of colour…

Another little tale from yesterday… I went down to the local market, which always has a very good car boot section on a winter Saturday. Although I just needed some ham ends and some garlic for the household, I had my “work” purse with me too, so I strolled through the stalls on my way to the food area. One stallholder, who has a house-clearance firm based down in a town on the coast, called me over; “I have something you might like… a bag of Indian stuff, I think.”

Oh yes…! A big bag of jumbled old saris. Some clearly in fairly bad way, but others didn’t look too bad. I estimated there would be at least 9 or 10 in there – saris are long, usually about 6 yards/5.5m of fabric – and most were of decent quality originally, many of them silk, and in a riot of glorious colours. I asked for his best price and was instantly able to see that this was a good bargain, although it involved handing over all of my “working” cash and some of the housekeeping too! But I would still have enough left to buy what I’d actually come for.

When I got it home (thanks to a lift from a kind neighbour, also on the hunt for bargains) I was delighted to discover that there were actually 17 full saris, plus a decorative offcut from a sari “fall” or pallu. One or two of the chiffon or thin silk crepe lengths were beyond use “as is” but have beautiful trims, which are worth rescuing in their own right, and much of the fabric is rescuable and has other potential uses. Most of the loveliest woven or beaded saris have some stains, alas; I think what I have here is another crafter’s stash, going by the cut-off pallu, rather than someone’s actual wardrobe. And three of them were “spoken for” by one member of the household or another, straight away. None of them are the sort that I normally buy in, i.e. traditionally-patterned printed silks. But some were instantly saleable, either as inexpensive party-wear or decent fabric with lovely trims, so they’ve gone straight onto my stall at a very-reasonable price, to cover my costs.

I shall say no more, except to say that if I’m quiet for the next few days, it’s because I’m either dealing with yards and yards or fabulous fabrics, or I’m dreaming of what I can (and must!) do with them…

OLYMPUS DIGITAL CAMERA
A riot of colours and textures…

OLYMPUS DIGITAL CAMERA
Stunning contrasts…

OLYMPUS DIGITAL CAMERA
Fabulous trims…

Ooooh – nice!

Bit of luck yesterday – I went down to the Tip with loads of cardboard, polystyrene (aaaargh – horrible stuff!) and wrapping from the utility room revamp. “We’ve got something for you!” Lee greeted me. “Some alpaca, in fact.”
Curious, I trotted over to the covered skip, thinking most likely I’d find a bit of raw fleece from an older animal that someone had meant to use for toy stuffing, perhaps. But no – two big bags of absolutely gorgeous-quality, squishy-soft, white, crimpy, supremely spinnable fluff, labelled “weanling”… the sort of stuff I’d have to hand over at least £30-£40 a bag for, if I were inclined to actually buy any. I love spinning (and wearing) alpaca, but don’t usually feel I can justify spending that much on my hobby – maybe £4 for a little bag once in a while. I spun up a quick sample skein last night and enjoyed it hugely; it almost spins itself. There was also a bag of washed Jacob’s fleece, which I shall give to my neighbour, as I already have 4 bags of it. I have to ask  – who throws these things away? There’s no sign of moths or  mice or anything else that would make me reject it. It may have belonged to someone who isn’t spinning or felting any more, for whatever reason, but how come they couldn’t find anyone to give it to, rather than just dumping it? Not that it matters; luckily the gents were alert & it’s made its way into my stash now. Into the very top, the next-project bit of it, as it happens.

What a lovely find! I’m a very happy bunny. Thanks, gents…

And I’m hardly even going to mention the pheasant – poor little fellow threw himself in front of a car (not ours, I hasten to add) on a country road at the weekend whilst we were helping with the move. We drove one way; the road was clear. We offloaded & drove back again 10 minutes later; there he was, dead as a dodo. He was on a bend & anything much shorter than a human would have been hugely at risk of being squished themselves, trying to drag him away – so who could resist? A large pot of delicious stock & several tasty salads later, I’m very grateful to him…