In the spirit of Thrift…

A long time ago, I discovered that the word “Thrift” doesn’t quite mean what people generally think. (Although there is an element of words eventually coming to mean what people think they mean, rather than what they originally meant. Just don’t tell Humpty Dumpty.) It didn’t, and shouldn’t, mean penny-pinching miserliness; it came from the same root as “thrive”, just as “frugal” originally meant much the same as “fruitful”. Once I’d wrapped my head around the idea of thrift as something positive, it put a different slant on my attempts to live within our means as we raised our biggish family on one-and-a-little-bit incomes whilst paying a fairly hefty mortgage to afford a home big enough for us not to actually fall over each other. It became a challenge to get the very best out of the resources actually available to us, rather than to become bitter & envious, and strive after ever more money and ever more stuff.

There are all sorts of interesting thoughts hovering around this; why are we continually encouraged to buy, buy, buy; to upgrade things that aren’t broken, to cook with fresh ingredients from the other side of the planet, to constantly change our clothes & decor at the whim of fashion editors & celebrities, to replace rather than repair? Is this a sane way to try to run the world? Why is our own time rarely recognised as an important resource, only time that someone else pays you for? However, the central fact is that, given that you actually do have enough (a key concept) of everything vital, it’s an interesting challenge to see what more you can do with the resources, of any sort, that do come your way.

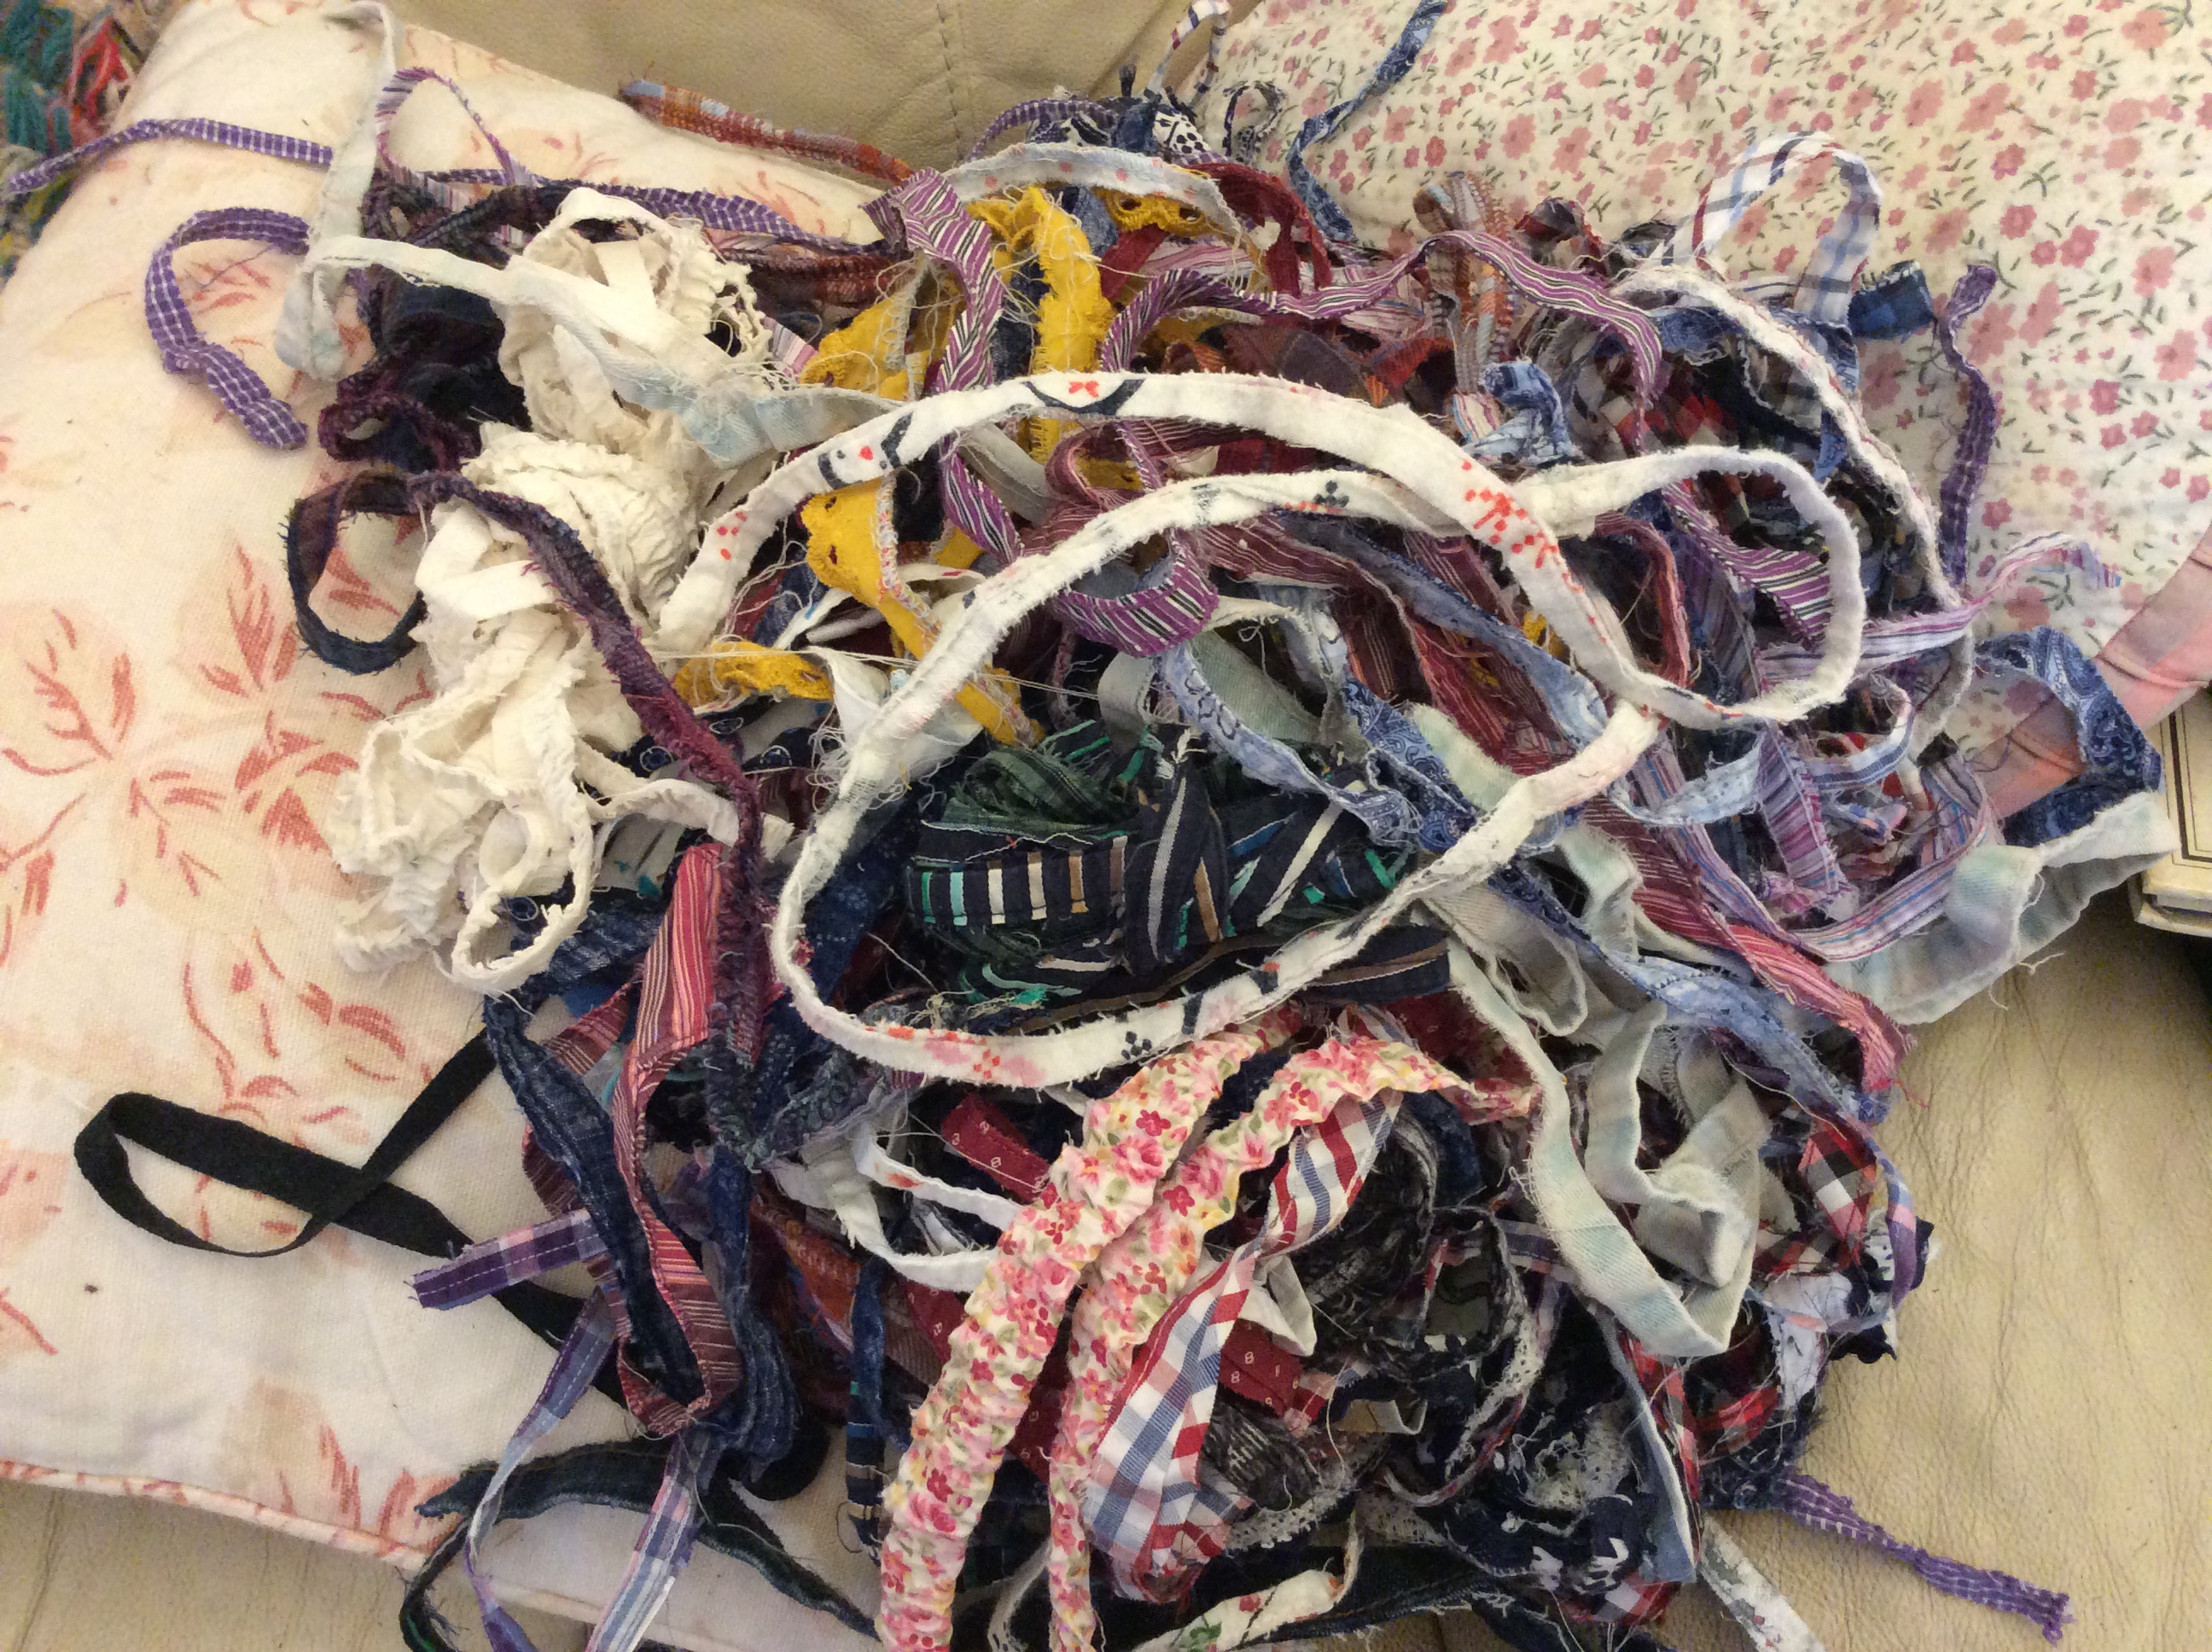
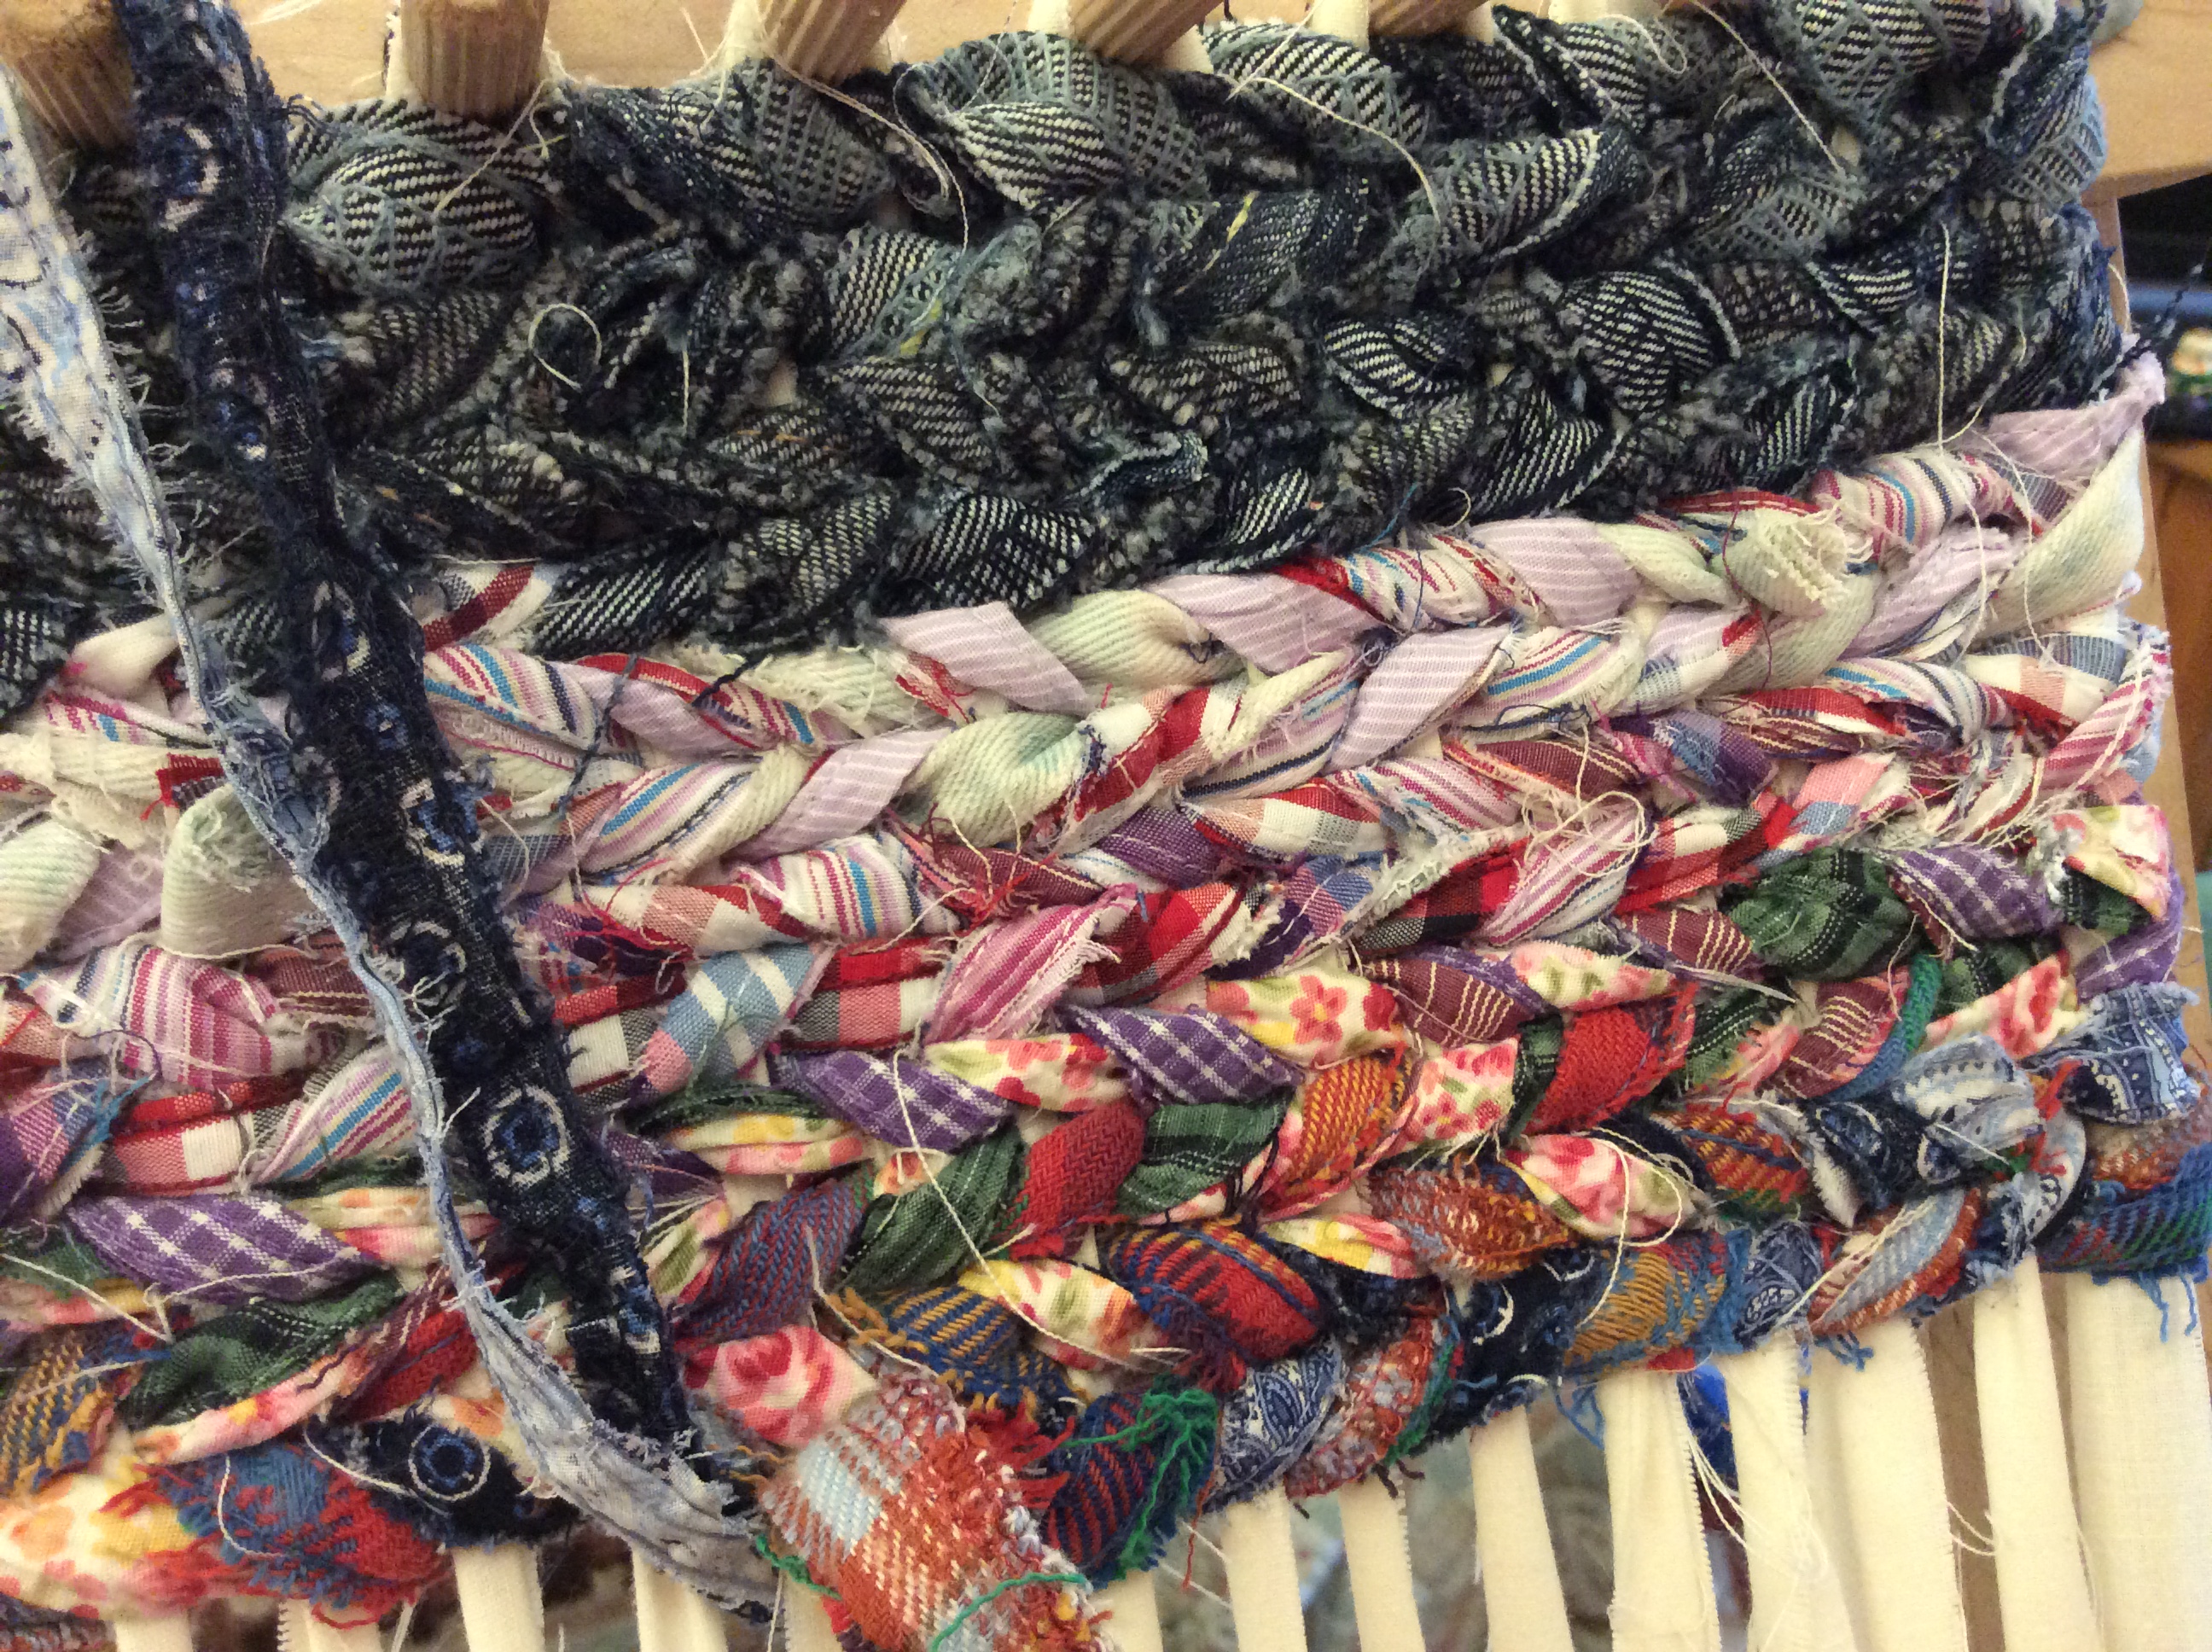
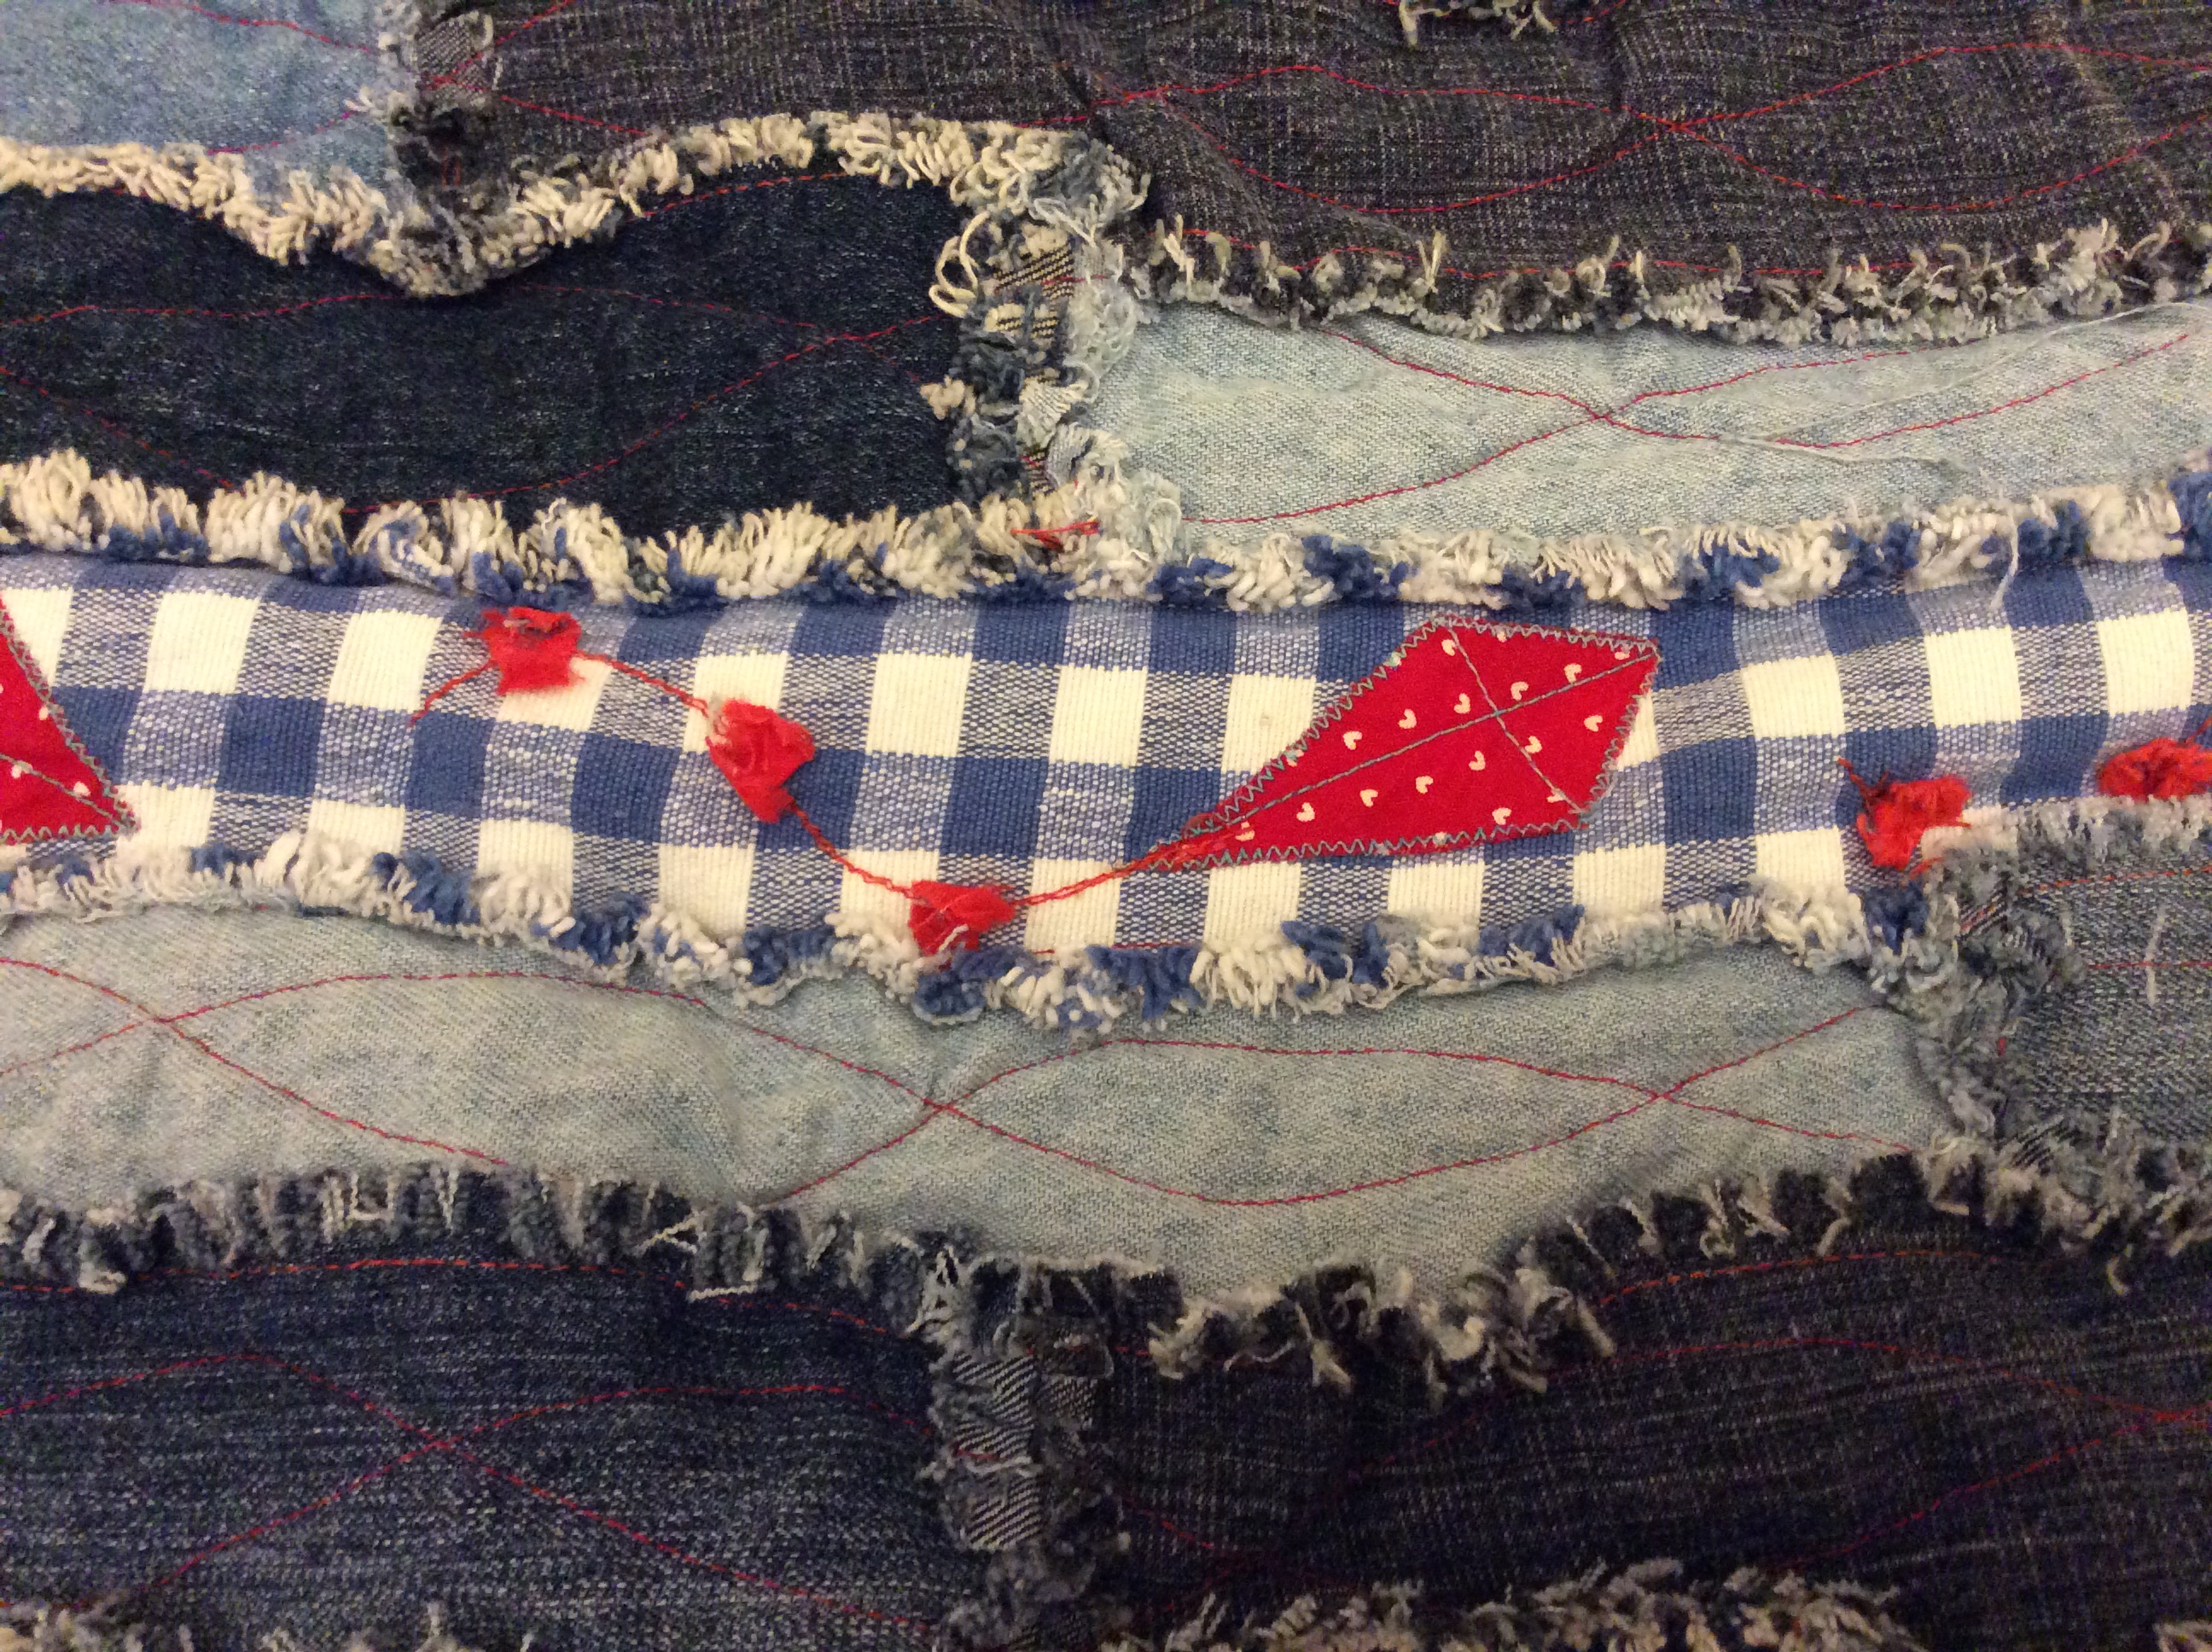
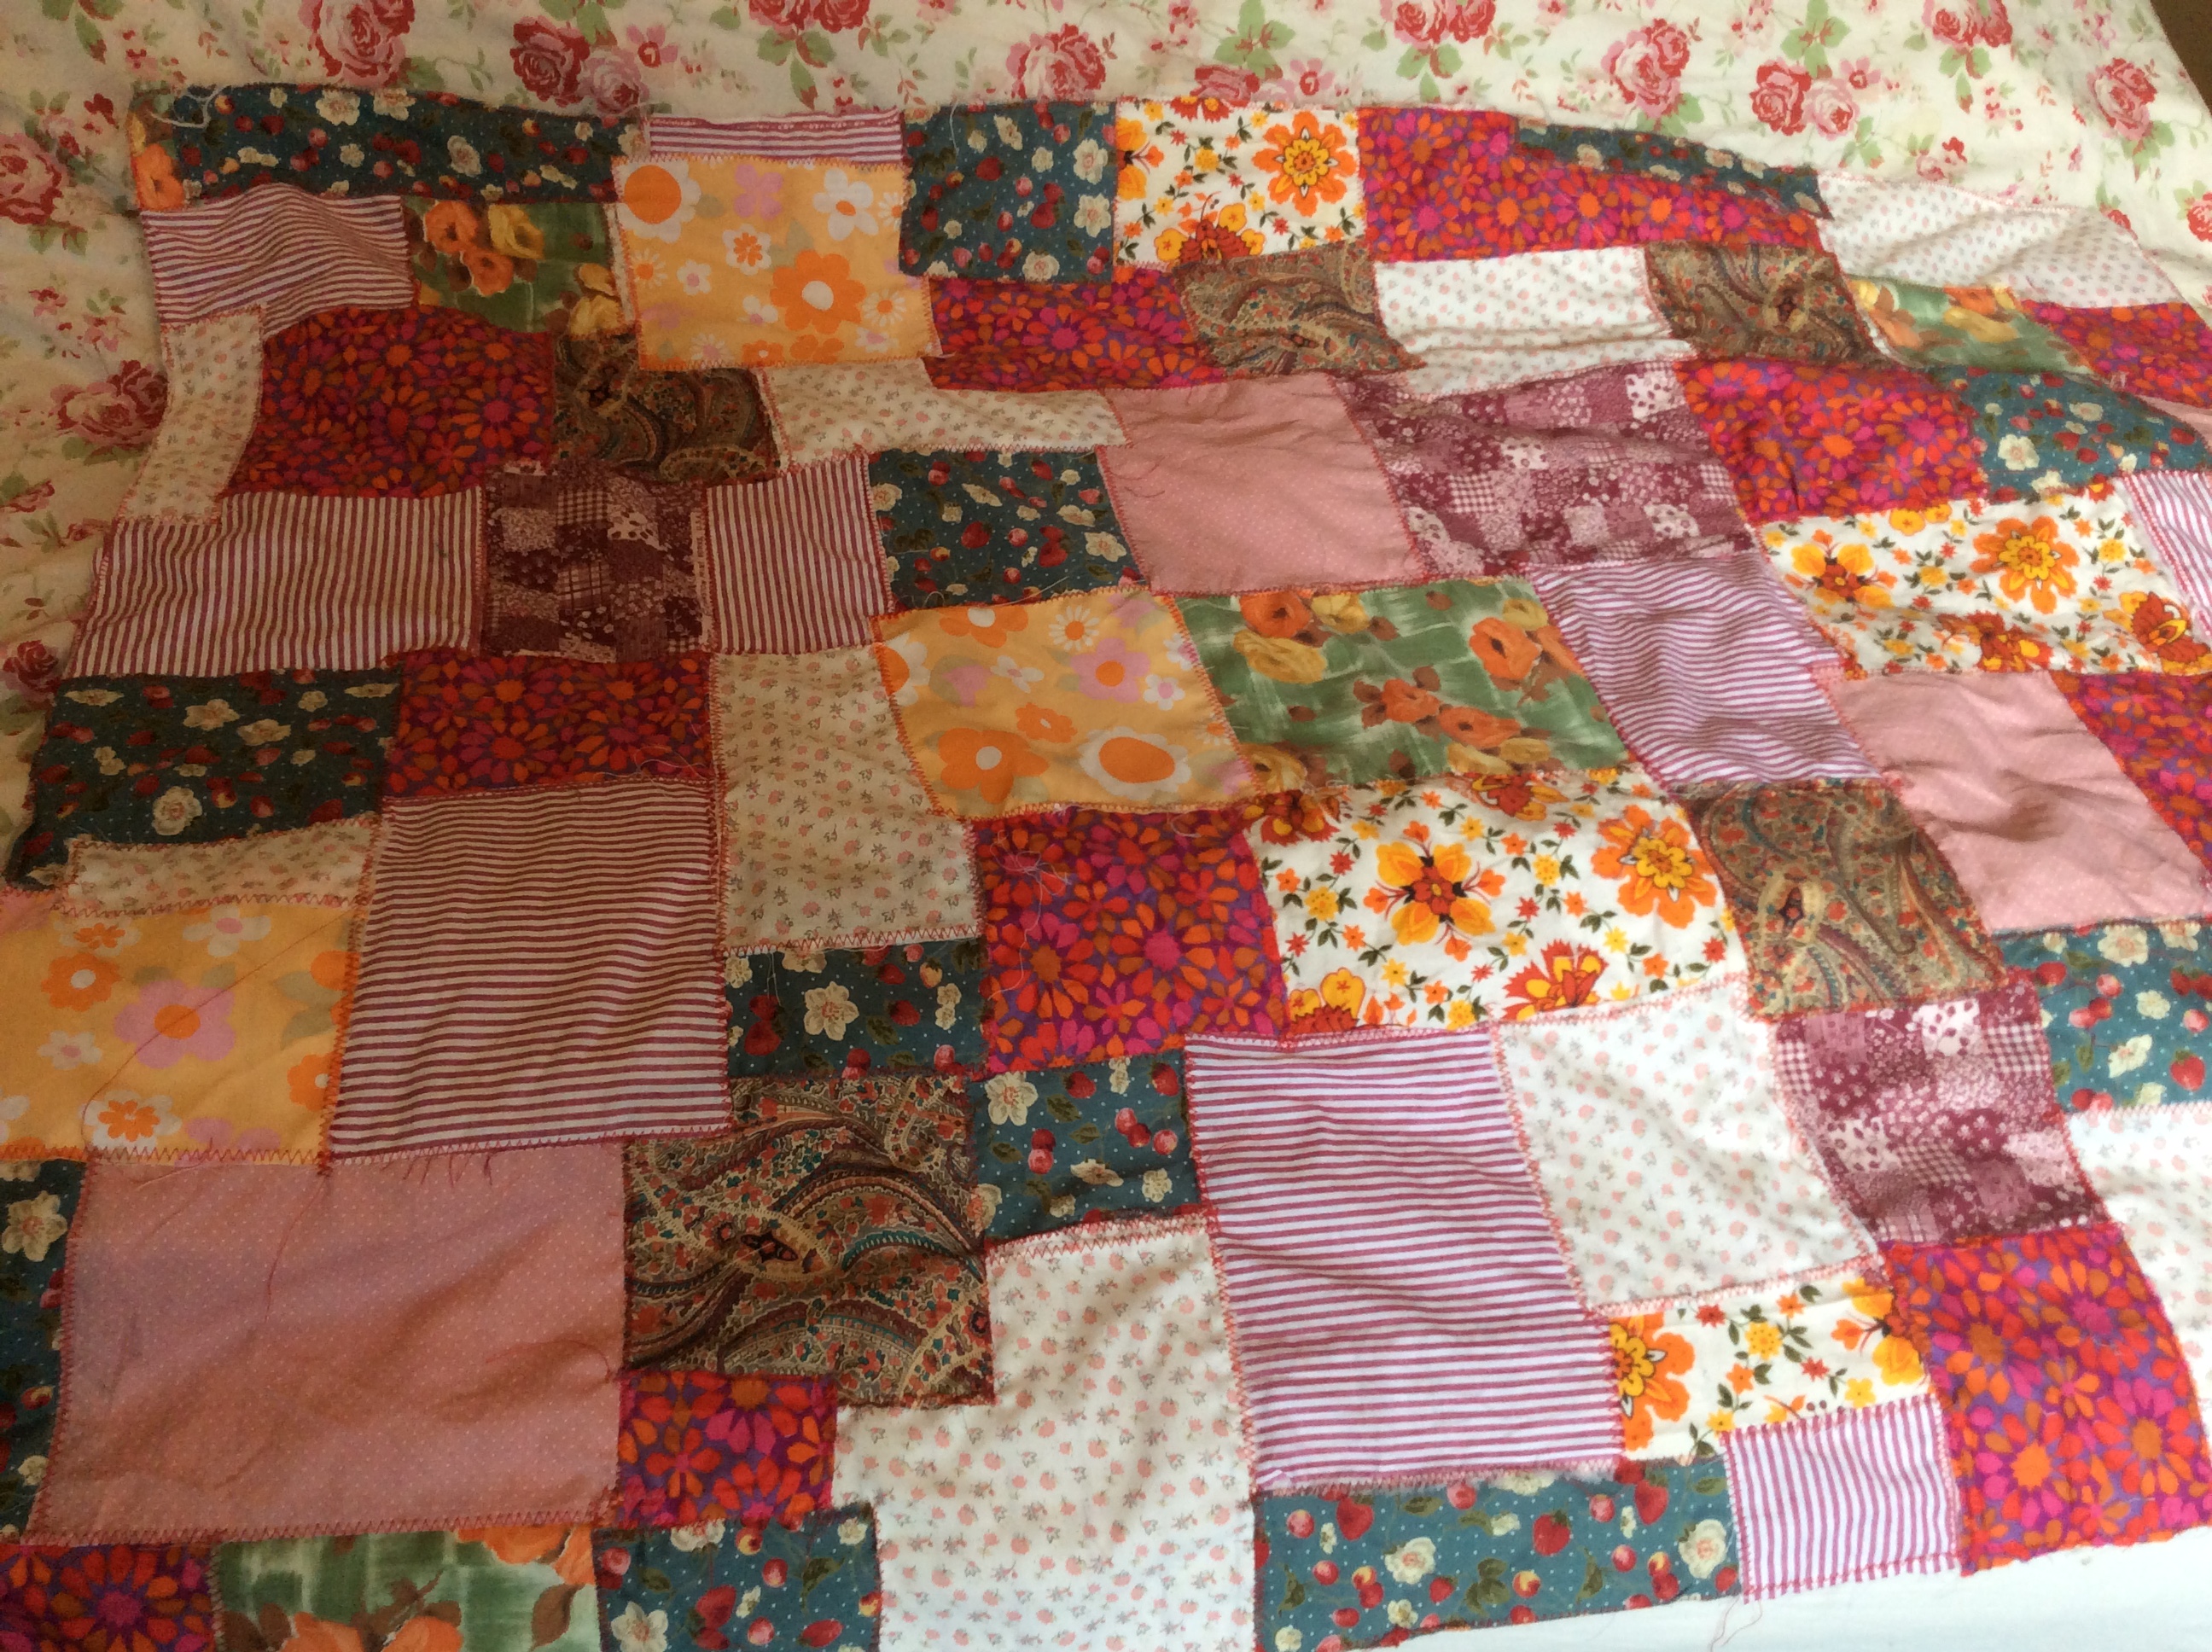
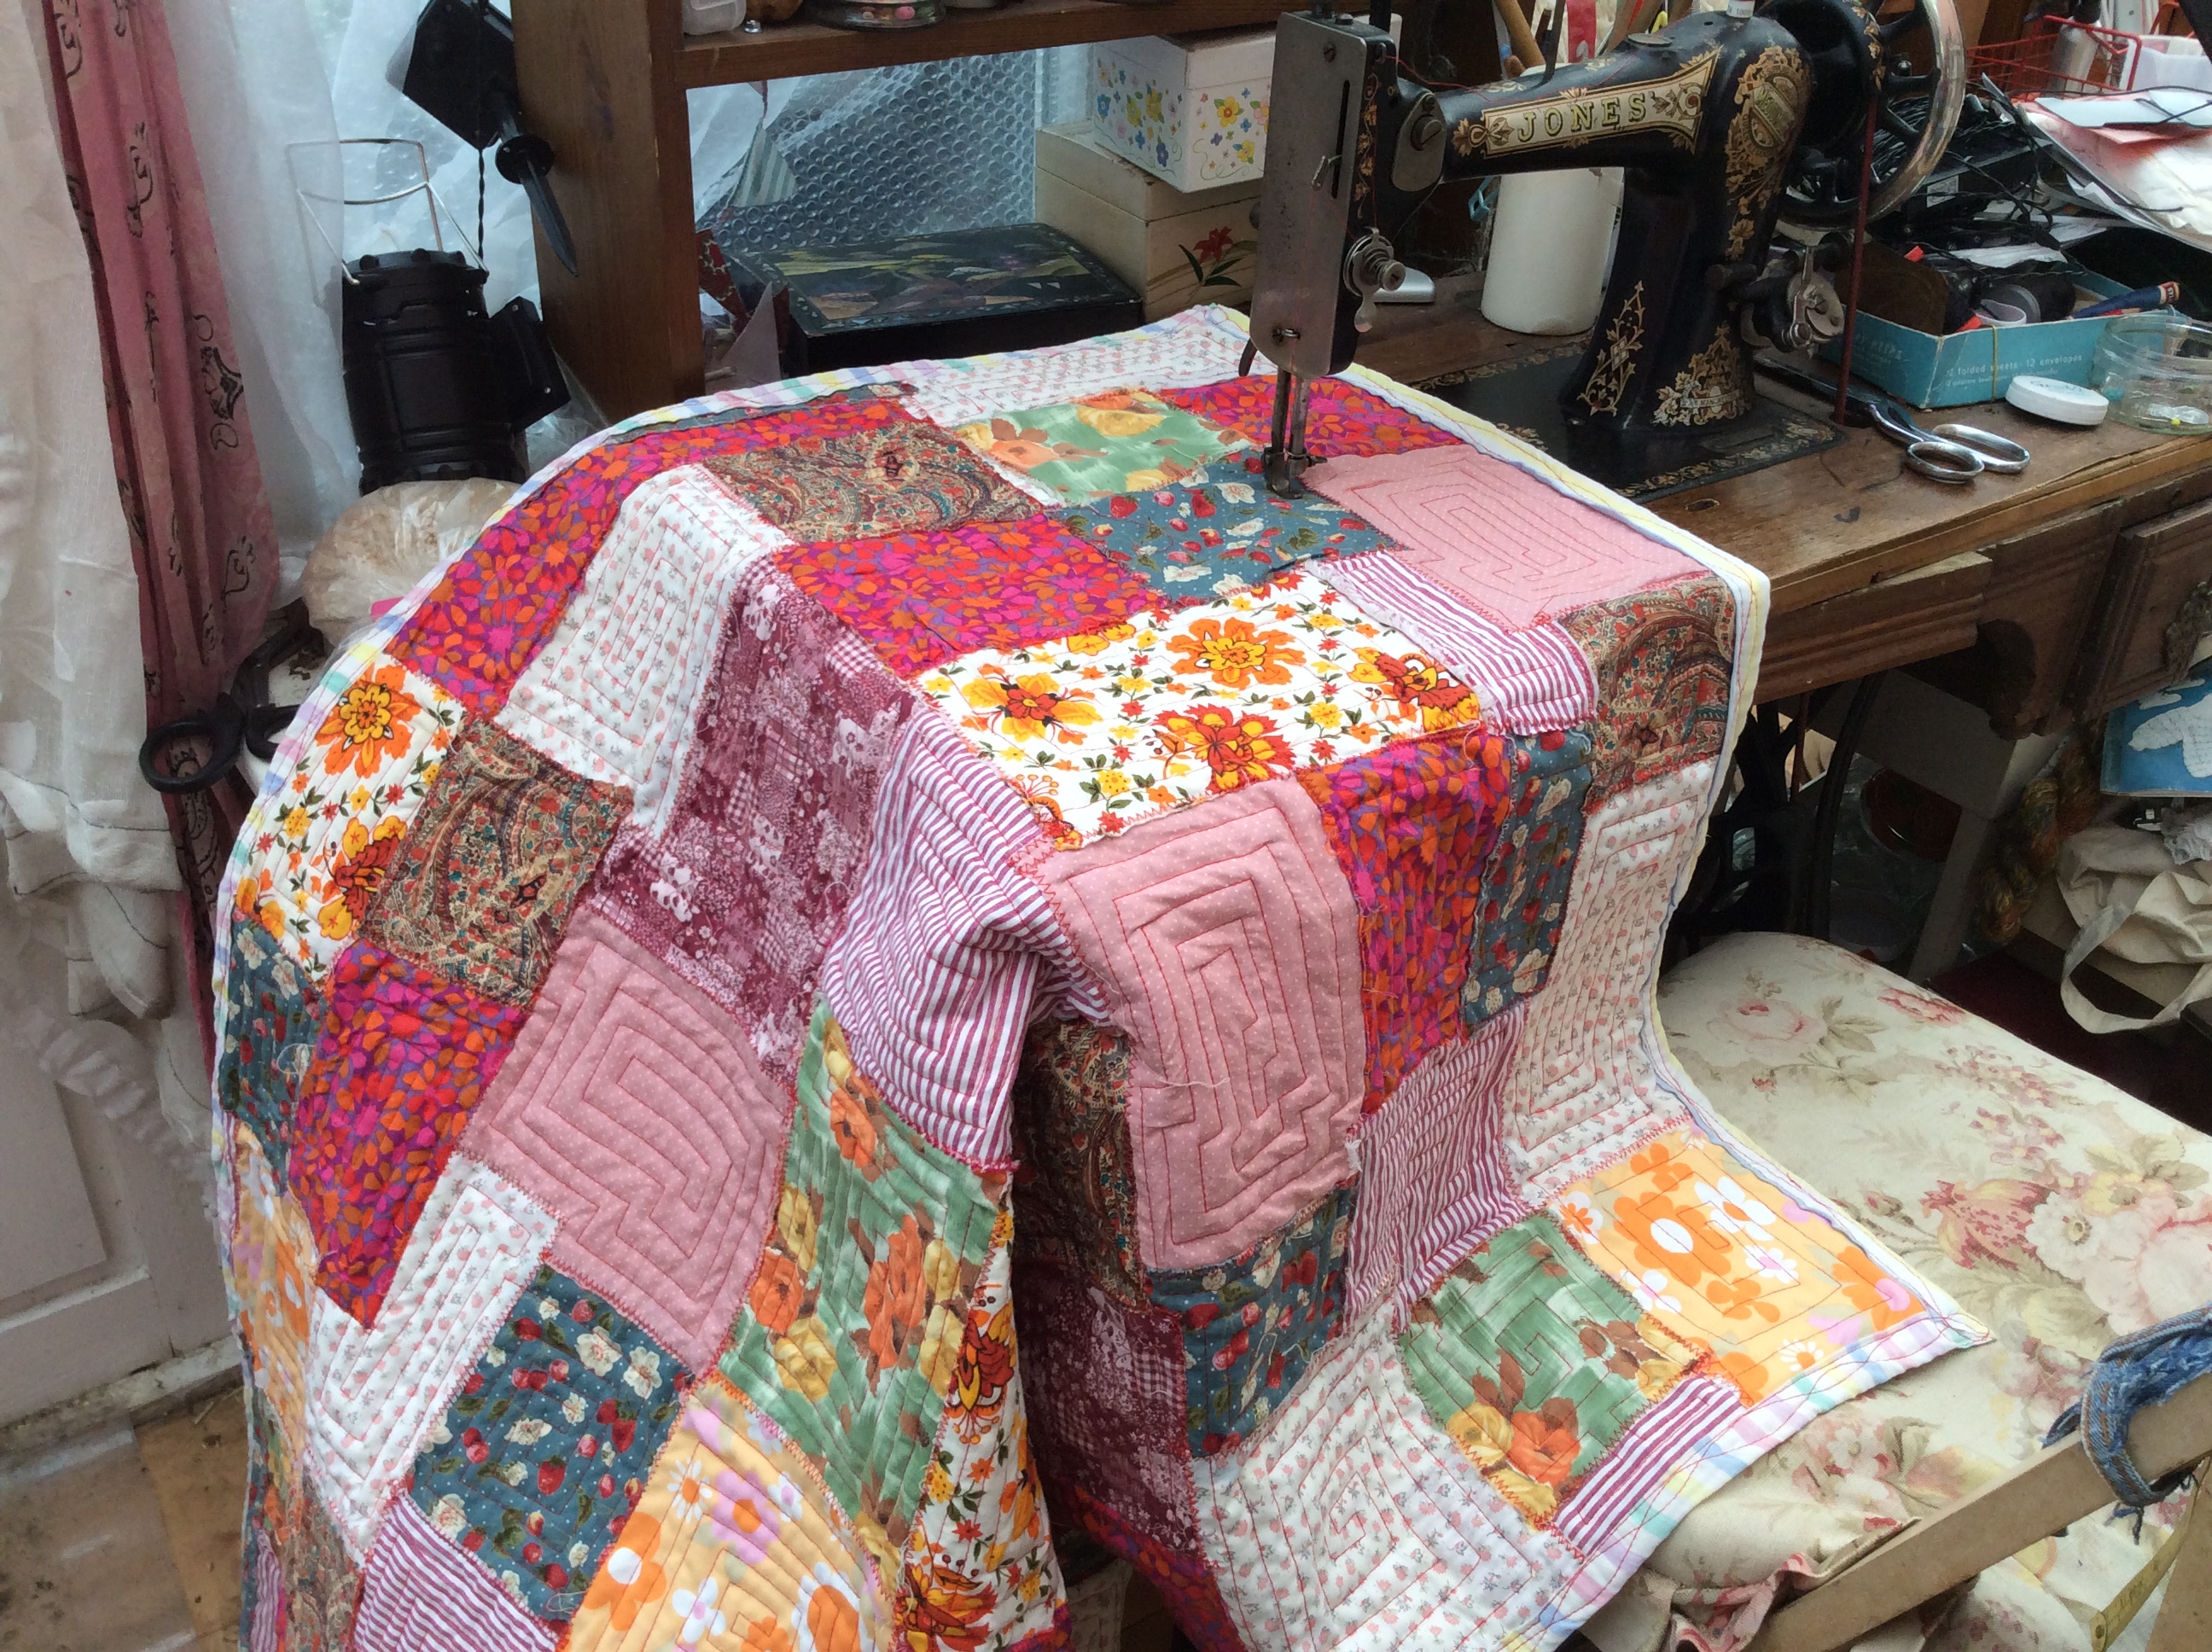
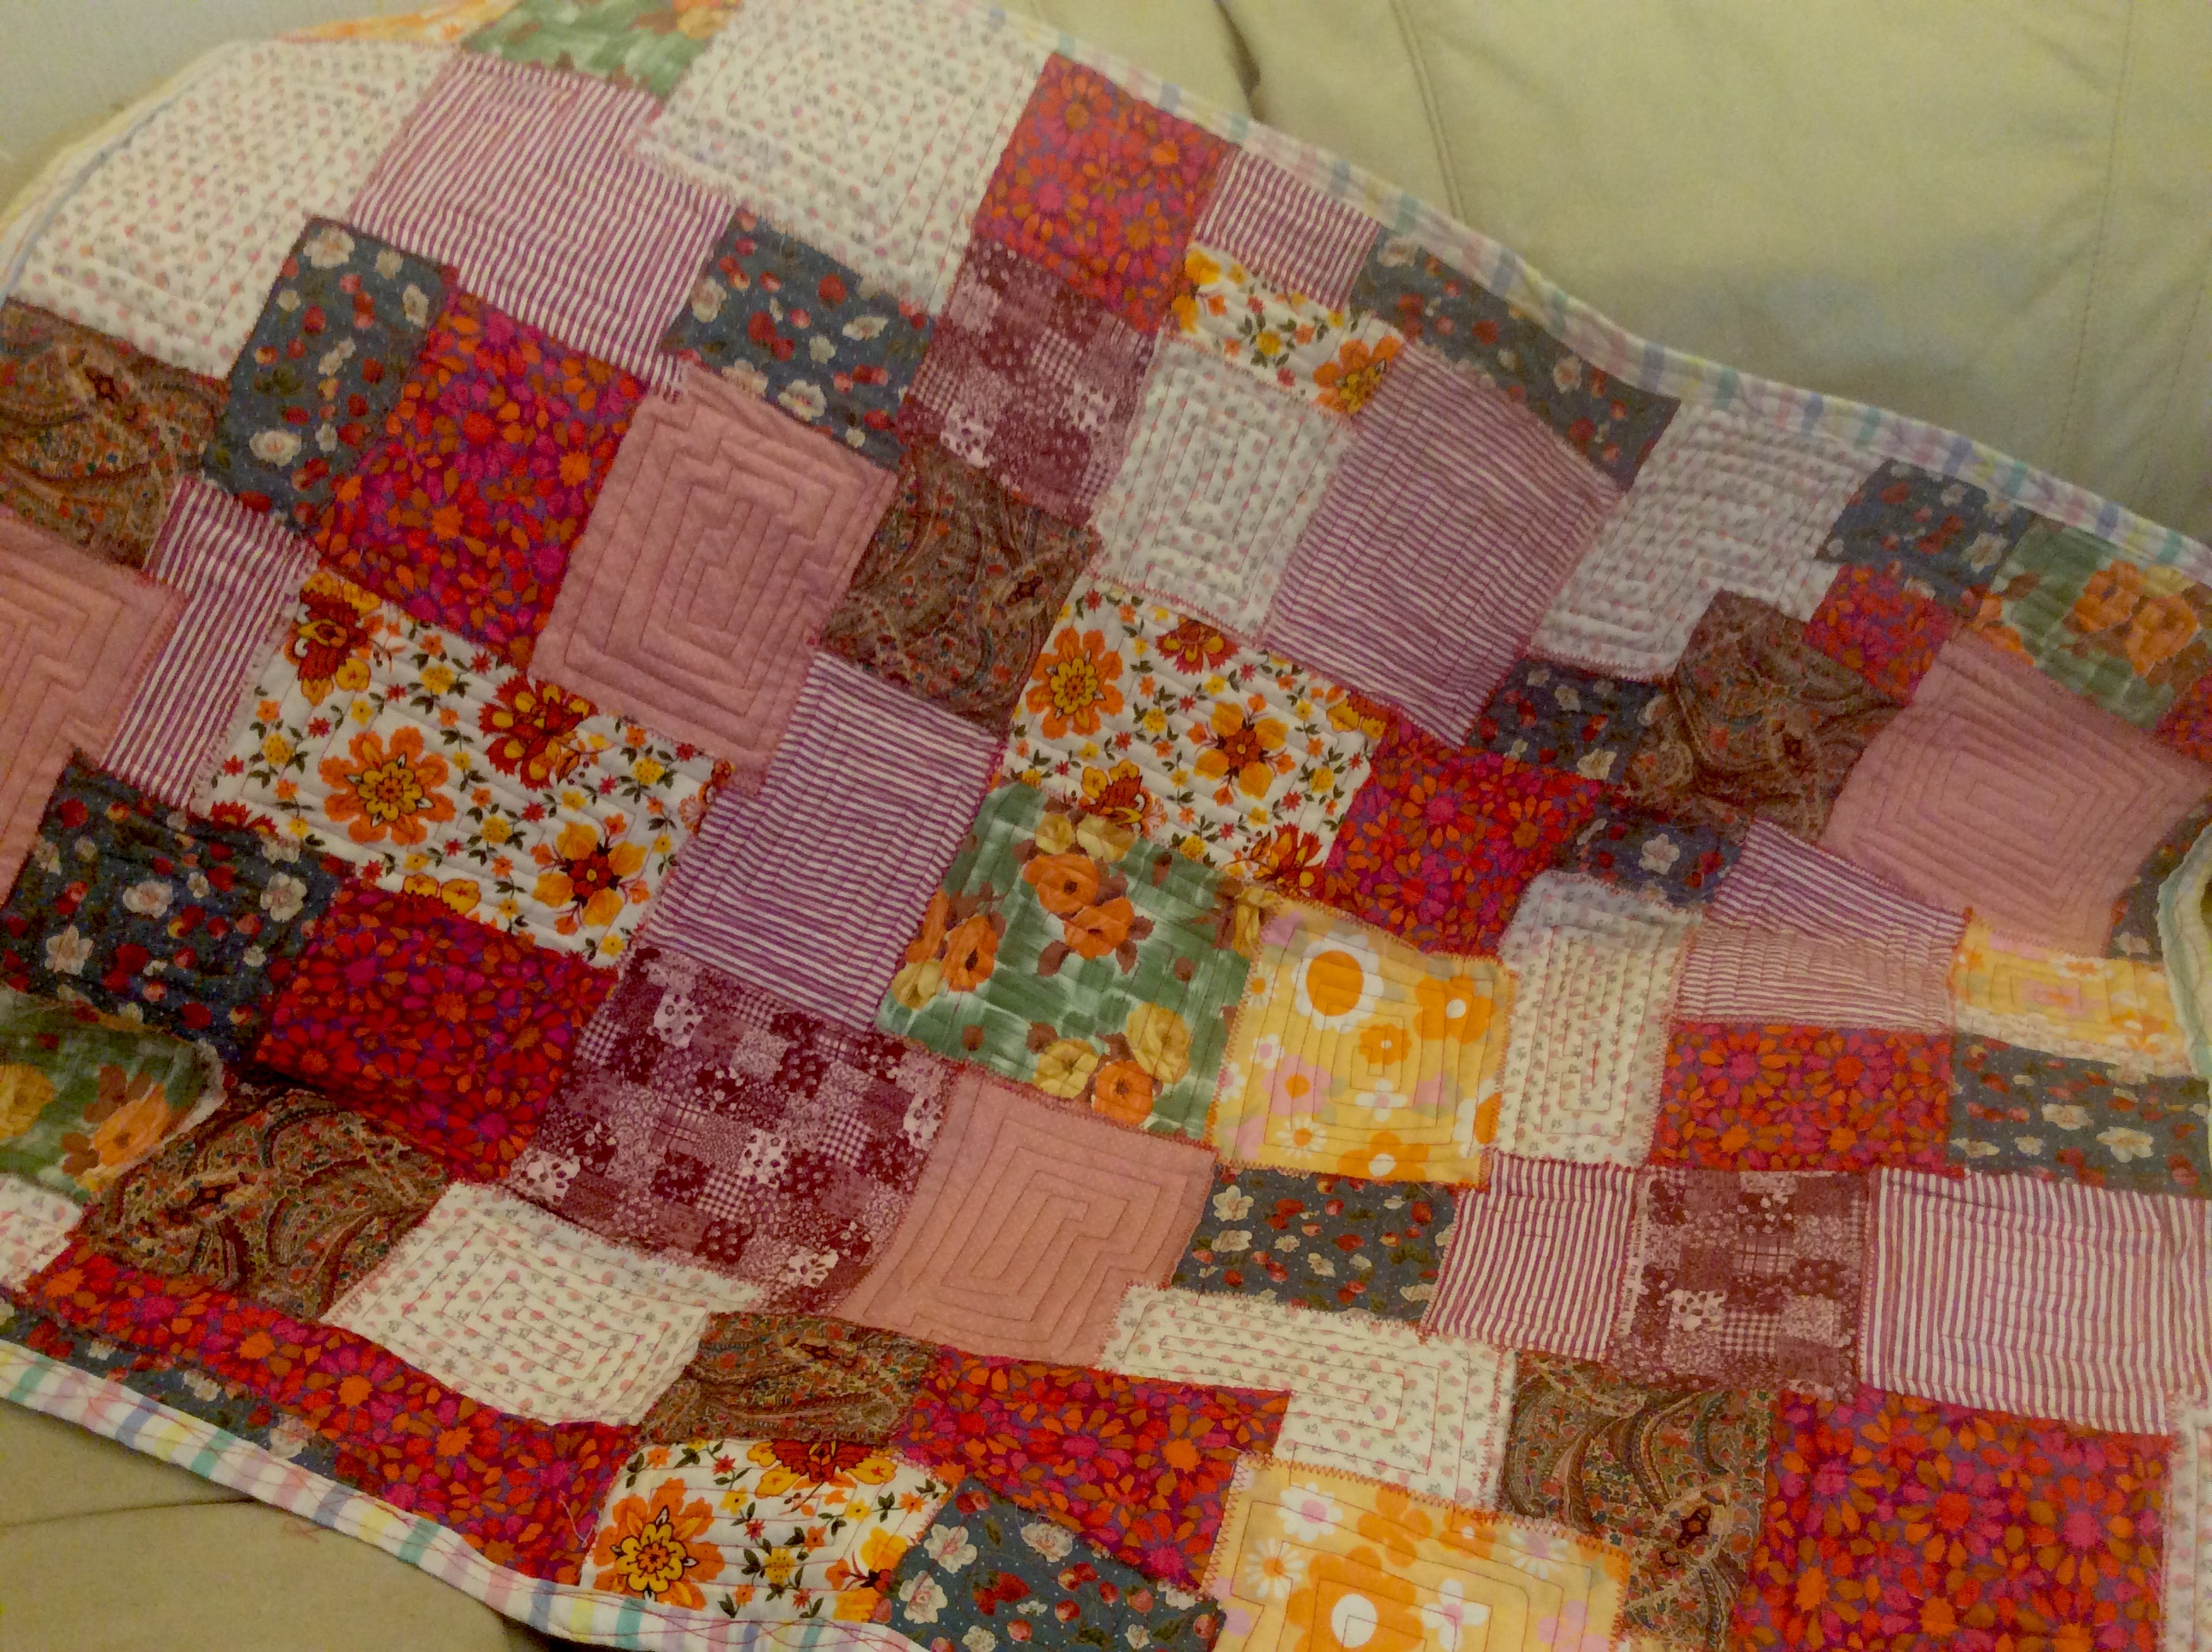
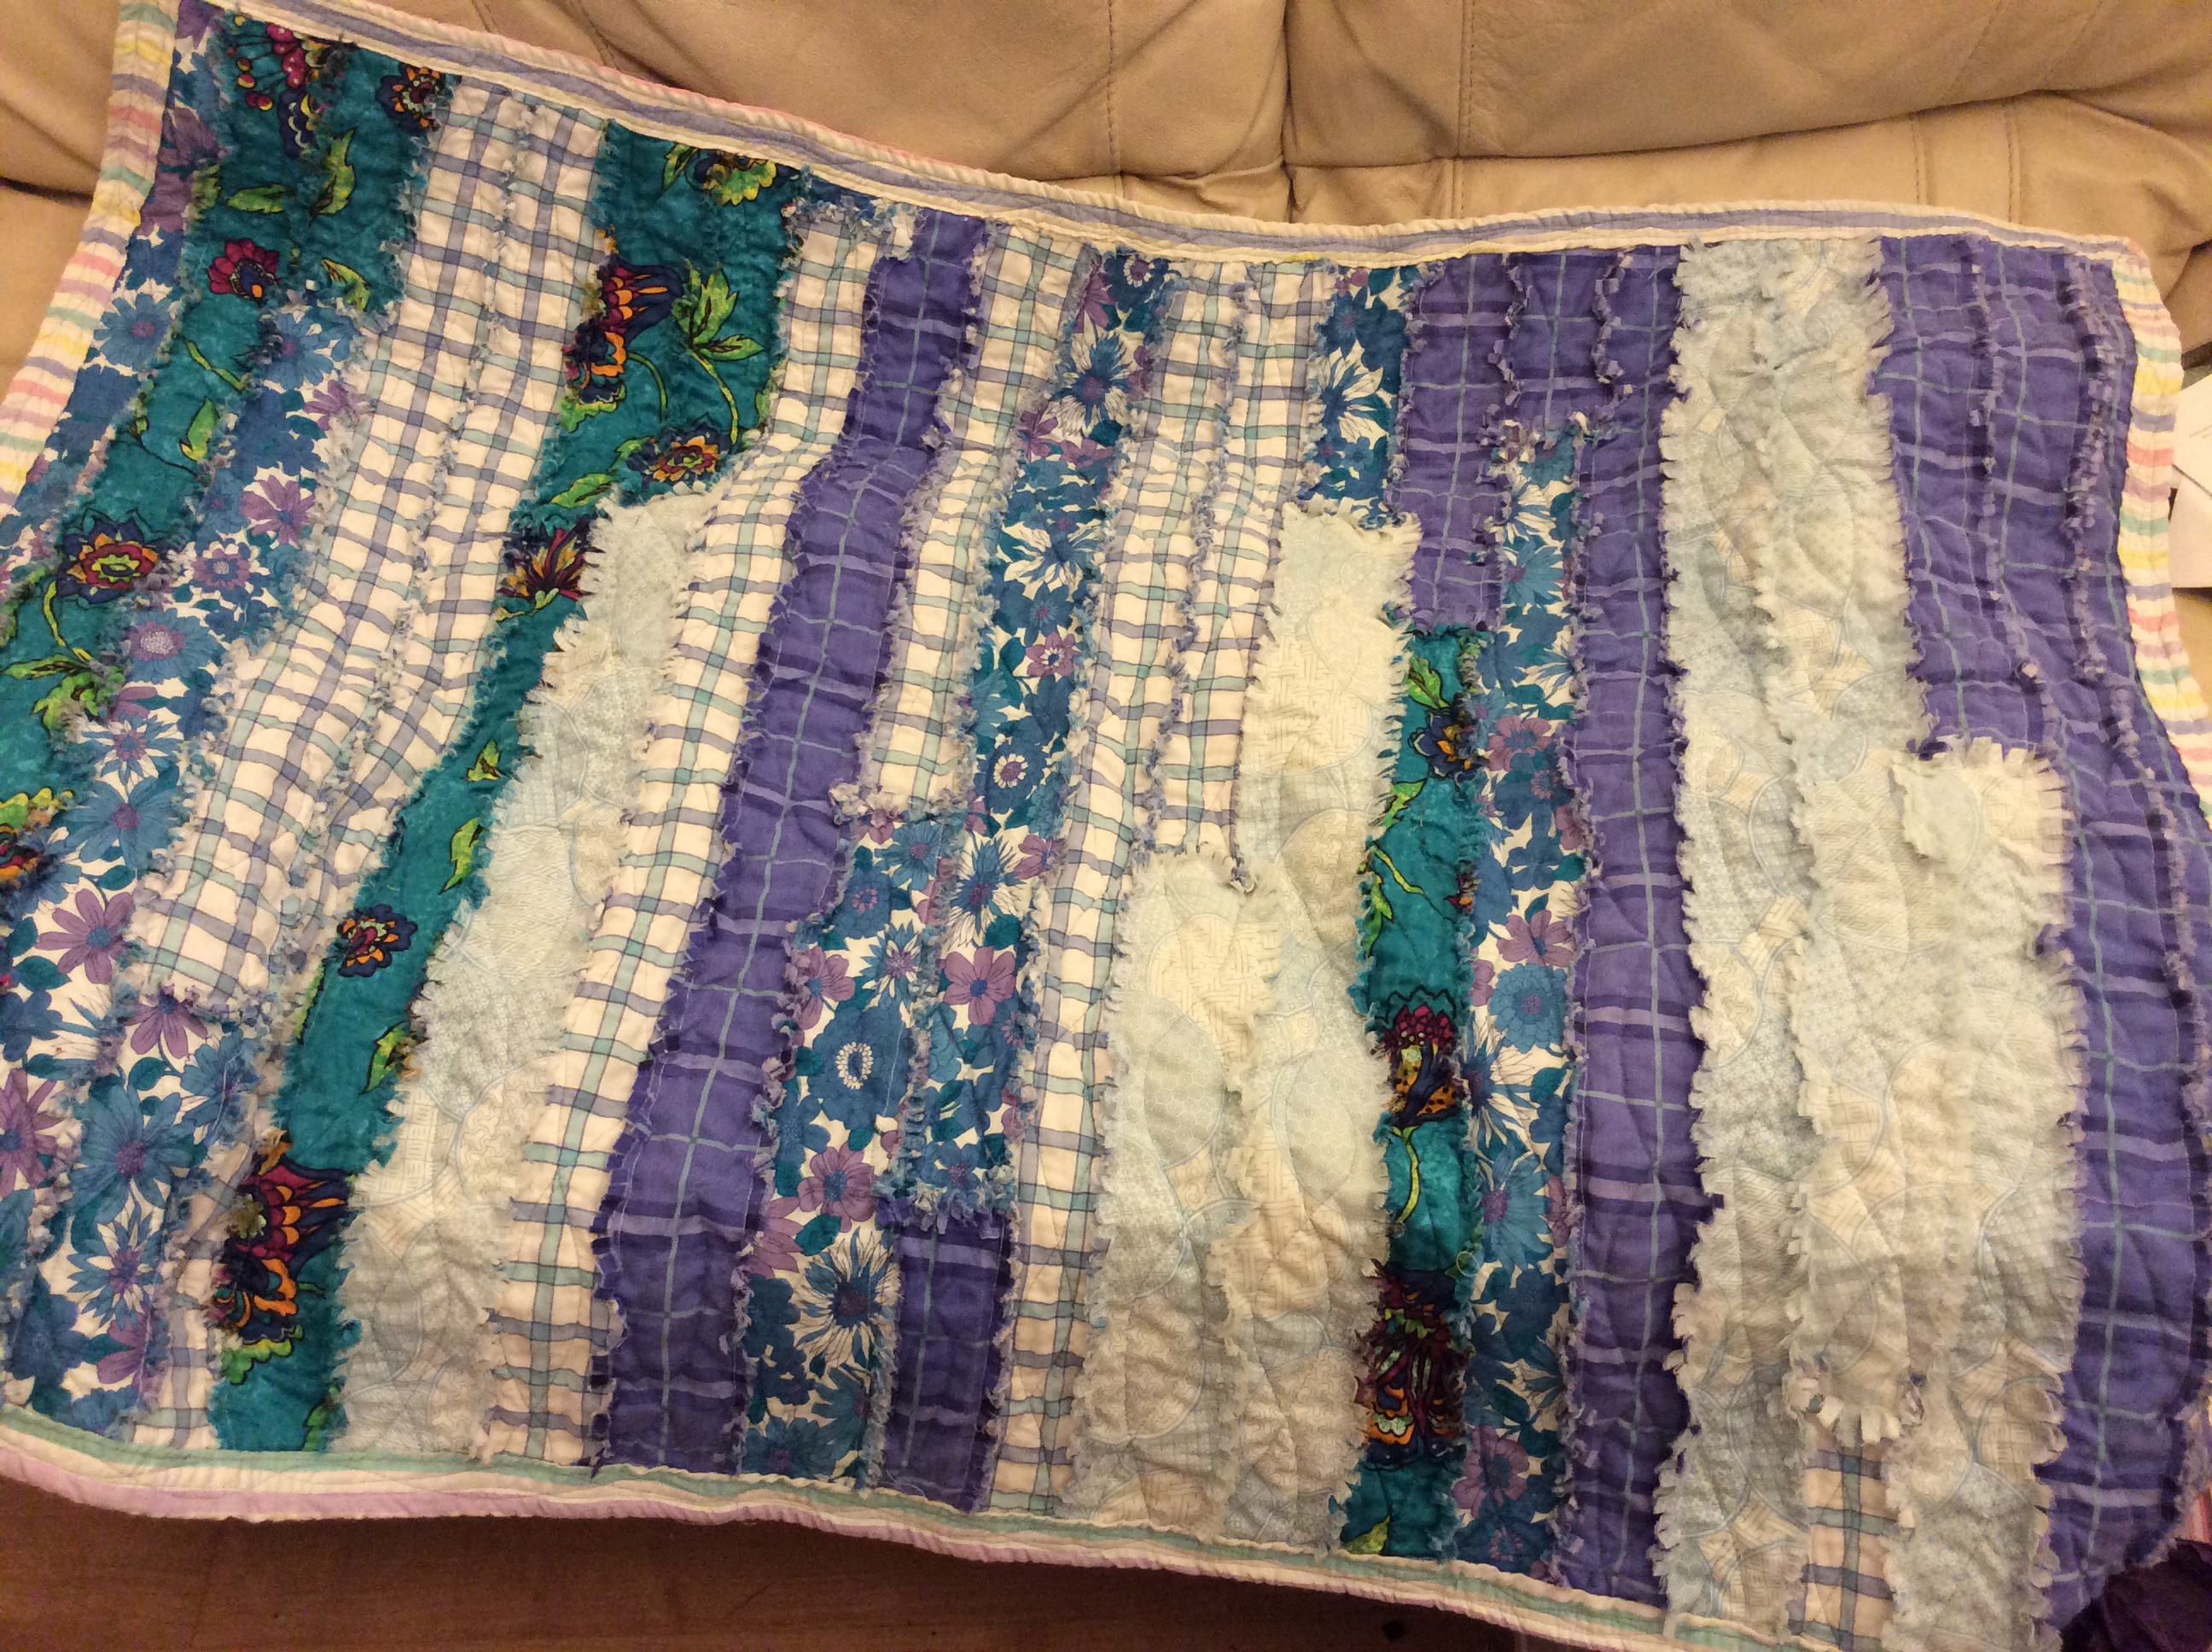
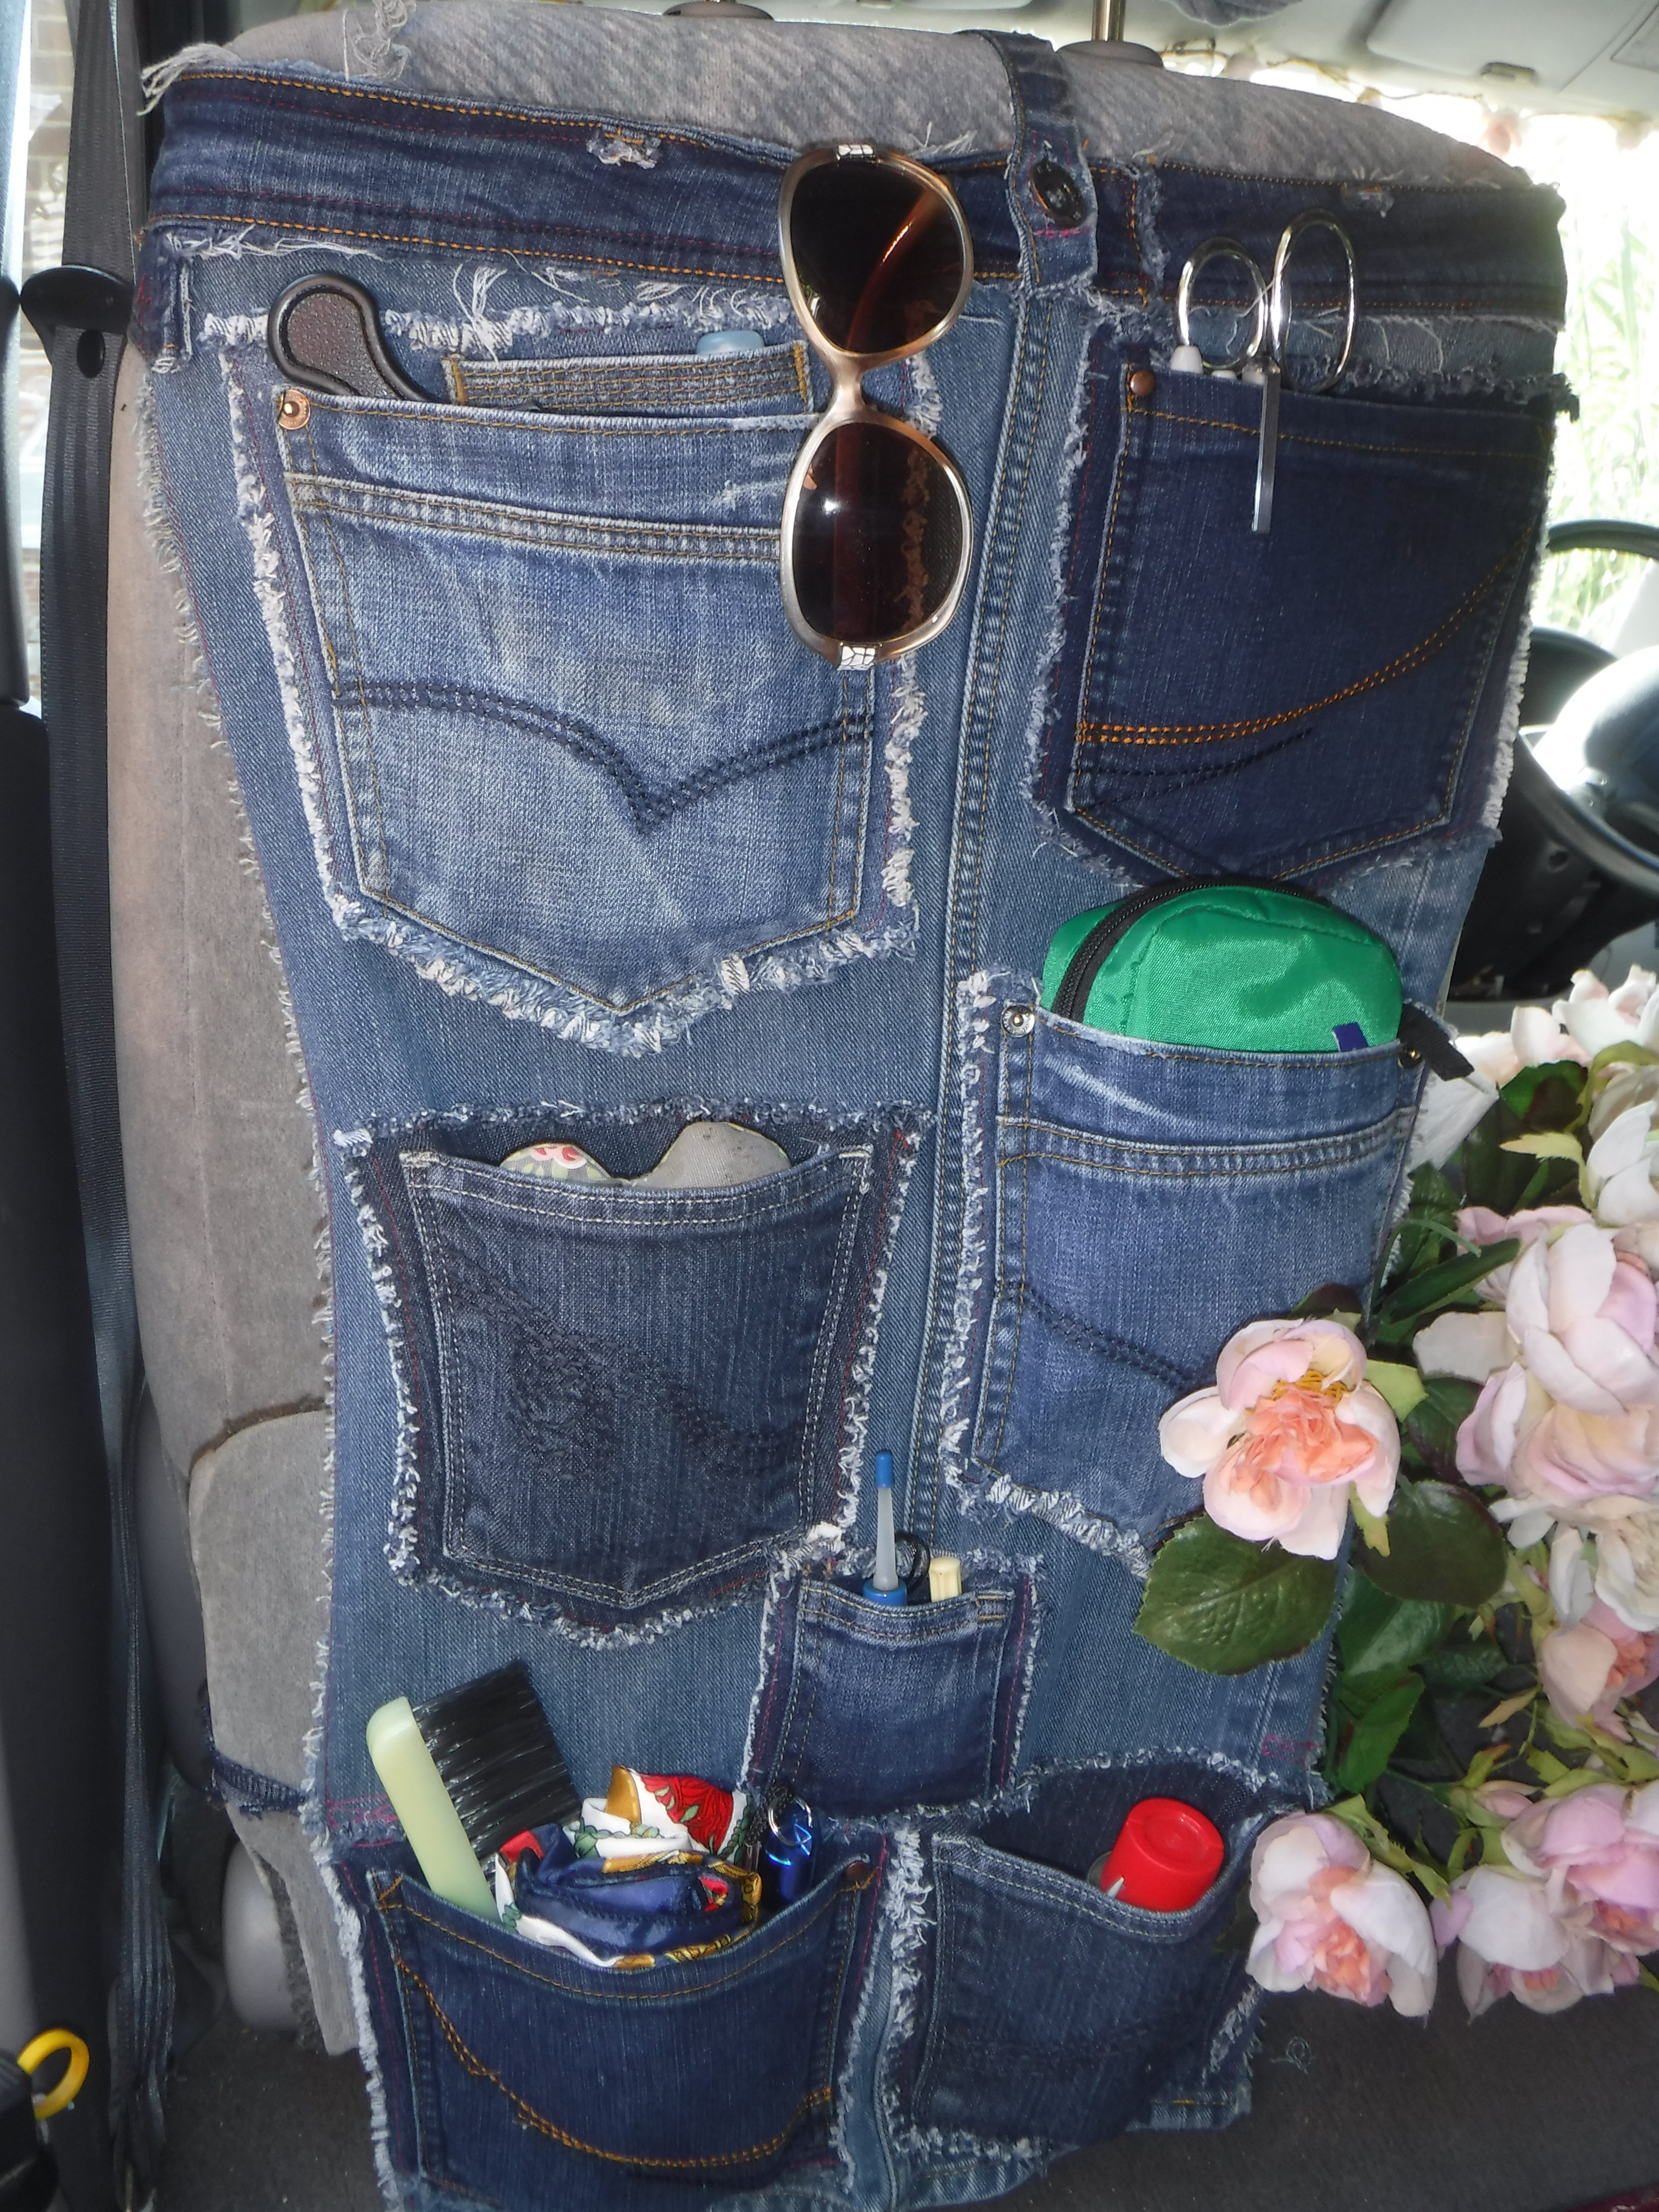
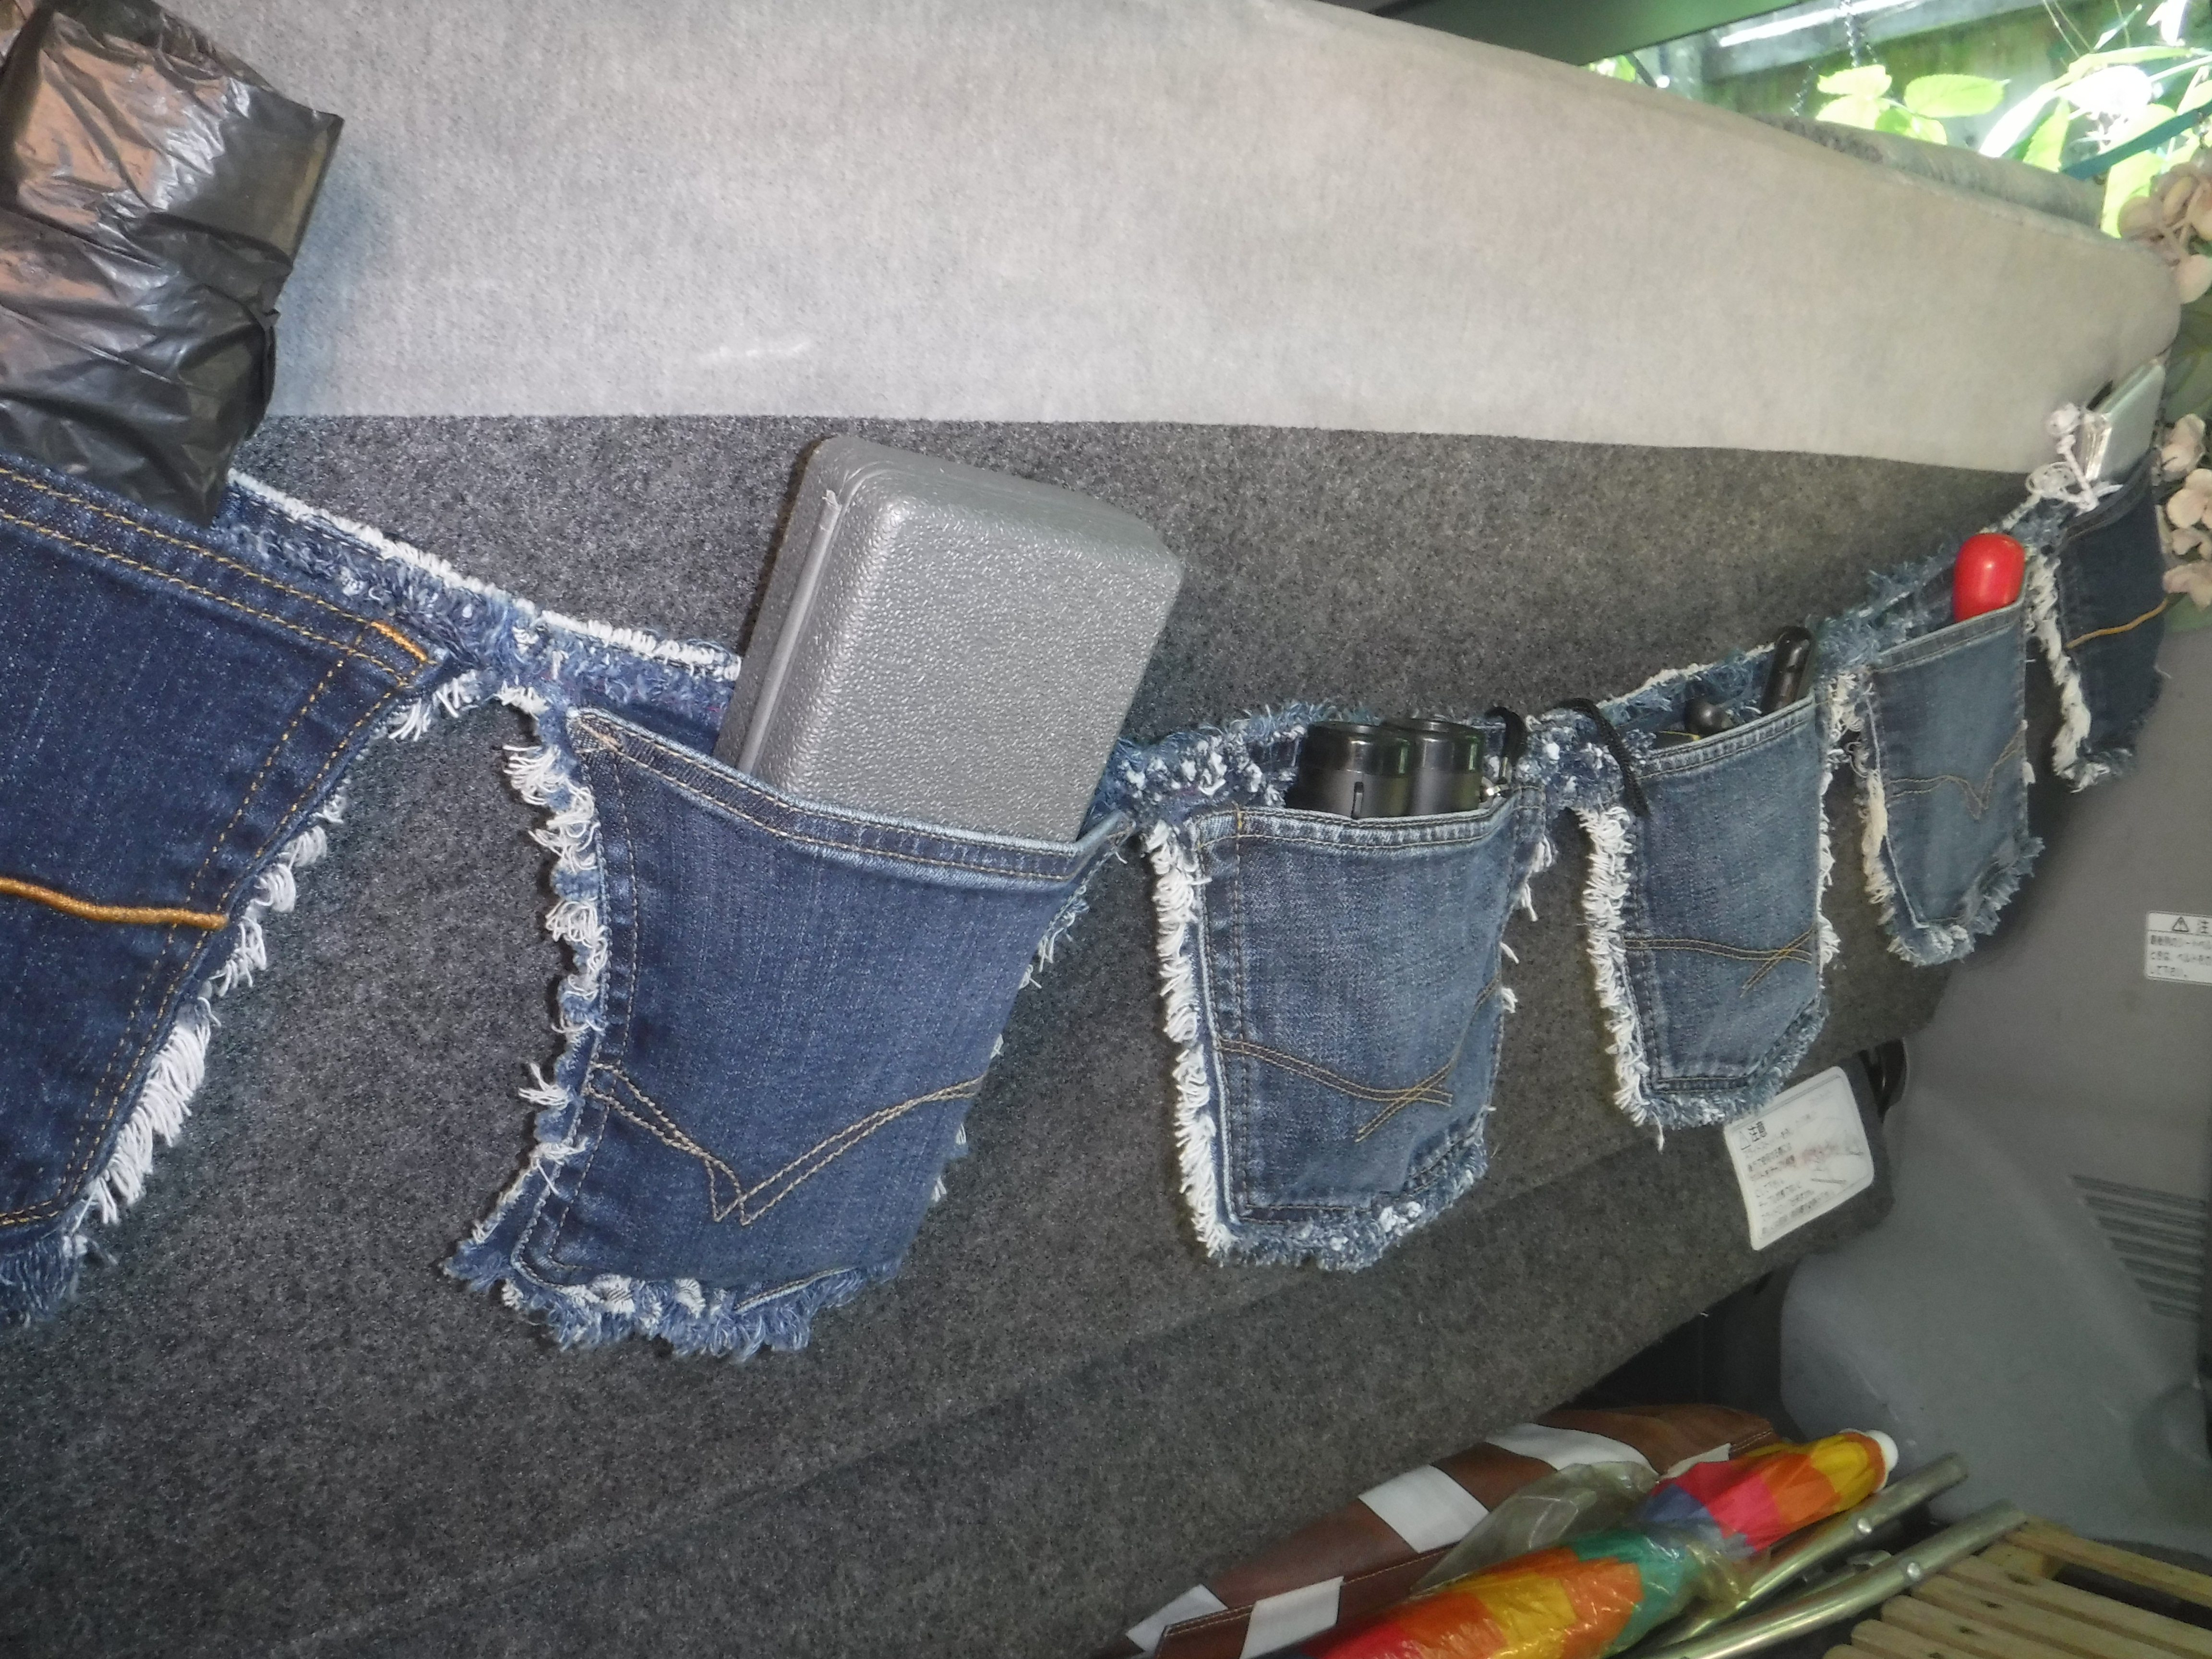
Hence my determination not to just throw away (and where exactly is away?) the little strips of not-so-usable fabric that resulted from demolishing 20-something shirts, some old jeans, and a couple of skirts for free or very-inexpensive fabric. The hems, side-seams & plackets, mostly; I have another project or two in mind for the collars and cuffs. And thanks to lockdown 3 here in the UK, I have plenty of time to put my plans into action for a while. So, here’s the finished hem-and-seam rug:

Rug in twined-weave, made from seams, hems & plackets of old shirts, jeans & skirts, plus an old duvet cover.

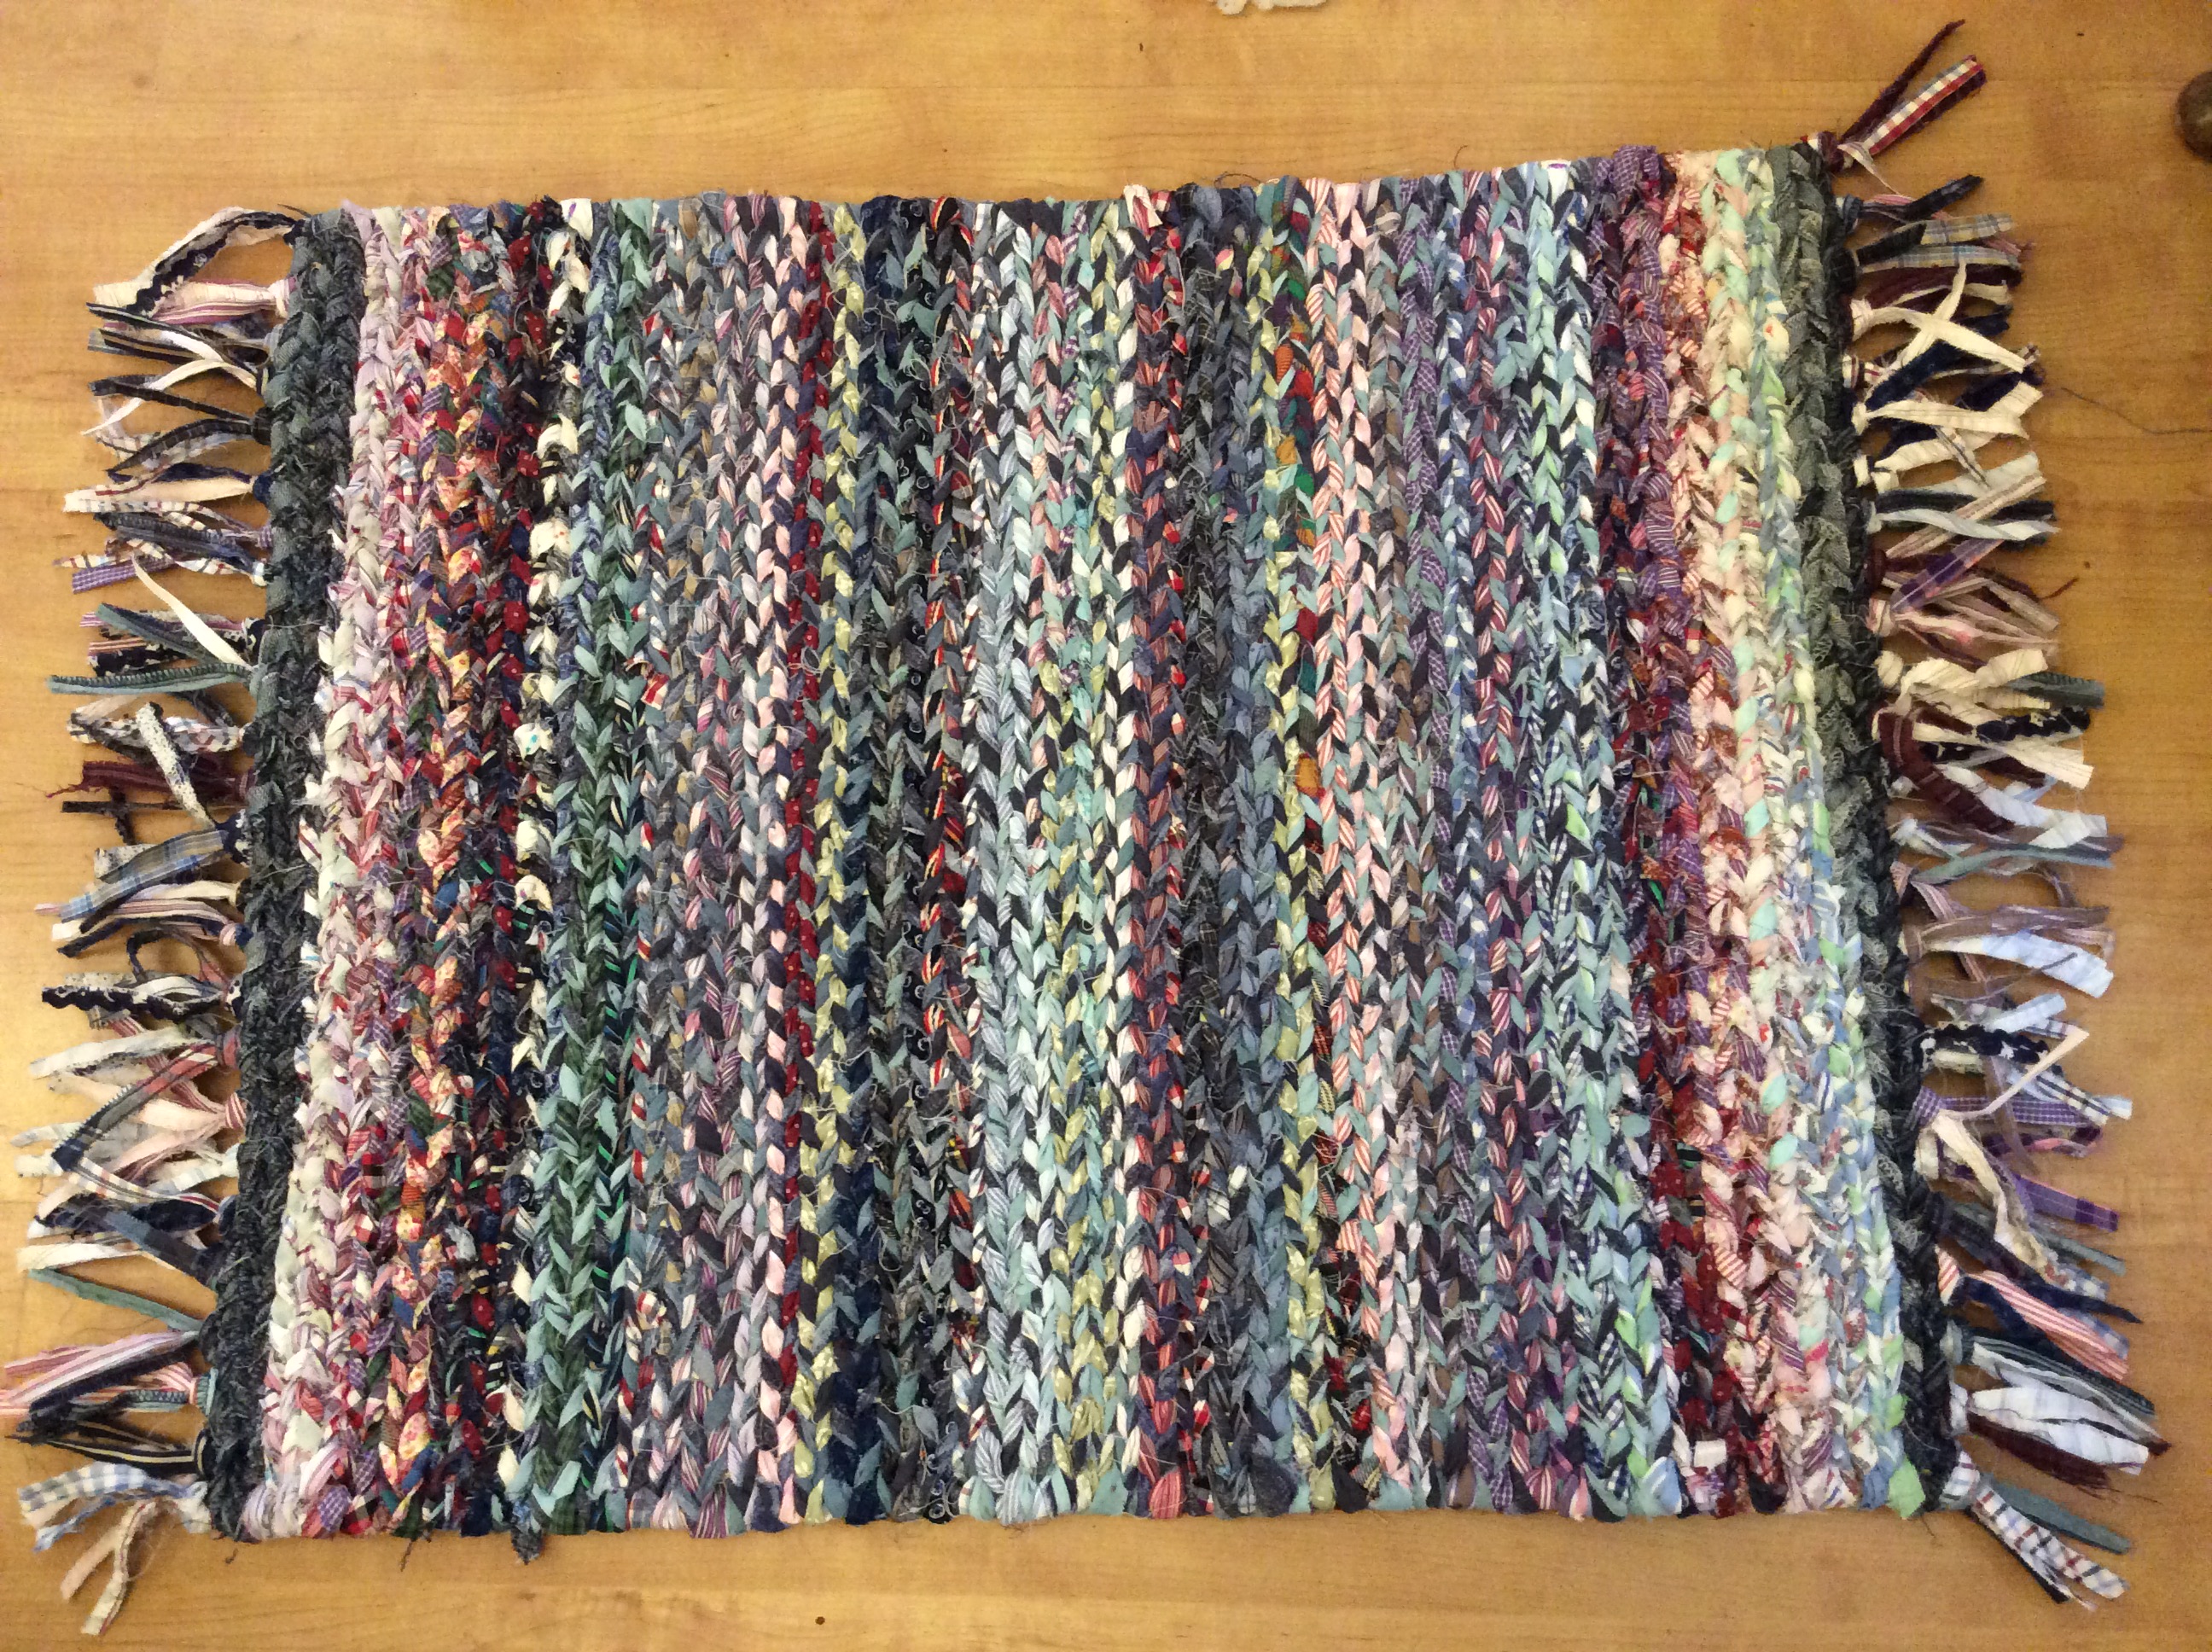
I do know how very lucky I am, to have the time and the space to make things, but something inside me won’t let me not make things, and of course there are plenty of other things I should probably be doing, like housework. The things I make may be simple & easy, and I really don’t need another rug, but it’s given me great pleasure to turn some things that under other circumstances could be seen as “waste” into something genuinely useful and colourful.

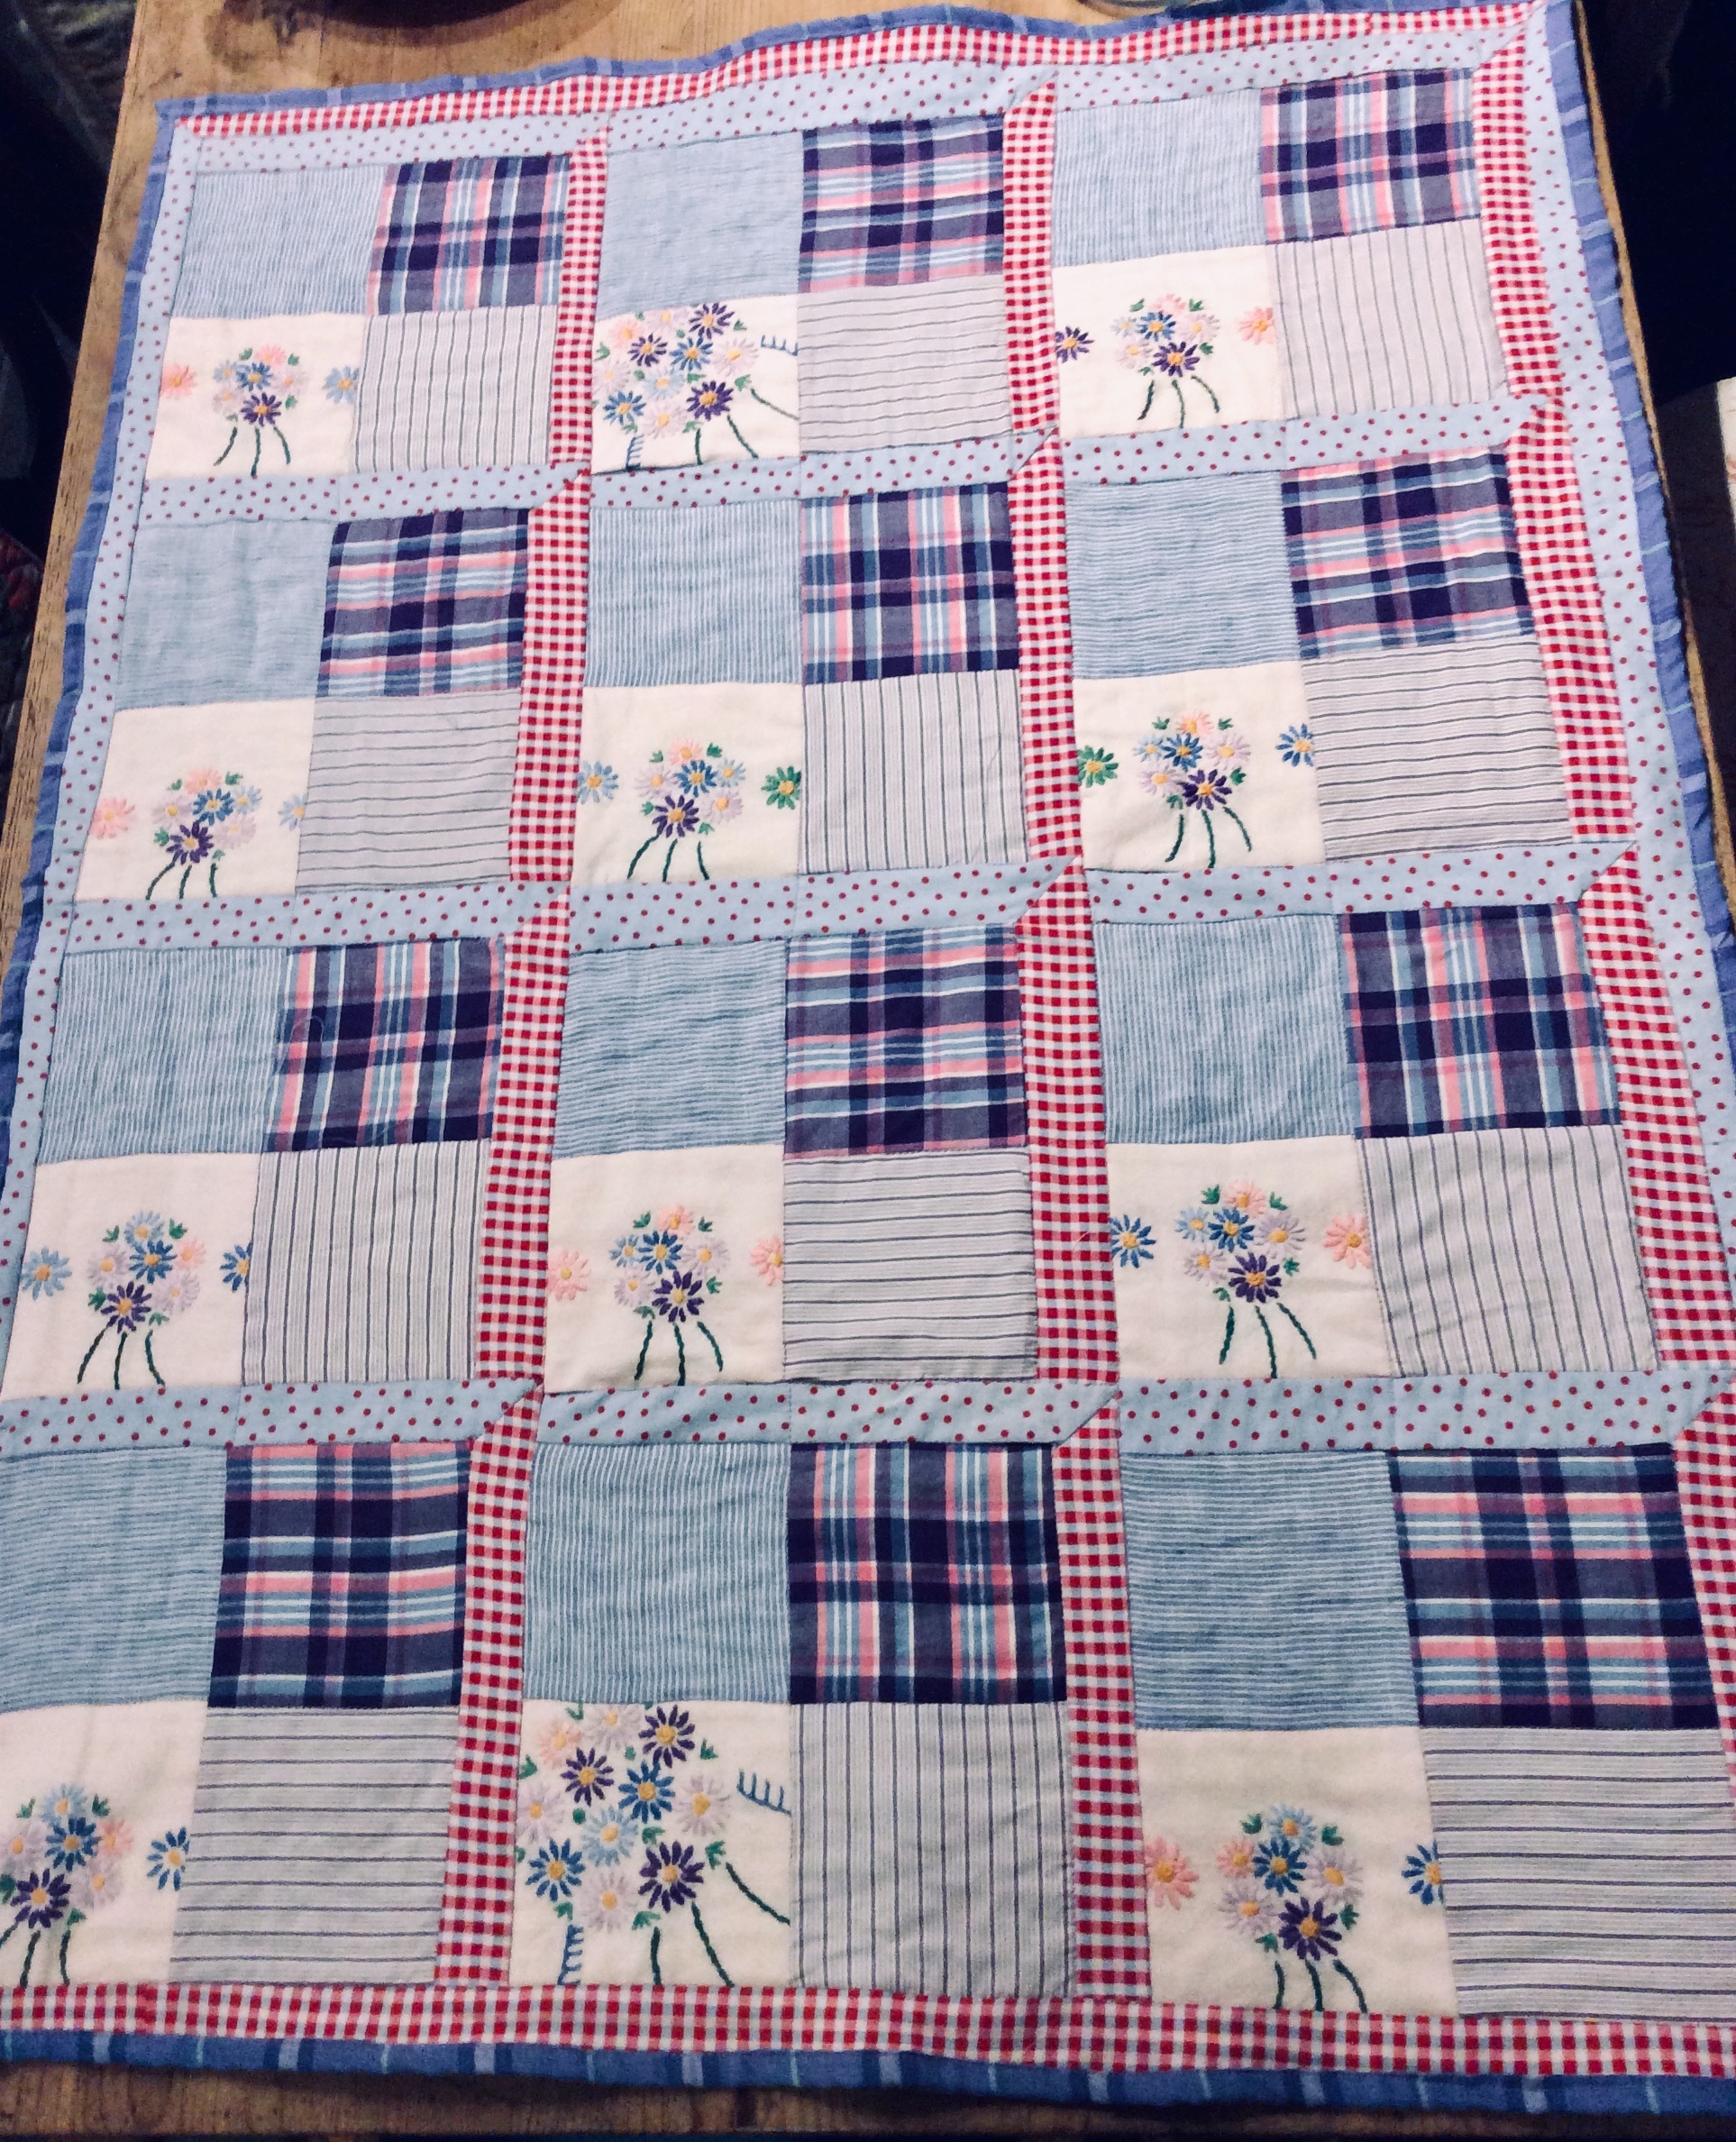
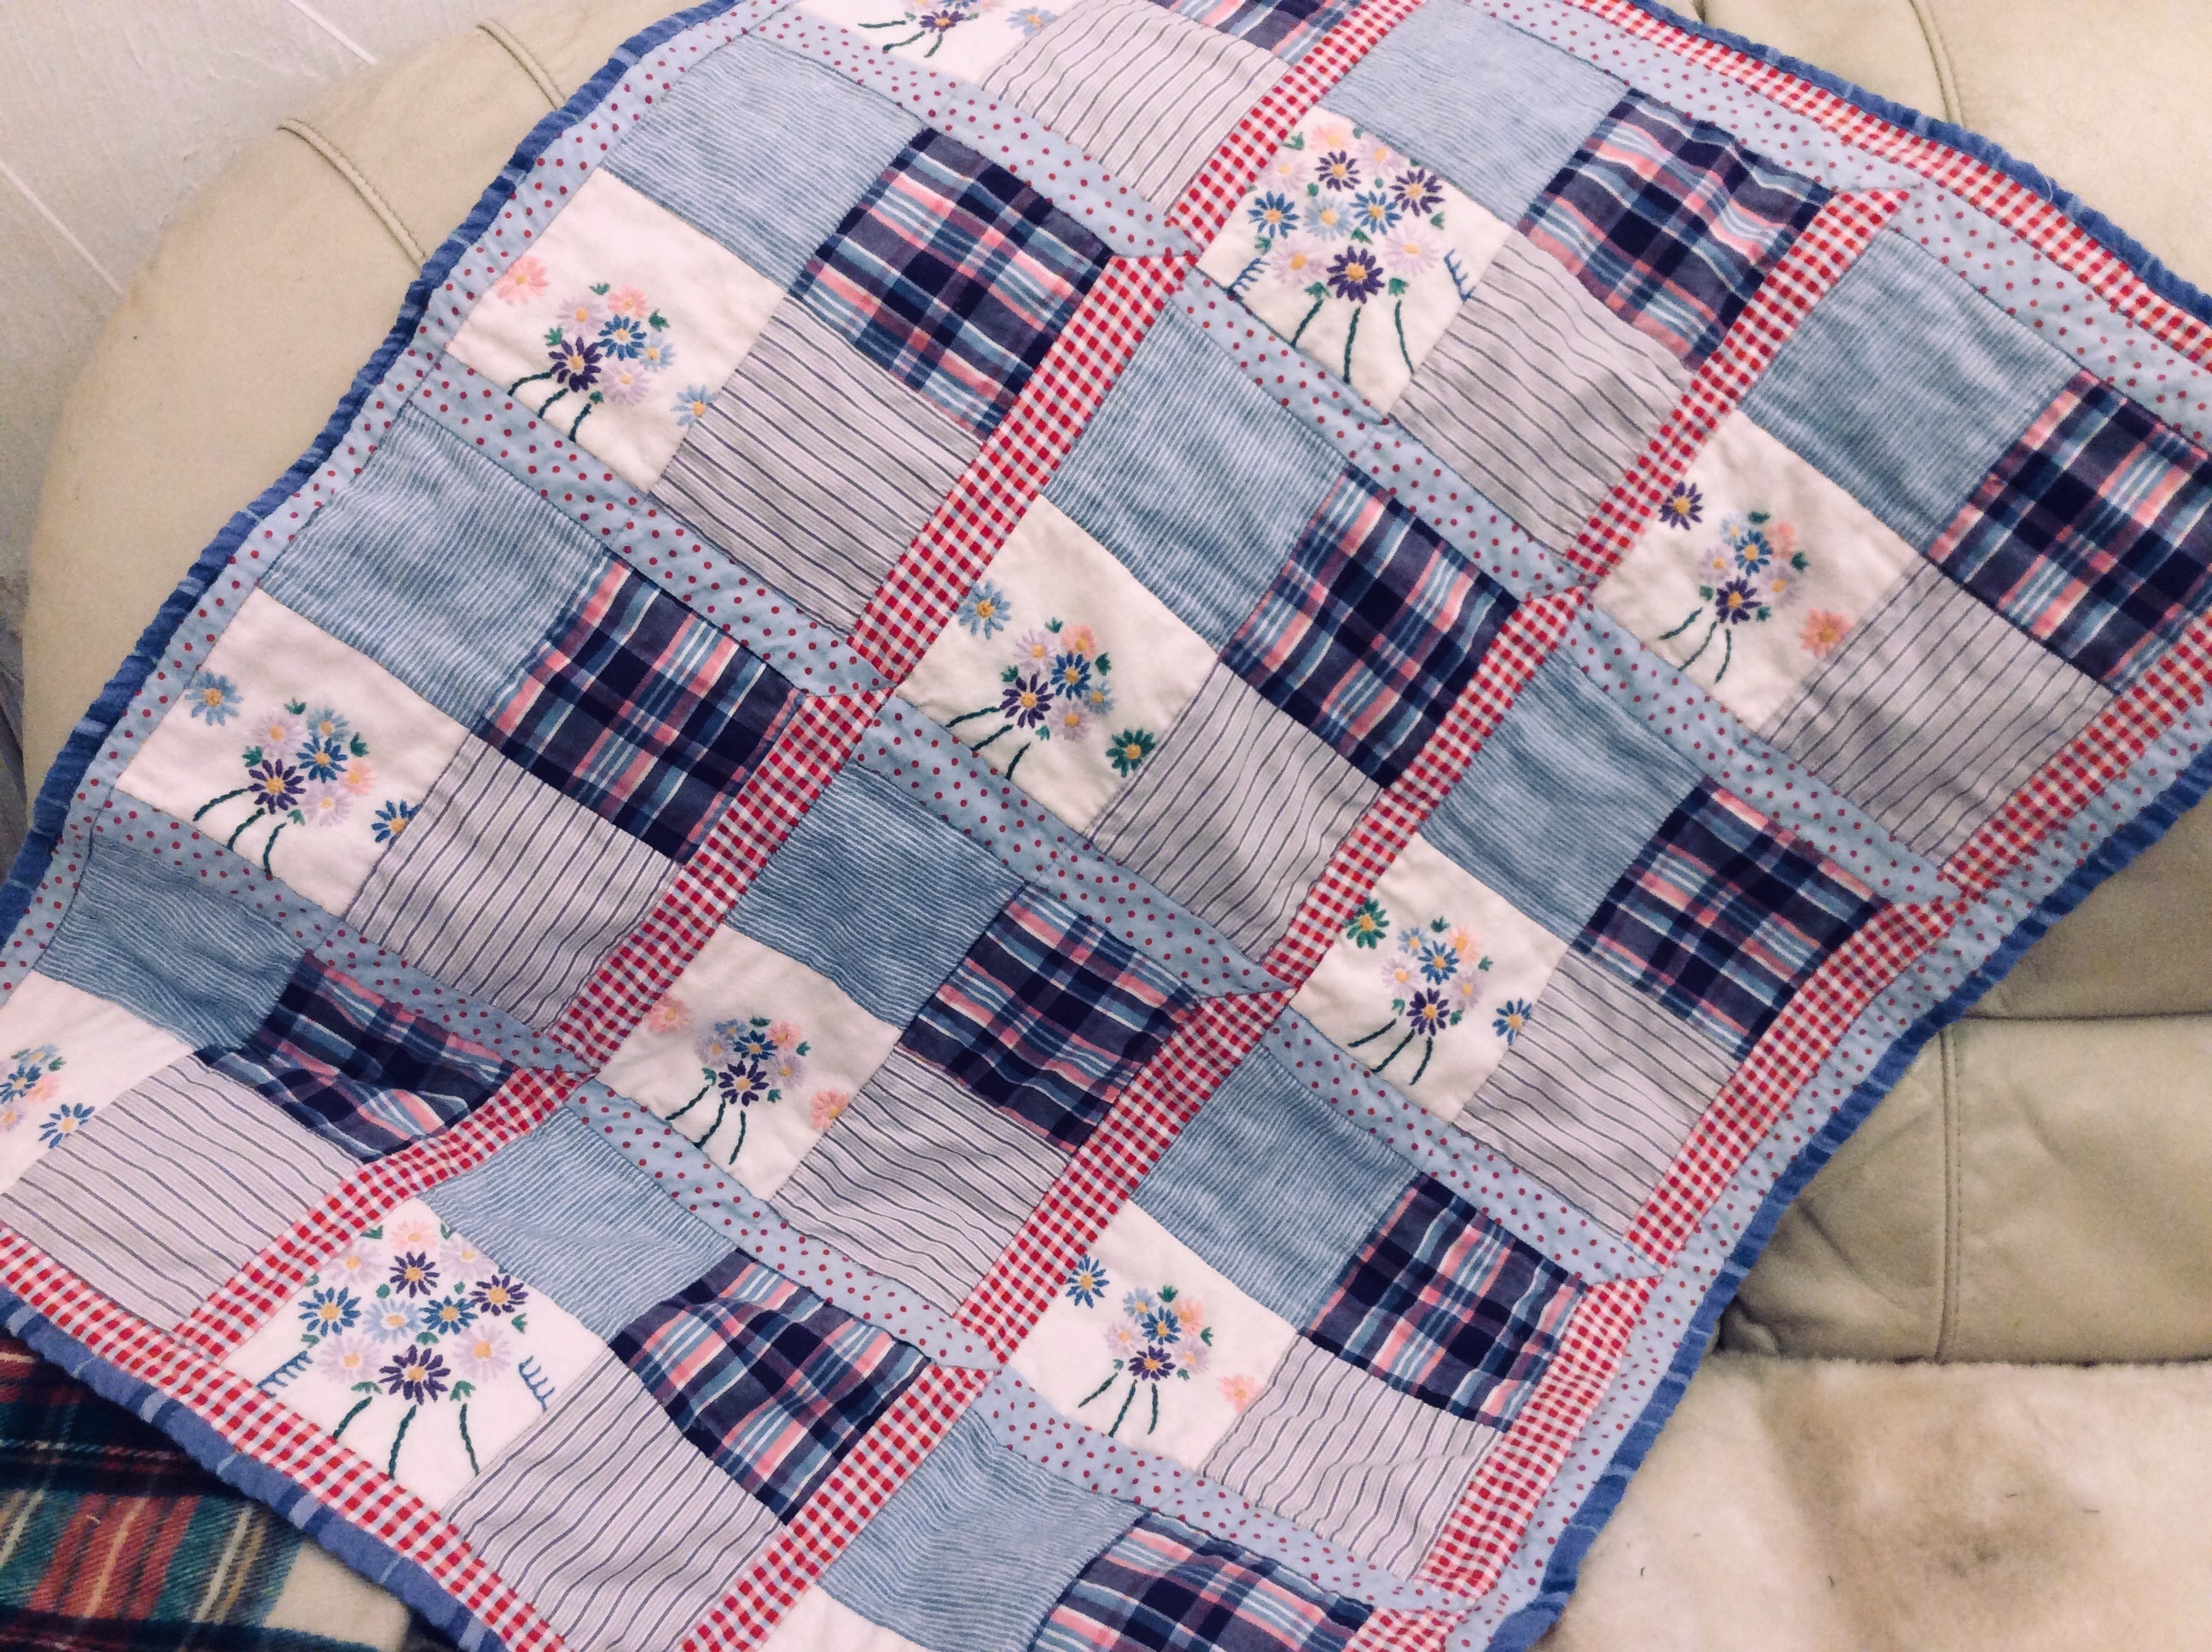
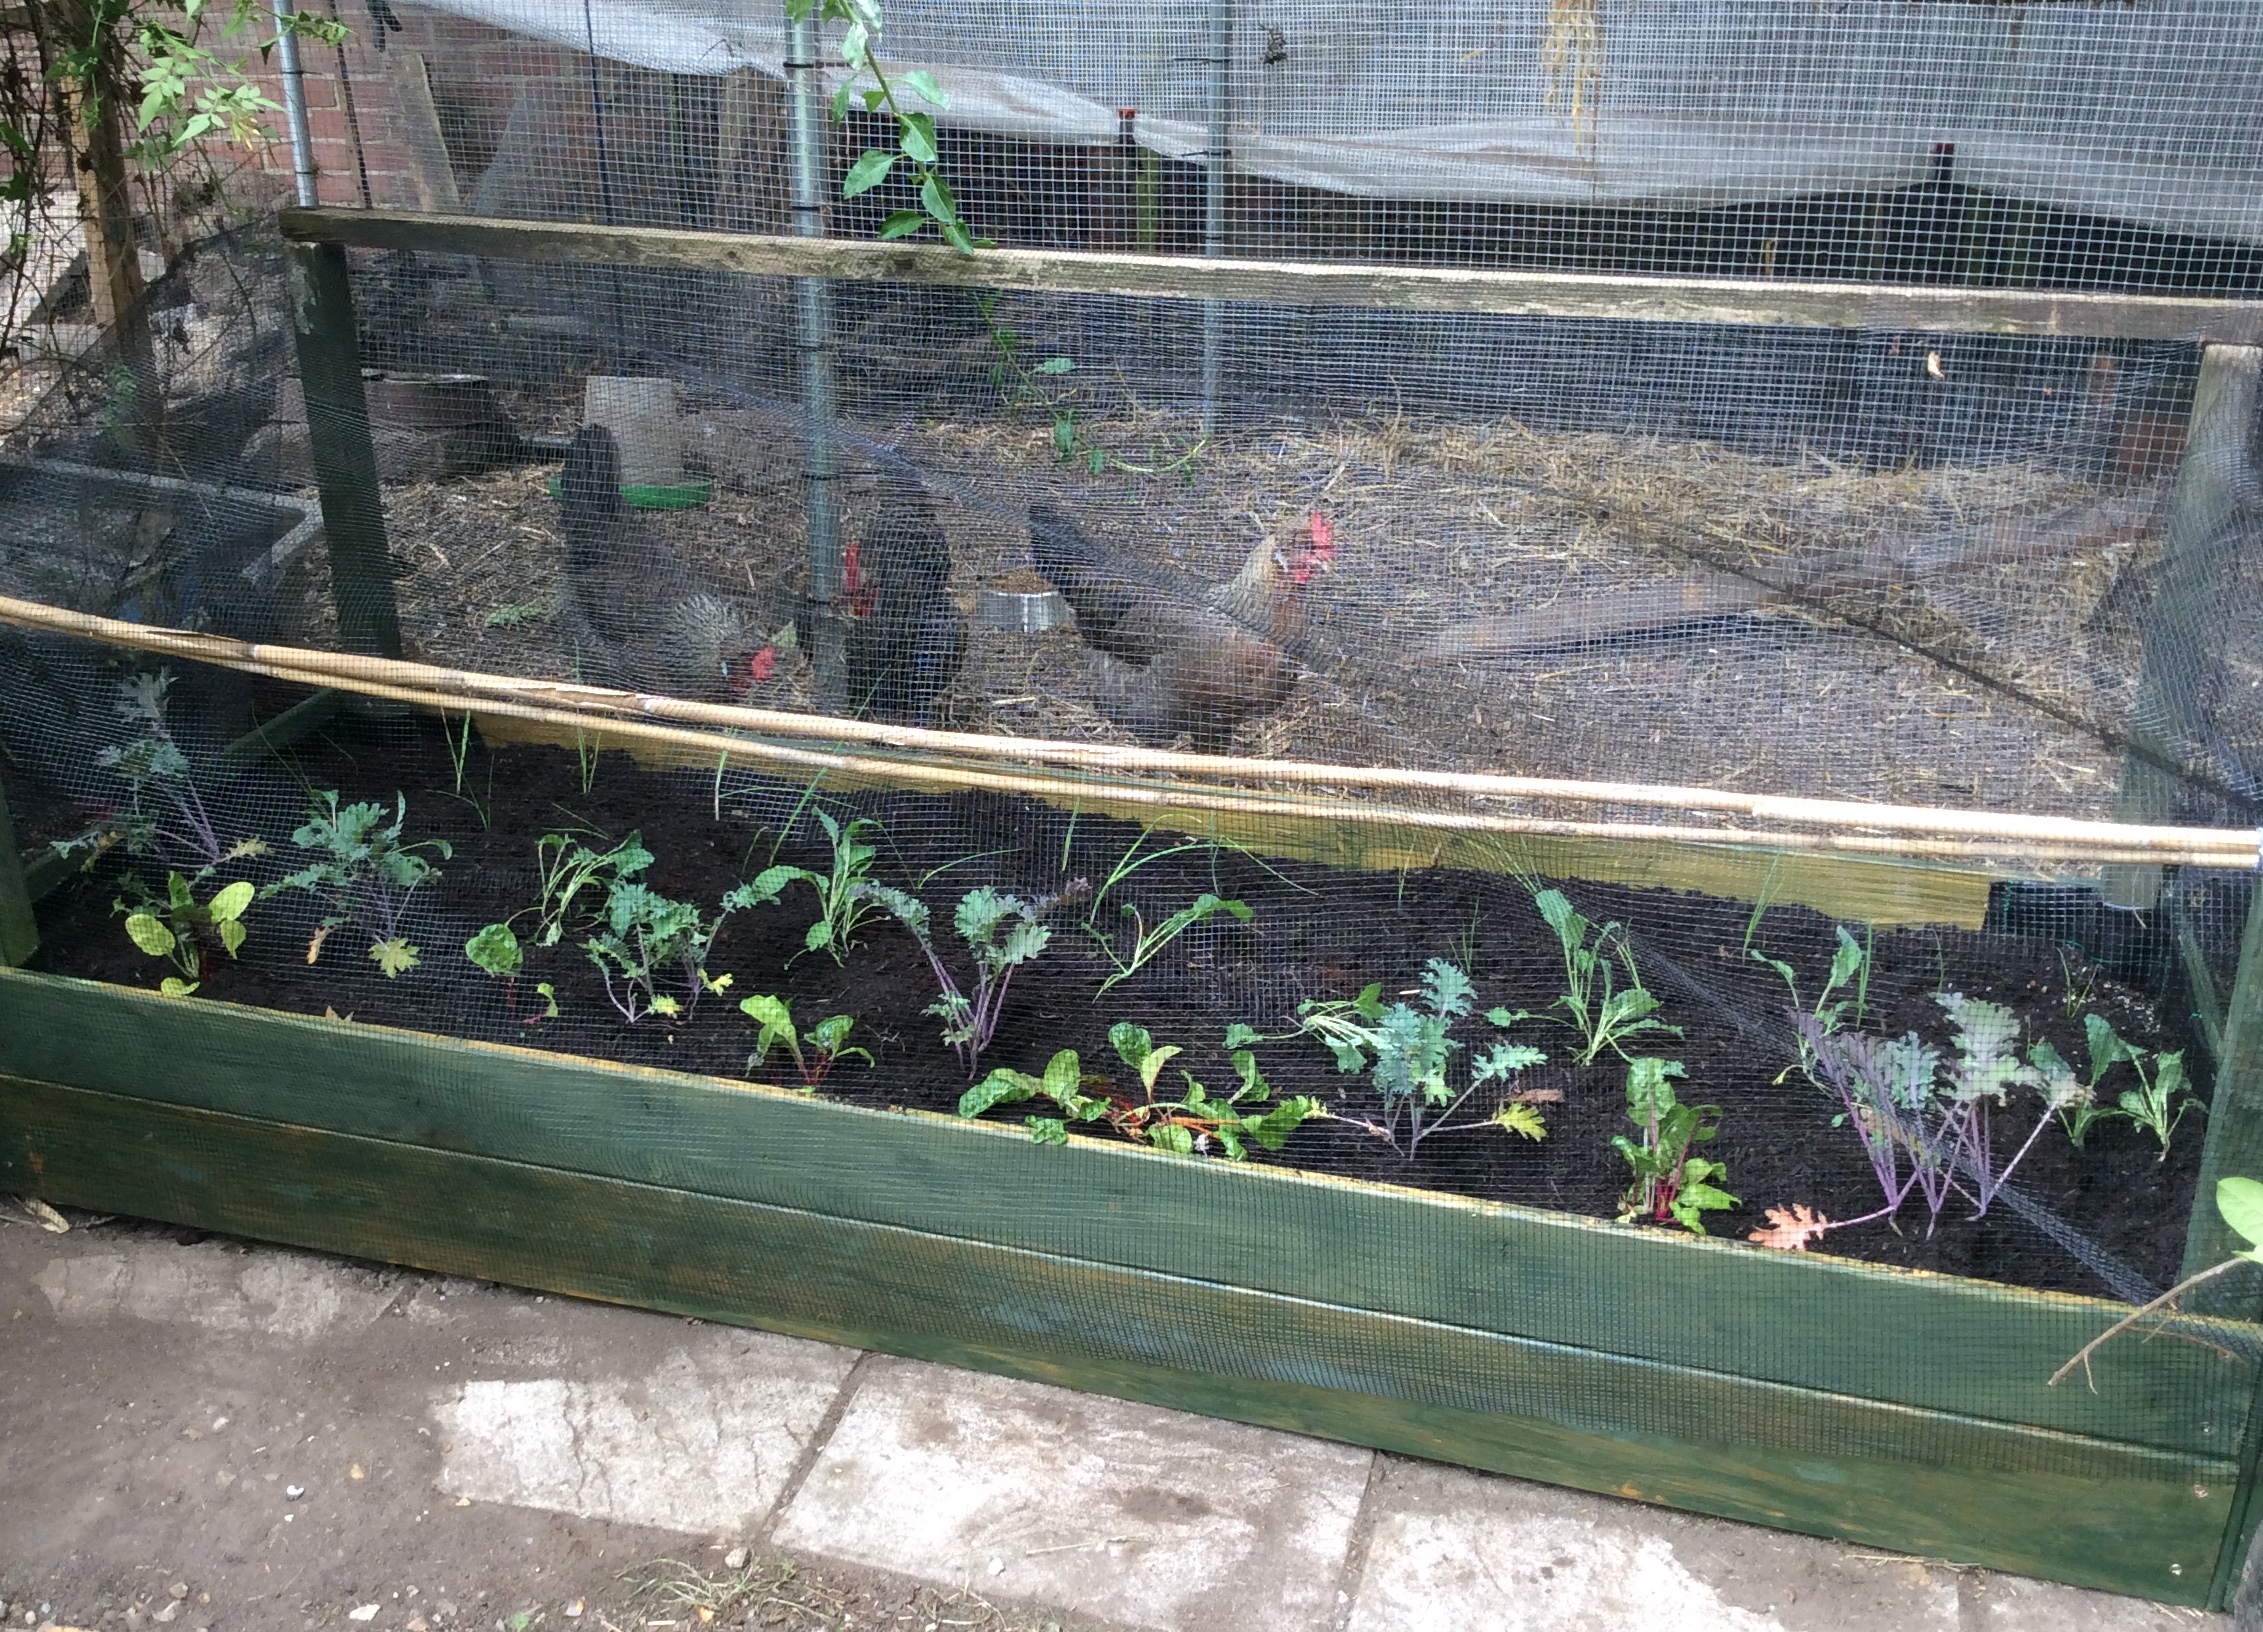
For the next few days, I need to concentrate on getting a few seeds started, and a part-done cot quilt that needs finishing before the “user” arrives! But then – where next with my massive “to do” pile and my random assortment of “resources”…?

Sooo – Christmas has gone away…

… the family have eaten leftovers for a week, my allotment’s a weedy mess, the house is a tip, we’re back in lockdown again, I have 101 half-done or not-even-started projects lying around, and what am I doing?

Shirt, pyjama & skirt seams

Weaving shirt-seams, of course! I have 3 big bags of little strips of fabric cluttering up my sewing room, from dismantling lots of shirts/jeans/pyjamas/tablecloths & tea-towels for quilt fabric & other projects, and there’s only so many you can use as plant-ties. I’d been keeping them for a course on Weaving with Waste that I’d booked onto last September, which sadly couldn’t take place. There’ll be another one, of course, Once All This Has Blown Over (OATHBO in certain online quarters) but just imagine how much more I’ll have accumulated by then. Though my New Year’s resolutions, as usual, include putting myself on a Fabric Diet ; no more fabric will be acquired (new or otherwise) until at least half of what I currently have as been used up or sold on.

Slightly less of a tangle now

I have done some things: my Other Half has a second pair of cosy PJ bottoms made from an old flannelette sheet. They were cut out months ago when I made the first pair, and put aside in my enormous “to do” pile. DD2 has mended PJs and a new pair too, from some soft but sturdy brushed cotton found in a charity shop last spring at £3 for about 4m of 60″ wide fabric in a cheery red & white plaid. And I’ve finally managed to make a pair of what my great-aunt would have called, in a breathless whisper, “Underthings” (i.e. knickers) from an old t-shirt; not rocket science, I know, and of course I could just buy a pack of new ones, but it pleases me to re-use pretty & still-decent fabric & keep my money safe from those who peddle poor-quality “underthings” that fall apart in a few weeks. I’m pleased to report that they fit well and are very comfortable!

Poppy assisting with pyjama-making

I’ve also cut out & attempted to sew a warm top from blanket-type fabric acquired new, as a treat, a couple of years ago. Needless to say, I struggled with this. My overlocker didn’t seem to “like” the fabric & kept breaking one specific thread. At first I thought the thread must be weak, so changed it, but the next reel also broke every few stitches. Then I thought I must somehow have bent the needle, so changed that. But now I’ve realised that it was “pilot error”; the loopers & needles need to be threaded in a specific order, and once one thread had broken & been replaced, that order was undone and the machine was struggling to form stitches correctly. I’m hoping I still have enough fabric to sort it out, as I may need to re-make the sleeves entirely, I’d chewed so much off them before stopping to read the instructions… oh dear. You can’t cure stupid, as they say, by changing the needle!

So yes, plenty going on here, and there are still about 98 projects in the “to-do” pile, so I’m looking on lockdown 3 as a chance to clear as much from that pile as possible. Let’s see if I can end up with a chance to see the floor of the sewing room/spare bedroom once more…

Not the most “helpful” of assistants, really…

Take 3 discarded shirts and an old tablecloth…

… add an Ikea cushion cover and a strip of old duvet cover, mix well, and :-

Lockdown stashbuster 5

I had a gorgeous, but sadly very stained, 1950s embroidered tablecloth sitting in my stash, and I’ve been determined to do something lovely with it since I first found it. It was so bright and cheery, yet it would never have been put for sale at a charity shop; thanks to those stains, it would just have gone into the rag-bag. I could have made umpteen cards from the motifs – and have made a few – but didn’t want to dissipate the prettiness too much. So it seemed a good idea to base the last little lockdown stashbuster quilt on what was left of it.

I also wanted to do a little bit of actual piecing, rather than haphazard flinging together of strips. As you can probably tell, it’s not my natural medium; far too painstaking, but it suited the subject matter! I’m a LOT happier with this one, though it’s a tad undersized at 2½’ x 3’2″; this was dictated by the size & number of motifs available. Perhaps a crib, pram or pushchair quilt?

Oh, and the batting’s a bit – different. Cotton “Bump” interlining extracted from some fabulous but badly light-damaged old curtains; it’s been washed before re-use, to control any shrinkage, but it still seems soft, fluffy, & lightweight, not unlike the “official” batting I used in the others. Just a tad less inclined to pull apart, so now the hunt will be on for old interlined curtains…

Anyway, time for a break from the sewing machines now! As lockdown comes to an end, and we gear up for the festive season – well, as festive as it can be in these socially-distanced days – I need to concentrate on sorting the house, the presents and the food out for a while. Time enough for stitching, or spinning, or weaving, when the excitement, and the workload, have simmered down…

Washed and ready to roll…

Not doing that again in a hurry…

How to mangle denim… but Poppy approves!

Well. Lockdown Stashbuster 4 is finally here, but I’m not exactly pleased with it. Best, I think, to describe it as a learning process!

For a long time I’ve wanted to do something with denim; I suppose I have, but never anything I’ve been proud of. The idea I had in my head for my “quick & dirty” use-it-up cot quilt no. 4 was a variation on denim “bricks in a wall” – basically 2½” wide strips, cut in random shortish lengths, joined seams-up & chenilled, with a few contrast stripes. (The eagle-eyed who know us well will spot the edges of our old kitchen curtains playing the part of the contrast stripes.) I didn’t think it would take very long…

1st lesson: most modern jeans are woven with a degree of stretch. I thought I’d specifically excluded any stretch denim when choosing the old jeans to chop up, but it turns out that most of them stretched a little in one direction or the other. Which caused the finished top to skew frantically, though I’d have sworn all my seams were straight whilst I was stitching them. In the end I had to cut about 3″ off each side, one at the “top” and the other at the “bottom”, to make it look remotely rectangular but there was no way I could get rid of a marked “bowing” effect in the middle.

Lesson 2: some jeans are fairly lightweight, others are – not. The difference in fabric weights means some “bricks” are “dominant” when it comes to chenilling, and look bigger in the finished article. And the heavier-weight fabrics are just that – heavier – and my shoulders were aching like mad with all the pushing & pulling by the time I’d finished quilting it very roughly. Next time I have an urge to use denim in an actual quilt, it’ll be lightweight, non-stretch shirt & skirt fabric only!

Lesson 3: choosing a fairly heavy calico for the backing wasn’t a particularly sane move either, though at least it “balances” the top. This quilt would work well for a restless toddler; it’s too heavy for an actual baby.

However, it’s not all bad news, because lesson 4 is that I’m no longer terrified of appliqué. I wanted some brighter splashes, and kites somehow floated into my mind (as they often do!) so I just ironed some double-sided interfacing onto some scrap red cotton, cut out some little kite shapes, ironed them on and using a very tiny zig-zag, stitched them down. The tails are just a double line of red lockstitch, going over some red frayed selvedge scraps.

Teeny tiny kites…

The centre contrast stripe has a strip of old hand-woven braid stitched on, rescued from an old sewing box that came in on an auction-won job lot. I had no idea whether it would wash well; it might have shrunk or bled colours, but I thought it had probably been washed many times before, & luckily it had & it didn’t.

At this point, the big Pfaff decided it had had enough for now and wanted to go off to see its friends at the repair shop for a service. Fair enough, we can cope without it for a month, and to be honest, it’s high time; having your sewing machine properly serviced every now & then is worth every penny, in my estimation. So Stashbuster 4 was bound with strips cut from an old shirt-back, then quilted on the old treadle. Very badly; I was getting rather fed up with it by then. I spent the next few days snipping the seams in every spare moment. Take it from me, denim is tough stuff. As well as hurting my hands & defeating my little chenilling scissors, forcing me to resort to spring-loaded shears, this caused a lot of fluff on the floor and knackered one of the heads of our hoover. Hopefully mended now!

So today I snipped the last seam with a sigh of relief & popped it into the washing machine. Needless to say, it wasn’t done with us yet; the washing machine pump blocked, so it failed to drain. But luckily I managed to clear the filter, which mysteriously contained 9 hair grips, a large scrunchy, and rather a lot of tiny fragments of denim. This seems to have put it right, thank heavens. We could do without having to call the engineers, just now.

Needless to say, I didn’t get the landing curtains finished. They really should be the next project, if only because that will clear a LOT of space in there, and make the landing look a bit less 1995. And we are getting close to the end of Lockdown II, though like most people in England we’ll be moving into Tier 2, so still fairly constrained, although the incidence of Covid-19 here is actually pretty low. But so is the hospital provision…

Anyway, end of lockdown notwithstanding, I have another idea; not sure if this one will be Lockdown 5, or Tier-2:1, but I’ve hardly made a dent in my stash yet…

Lockdown stashbuster 3…

Whilst sorting out the blue/green strips for Stashbuster 2, I realised I had a lot of smallish rectangles (or thereabouts) in the scrap drawer. So my plan for Stashbuster 3 was to use some of those up gainfully, trying out a different technique. So this time it was foundation-pieced onto some random lightweight cotton; I took the rectangles and placed them randomly on the foundation cotton, then swapped them round until I’d a) achieved coverage of the foundation piece, and b) something vaguely pleasing to the eye, provided that eye happens to like chaotic brightness.

Hmm… there are still a lot of holes!

Then I pinned the pieces into position, rolled it up & took it through to my big computerised (secondhand) Pfaff, and zig-zagged the pieces into position. Needless to say, a fair few had fallen off by the time I got to them, and I managed to stab myself with the pins umpteen times. I wonder if a dab of PVA in the centre of each scrap would have worked better?

Scraps zig-zagged on…

If I weren’t just stashbusting, I might have used some of the Pfaff’s enormous range of stitches and some interesting thread. However, in the cause of using stuff up whilst I actually have some time available, I just went for fast & furious. After cutting & sticking on some wadding & backing (which also did duty as the binding, folded over, ironed & stitched down) with that miraculous 505 spray, I transferred operations to my REAL sewing machine, the 1909 Jones treadle.

If I could only keep one machine, it’d be this one. Never skips a stitch or sulks.

It took a lot longer to quilt this one; it’s much more closely quilted. I chose to more-or-less echo the shapes of the rectangles and their overlaps. So if quilts got names, I’d call it “Corners” as I turned an awful lot of those! But the joy of working on an old-fashioned treadle is total control; it never runs away with you. Anyway, by this morning I was very nearly there…

Hours & hours of turning corners later…

All done by lunchtime! And has been washed, dried & stashed away with Stashbusters I & 2, waiting for small owners, should those days ever arrive! Mind you, I’m not saying they have to be human owners…

The finished article.

Stashbuster 4 will be somewhat of a change of direction… but there are a couple of large alteration projects to shift first, to make more room in the “Sewing studio” aka the spare bedroom. So I’ll allow myself at least a week to get this one done & dusted.

Actual practice…

I’ve been tidying the “sewing room” (aka the spare bedroom) in preparation for some serious stashbusting. I have far too much fabric, nearly all reclaimed, and all of it utterly gorgeous, so I’m choosing to see the current 4-week lockdown as an opportunity to do something with it! My plan is to make a handful of little quilts; nothing fancy, just scrappy strips & squares, according to my resources. Then I’ll have a stock of things to give to any new humans that might appear on my horizons, our assorted Offspring being of an age when that kind of thing may begin to happen. I’m seeing it as a rainy day project, because there’s a lot of work to do up at the allotment and in the garden, but at this time of year I’m a bit of a fair-weather gardener.

Random strips of torn-up bedding, converted into a “fuzzy” cot quilt

Many a slip, of course; the proof of the pudding will be in the quilting, to muddle several metaphors. One finished already, though! And some mending done, too.

I was intrigued to discover, at a Zoom meeting of our Guild last weekend, that other people had also mislaid their creative mojo during the spring & summer lockdown. I wonder if it will be different this time? We’ve had a bit more of a run-up at it, this time, and have a better idea of what to expect. Also, there isn’t that feeling of “anything might be about to happen, any time” that kept so many of us feeling almost paralysed, in a creative sense, last time. But whether very much creativity will actually happen this time is anyone’s guess.

I wandered into a couple of charity shops earlier in the week & was intrigued to see people making a beeline for the bookshelves, then scooping up several books at a time, almost without actually looking at them. The sad thing that struck me was that in all the shops, the books on the shelves were more or less the same. Same authors, same best-selling thrillers & bonkbusters, same prices. I do know they have to concentrate on what they know will sell, but there’s precious little actual choice out there now.

Anyway, shan’t witter on for too long; there’s plenty more stash to bust, and an allotment to tidy up & mulch for the winter. But look what I found hiding under the Jerusalem artichokes; a very tiny Turks’ Turban squash! I thought someone had dropped a satsuma on our plot, but it’s smaller than that; it’s next to a quince & a pomegranate in the pic, and about equal in size to the clementine behind it. It’s quite heavy, but I suspect there won’t be too many seeds in that one!

A very dinky but fully-formed squash.

From bunk beds to raised beds…

bunkbedraisedbed
Missy, Norma & Daisy inspect the “new” raised bed

It’s been an interesting few weeks… I’d have liked to document the Covid-19 lockdown – not that it’s over yet – but somehow hadn’t the heart for it. And I’ve been pretty busy, despite not being able to do my usual markets, fairs & festivals, or visit my family; the allotment suffered a fair bit of neglect last year, thanks to my less-than-ideal health, so there was some very hard work to put in over there; I never, ever want to see a creeping buttercup again. Luckily the weather was excellent so I could just head on over there & get on with the job. And there was lots of fun to be had raising seedlings!

It was very difficult to get hold of seeds for the things I’d run out of, because after the Great Loo Roll & Pasta Panic of 2020, the next thing the general public around here did was strip the garden centres bare before they had to shut their doors. The big online seed companies didn’t seem to know what had hit them & many only “opened” their websites for an hour or so each morning, in order to try to keep up with demand. However, the gardening magazines came to the rescue with packet after packet of “free” useful seeds; not always the varieties I’d have chosen, but there when they were needed! And some of the less well-known seed sellers – smaller companies, or enterprising individuals, mostly on Ebay – helped me acquire the things I really couldn’t be doing without, like Red Russian kale & Orelia courgettes.

I don’t have a greenhouse (sore subject – I should have one, having paid for one that was allegedly in stock back in April, but there’s no sign of it yet & no word from the vendors despite many queries, although they still seem to be trading) so most of this year’s seedlings were raised in half a small dilapidated polytunnel, which was bought in a panic to house my bantams in during the Great Bird Flu Panic. The cover was in bad shape, having been cut to make roll-up “windows” to keep the birds well-ventilated & healthy during their confinement, but the frame is OK (as we’re only using half of it) & I managed to roll & tie the damaged cover so that it basically did the job.

halfbakedpolytunnel
The “half-baked” polytunnel

It’s all well & good raising seedlings to go into the allotment, but we may be unable to access our crops if we get a localised total lockdown, which I believe is a distinct possibility as the epidemic progresses. So I wanted to create some space somehow in our small urban garden, which is already pretty full of fruit & nut trees & bushes, roses, day-lilies, a wildlife pond, a 6m chicken run, bantams, a small lawn, 3 cats and all their friends, & what seems like several acres of drying washing. A small raised bed running alongside the chicken run seemed like a good idea, until I priced them up & realised that, complete with a kit to make a cover, a necessity with free-range bantams, we were looking at £150 & I still had to put it all together myself.

So – what had we got that might be press-ganged into doing the job? An inspection of the lengths of wood lurking in the garage rafters yielded 4 x 2m sturdy pine “planks” that were once the sides of our elder boys’ bunk beds, a number of rickety pine shelves & some sturdy bits of 2×2. There was half a pot of green stain to take the edge off the orangey colour of the varnished pine, and plenty of long screws & staples left over from reconstructing the Gumtree’d freebie shed at the allotment. I did need to buy some heavy-duty ground cover to line it, and some butterfly net to make the cover, plus some compost to top off the home-made & reclaimed-from-dead-pots stuff underneath, but altogether I’ve spent less than £25. It won’t last forever, but if it does us until next Spring, I’ll be happy and so will my plants. Then if we’re staying put for another year (we’d like to move to somewhere with a bigger garden) we might invest in something a little sturdier.

IMG_5218
A pumpkin flower in a wombled cold frame, and borage for pollinators – and Pimms – at the allotment.

I’m going crackers…

Having just finished dealing with the less-than-perfect apples, and making a batch of delicious medlar jam, I’ve found myself plunging headlong into Christmas again, about 6 weeks before I’m likely to be ready for it…

I’ll add more later, but for those of you, like me, bewildered by how time suddenly seems to speed up as the year turns towards its end and new beginnings, here’s the home-made cracker tutorial I promised you – about a year ago!

A9C096E4-E111-4AA0-9052-6A0DA4709B24

Denim strikes again!

Recently my little van needed to spend some time in “dry dock” having a spot of surgery. When I emptied her out – well, mostly – I was struck by the sheer amount of junk I’d been carrying around, particularly in my “beach” bag which used to hang over the back of the front passenger seat. There certainly were things appropriate to last-minute dashes to the beach – we live 20 minutes drive from Sandbanks, and it’s always pleasant to spend a sunny evening down there, usually on a whim – but also things I might need when I’m running the stall or doing a car boot sale. One or two tools, some for the van, but some in case I should come across an elderly sewing machine in distress. And a number of miscellaneous items I can’t imagine I’d ever need at all! All tangled up together so that I could hardly ever find what I actually needed & knew was in there somewhere

So, it was high time to rationalise, and tidy things up a bit. I had An Idea… our local recycling firm have recently opened a warehouse-shop where they deposit most of the rejected textiles they collect; some items (brand-new-with-tags, “quality” and “designer” stuff) are sorted onto hangers, which they charge a bit more for, but mostly you fish about in builder’s bags & pay 50p per item. I already had a fair bit of reclaimed denim, left over from making quilts & other things (including the old beach bag) but knew I wouldn’t have enough of the bits I needed for this job, so I popped down there & rescued 5 pairs of jeans to chop up.

A bit of cutting, twenty minutes or so of stitching, a bit of “chenilling” round the edges just because it pleases me, a quick wash, and lo & behold, my van now has pocketses! And there were still some pockets left, so I made another, different set to string across the rear of the back seat too, from headrest to headrest, to carry things that aren’t used so often but are still useful to have on board. With a bit of thought, I could have included a “secret” pocket in the front one, or one big enough to carry maps, but I’m happy with the result.

Now, of course, I have 10 cut-off legs, some waistbands, and some side-seams to stash away for the next Idea-with-denim that drifts my way!

pockets1

pockets2

One person’s patina…

…is another person’s dirt!

I didn’t rush to the Minster’s annual Fair yesterday. Having been unable to trade for the last six months, I have a backlog of stock to shift before I can start acquiring new pieces for my customers’ delight & delectation. But I couldn’t quite resist the lure of the bric-a-brac stall, and who doesn’t need a look through the secondhand books? You never know where you’ll find hidden treasure, even when you’re half-an-hour late…

I looked at it more than once; a little old – ladle? pot? measure? – with a long handle which looked as if it might be brass. It was mostly black and quite revoltingly greasy to touch; there was a space on the tabletop around it where other people had removed items but left this well alone. It looked as if it had spent the last 50 years in someone’s garage, accumulating a heavy coat of engine oil. But the feel was more – many years of chips, bacon and burgers – i.e. heavy kitchen grease, which is a bit more amenable to cleaning than engine oil.

“I think that’ll clean up OK,” I said as I handed over my 50p. The man behind the stall looked shocked. “But won’t that destroy the patina?” he asked, without a trace of irony.

From my point of view, there’s a big difference between patina – the honourable dings, scratches and scars of everyday use, the subtle sheen from years of handling – and sheer filth. And what’s right for an old oil-can that has spent years on a dusty garage shelf is just not appropriate on a culinary tool. People are simply not going to buy something to display (or just possibly use) in their kitchen, café or bar that looks and feels filthy, however “authentic”. I hope I’ve managed to clean it up & do it justice so that its cheeky-but-competent character shines through, along with that lovely coppery glow.

I can’t help wishing now that I’d taken a “before” picture so it would be obvious why no-one else had spotted this sweet little old handmade beauty, but here it is after half an hour with a toothbrush, a tiny quantity of 00-gauge wire wool, a cleaning agent intended for human skin, an Irish crochet hook and a lot of gentle scraping with a human thumbnail… It isn’t going to earn me a fortune, but it has earned a little place in my heart.